Branching Code
Jun 5, 2020 • 9 Minute Read
Introduction
Congratulations! You've just joined a new organization as a developer. You're all finished with orientation, and you created your accounts and obtained all necessary permissions; you are finally ready to contribute to the product your organization has been developing. But wait! Having just joined, you're not familiar with the codebase. You’re concerned you might make a mistake somewhere or introduce a bug. So how do you start contributing to an existing project without the risk of unintentionally introducing a bug to the existing code? This guide will show you how, by branching code using Git, you can contribute safely and visibly to existing projects.
Background
Branches are a shorthand for “branches of development.” Branches are like different versions of the same software that can be worked on independently for different goals. For example,
-
One branch may be tracking the latest stable version of the software over time
-
Another branch may be tracking the latest (experimental) version of the software
-
A third branch might be tracking a team’s efforts to add in support for a new library/framework/language/operating system (e.g., support for python 3.8 or Ubuntu 20.04)
-
A fourth branch might be tracking work to fix a bug (e.g., “the bug where the low-level .delegatecall() does not return the execution outcome”)
And so on, with the number of branches often exceeding dozens.
Once development on a branch is complete, e.g., the bug has been fixed or the feature implemented, it is now ready to be merged with another branch so that the work on both branches is combined. For a hypothetical example: while team A was fixing a bug, team B added a feature. Both jobs appear to be finished. By merging, a version of the software is created that has both the fixed bug from team A and the added feature from team B.
Lastly, as a technical note, Git offers helpful functionality that tests whether a merge can be made safely or whether there is potential for a conflict. A conflict can occur when both team A and team B had to modify the same file. Then it is possible that a naive merge will not work, and merging will require additional attention.
Real-life Example
The next section will briefly study a top-of-its-class, professionally developed, open-source repository: TensorFlow.
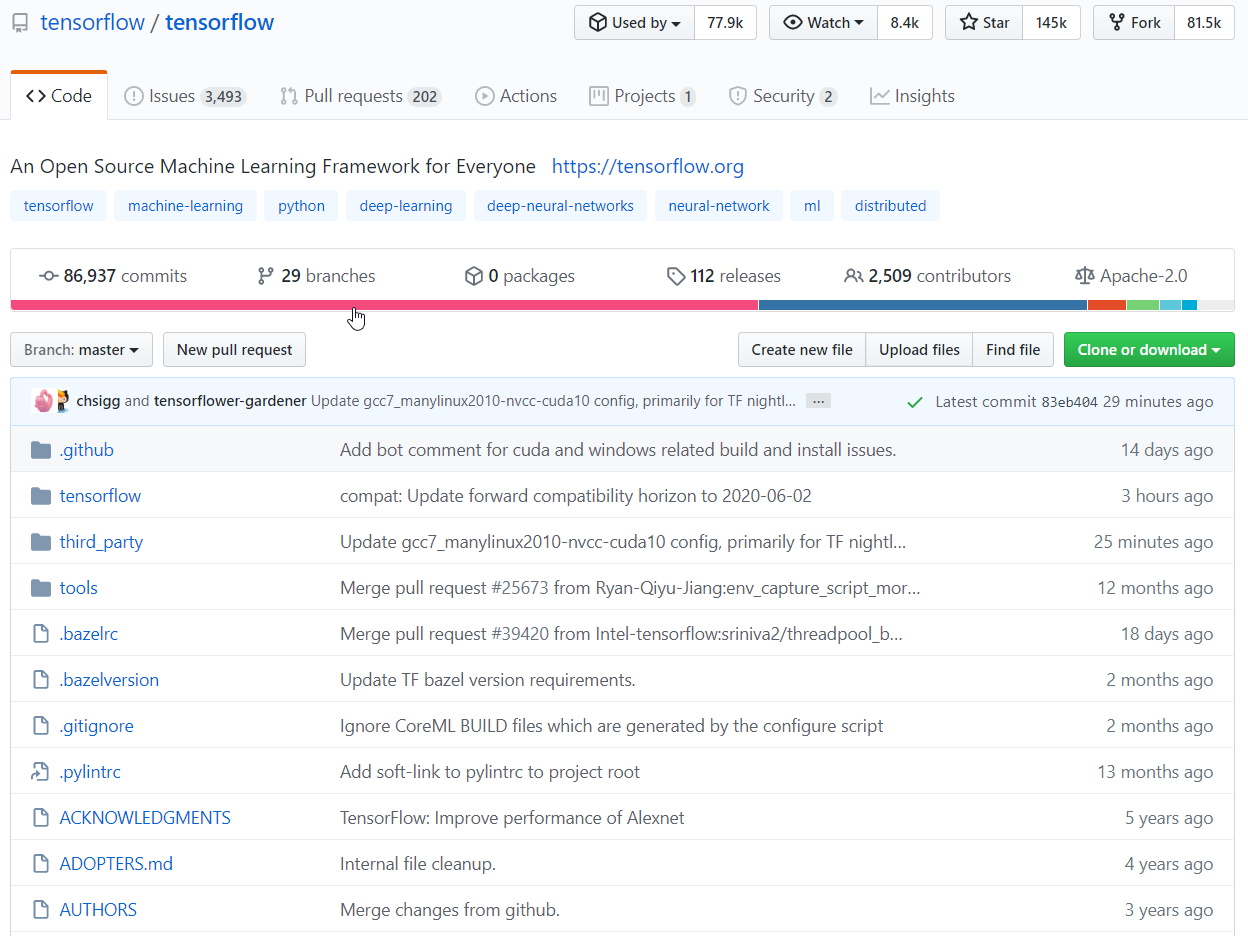
As you can see, there are 29 branches. For complex projects, branching is a necessity to track work on bugs, features, new versions, and other development that is all happening simultaneously.
A Word About Permissions
To make changes to a repo, you must have permissions. Collaborators on a project are people who officially have permissions to make most modifications to a repo. Contributors, on the other hand, do not have the permissions to make most modifications to a repo, but are allowed to propose changes via pull requests (more on this later).
Branching Code
To give full visibility on branching code, you’ll first learn how to branch code as a collaborator, and then you’ll see an illustration of the (small) difference in branching as a contributor. To begin, create a toy repo on Github with a single file so you can follow along.
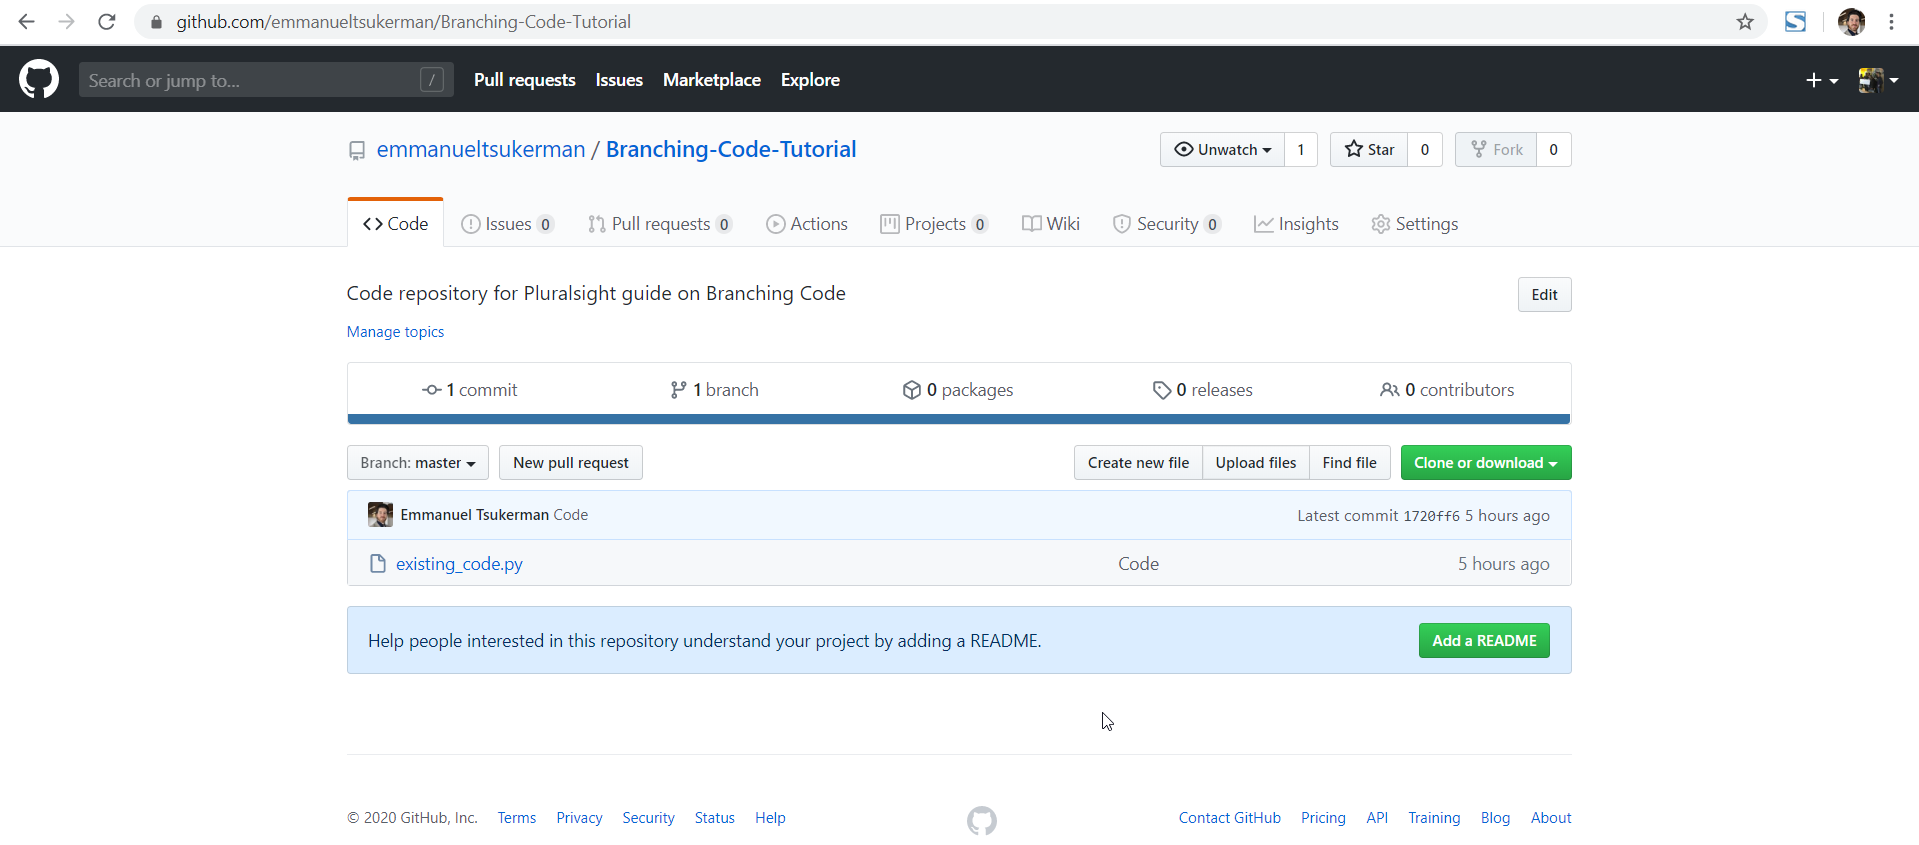
Now click on Branch: master.

Type in the name of the branch you’d like to create. In this case, development.
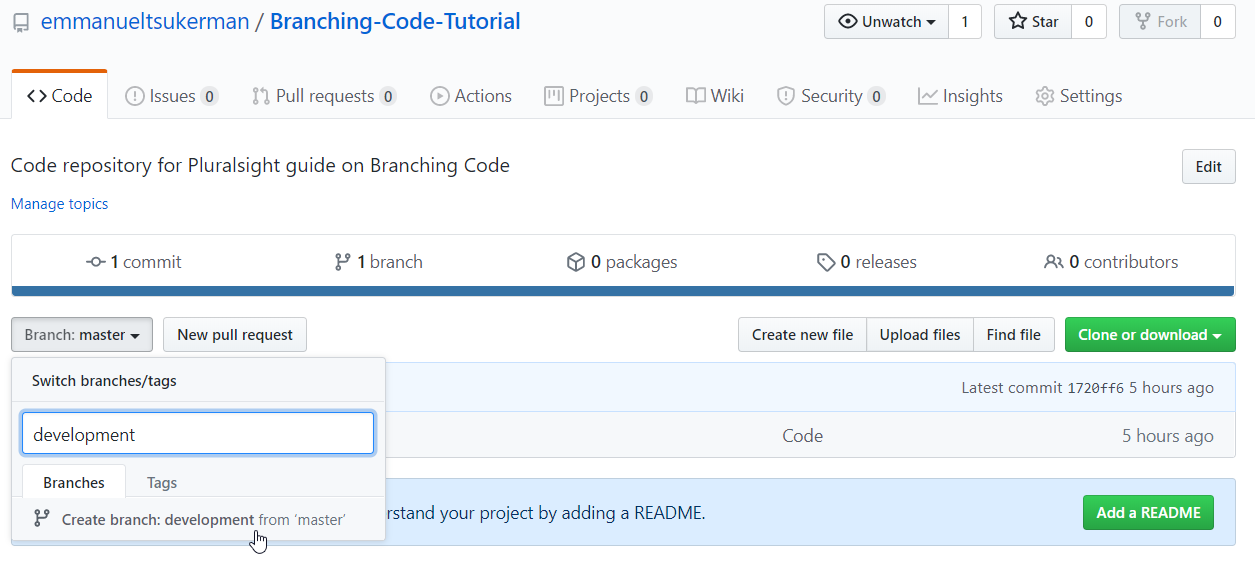
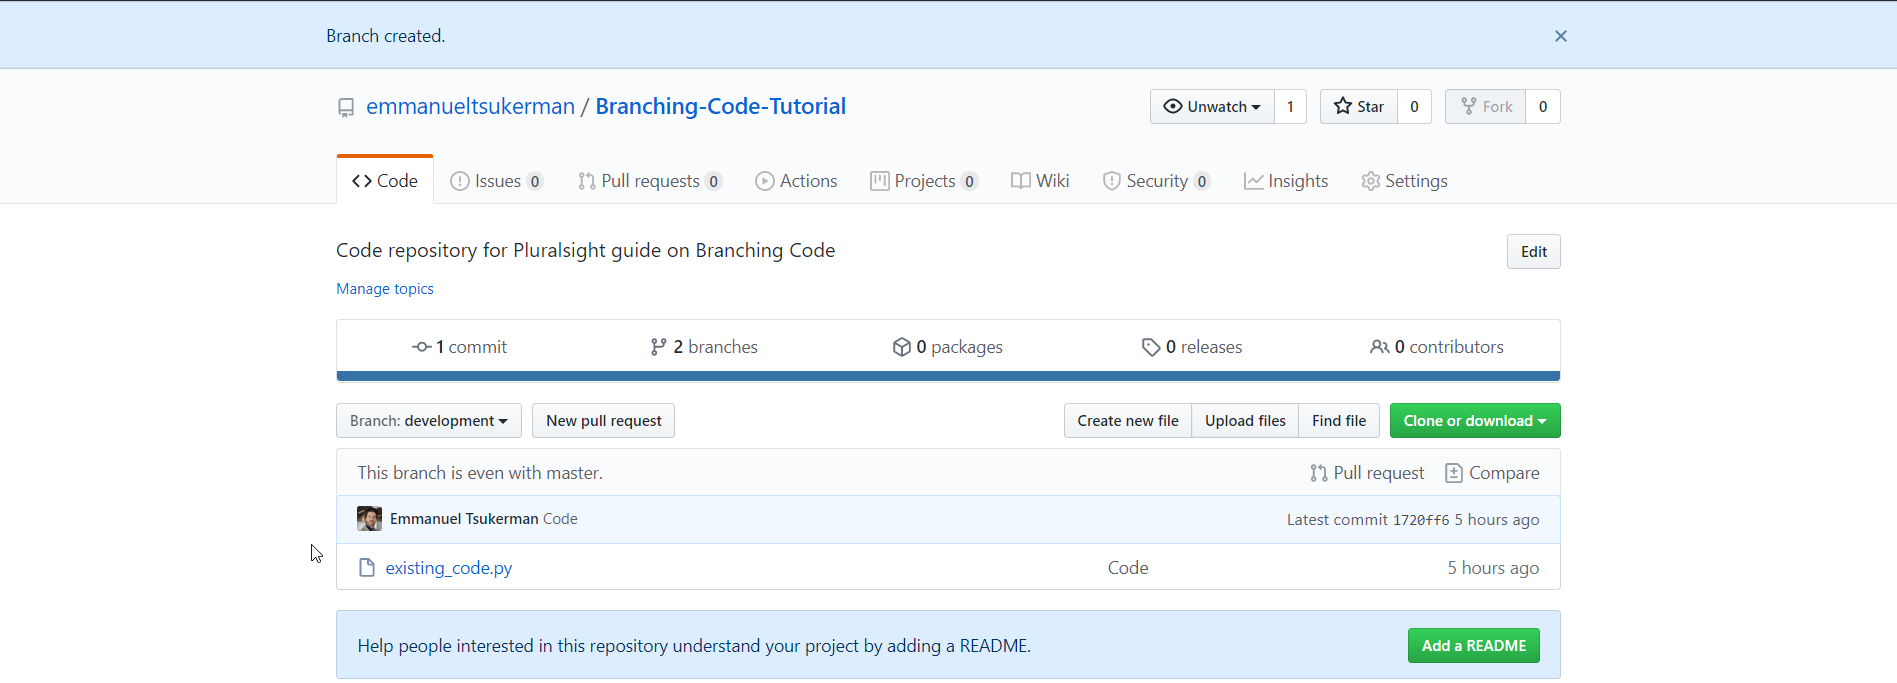
Click Create branch: development from ‘master’. The screen will refresh and will look almost the same, except now the branch will be development.
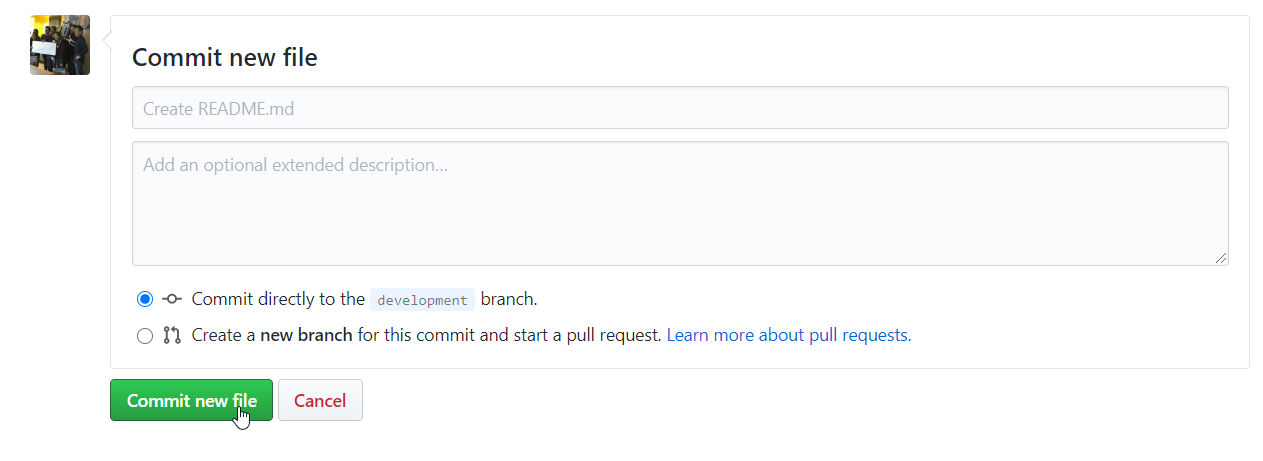
Now, you’ll make a simple addition to this branch. Click Add a README. Scroll down and click Commit new file.
Now you can see our dev branch has been modified.
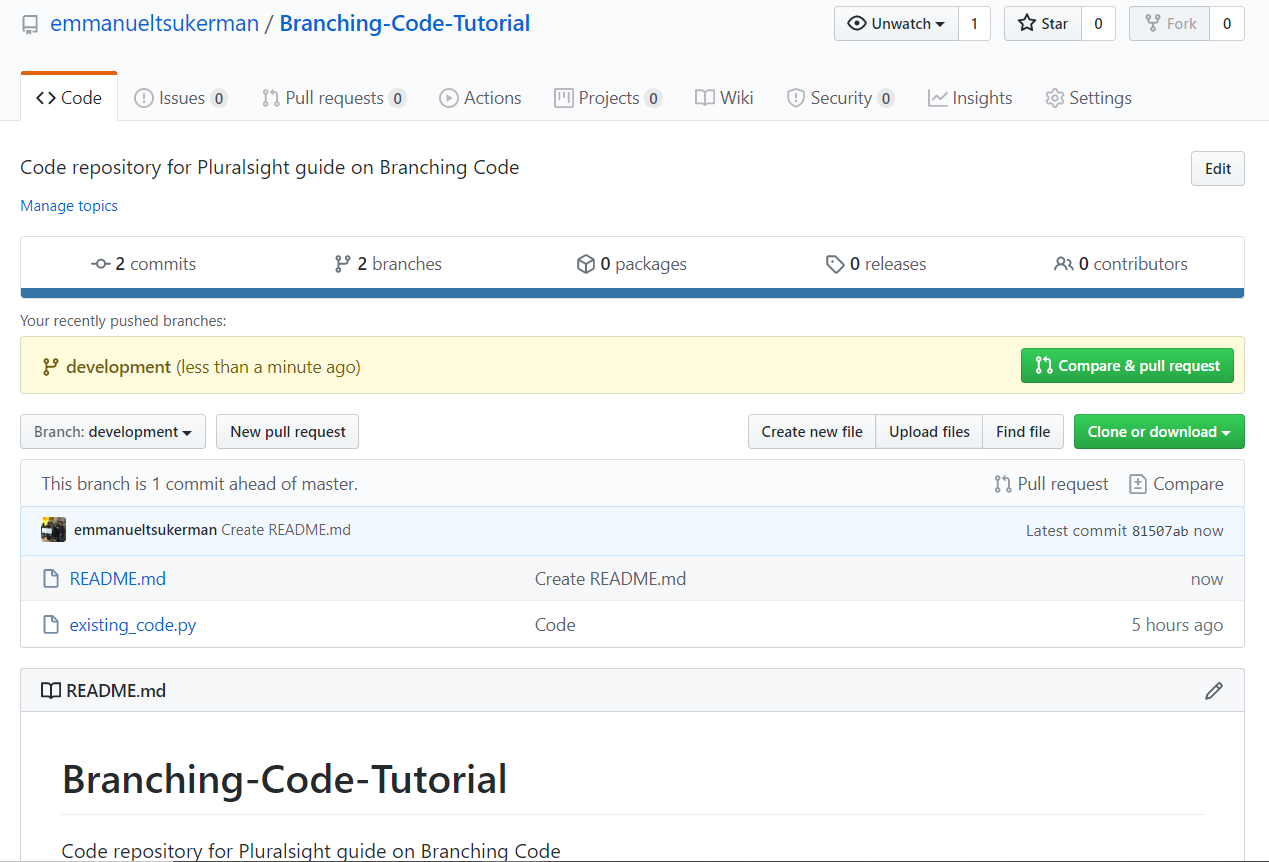
In particular, the development branch is now one commit ahead of master.
Happy with the change you have made, you’d like to incorporate it to the main repo, i.e., to the master branch. To do so, click Compare & pull request.

There is a lot of interesting information in the next screen:
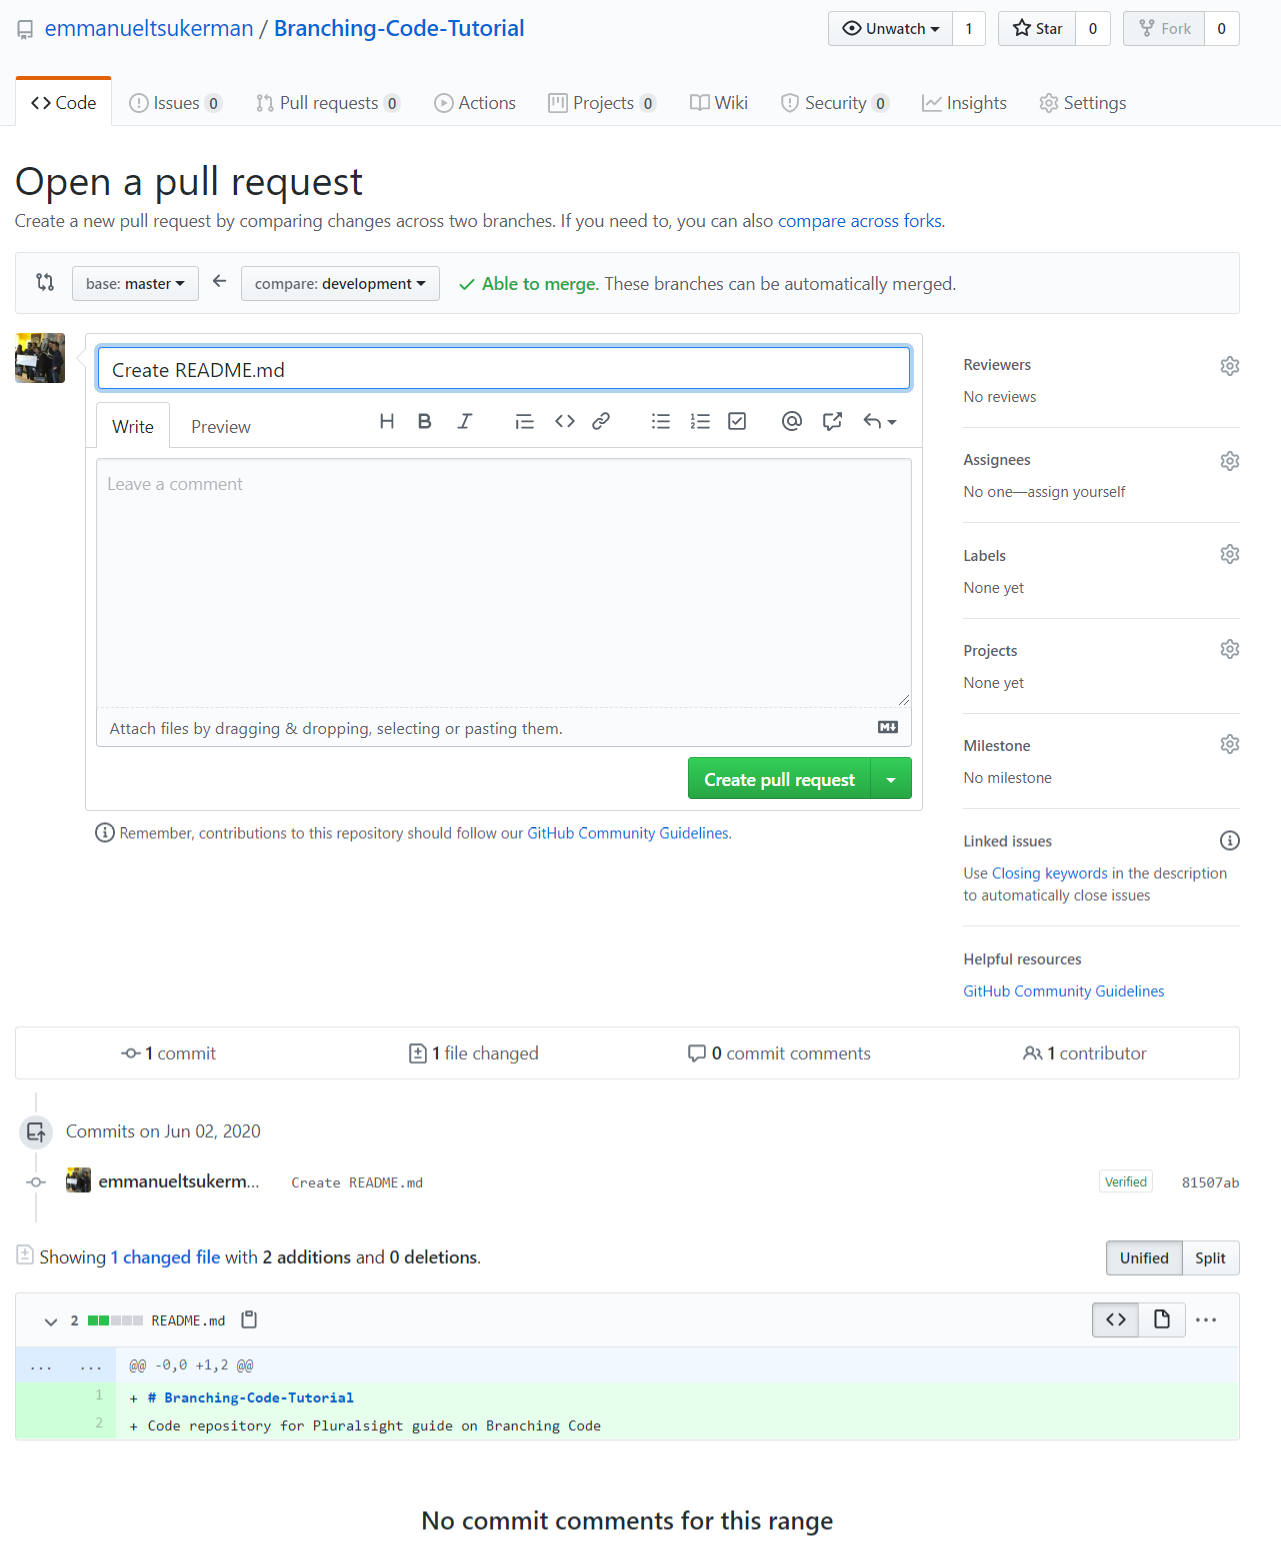
First, notice that you can generally choose which two branches to merge, and which direction the pull request goes.
Secondly, notice that Github automatically determines if a merge is “safe.” Unsafe, or conflicted, merges occur generally when a file in both branches was modified differently.
Thirdly, as part of the pull request (a.k.a “PR”) you have the option to leave a message. Usually, you’ll detail what changes you have made. In this case, the default Create README.md is explanatory enough.
Finally, on the bottom, you can see the actual code that has been added (in green), and if you had deleted code, you would have seen it appear as well (in red).
Go ahead and click Create pull request.
If you click on the Pull requests tab of your repo, you can see the pull request you have just made, awaiting your approval.
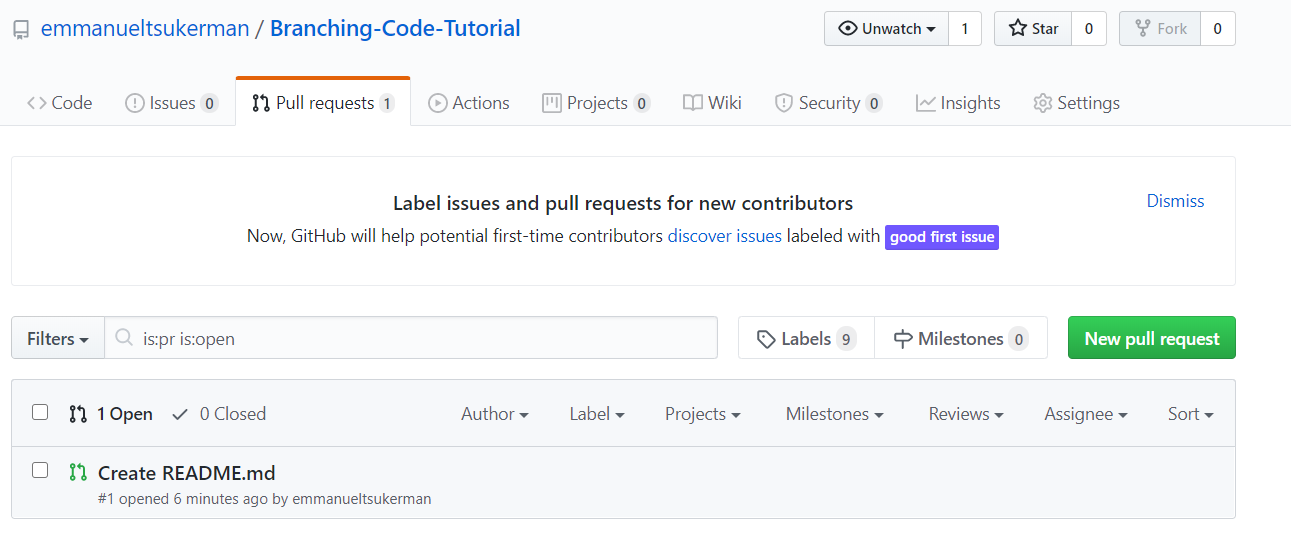
This same tab can list many pull requests that will be getting reviewed for approval.
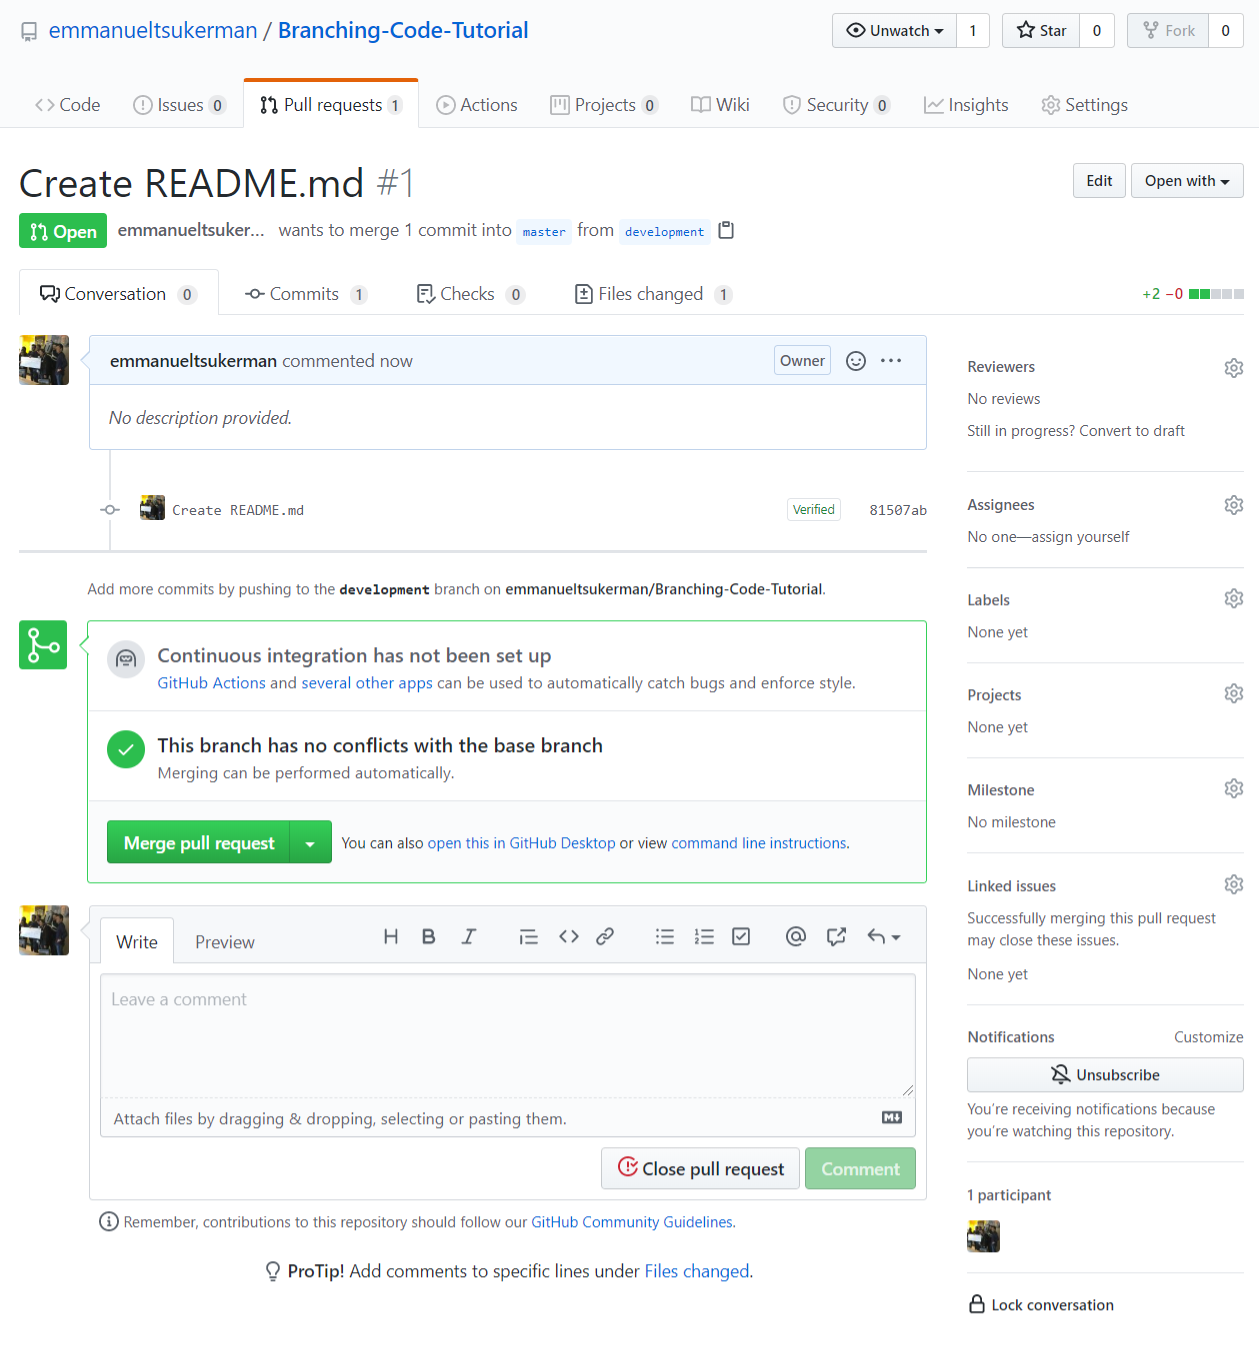
Click on Create README.md, then click Merge pull request, and then click Confirm merge.
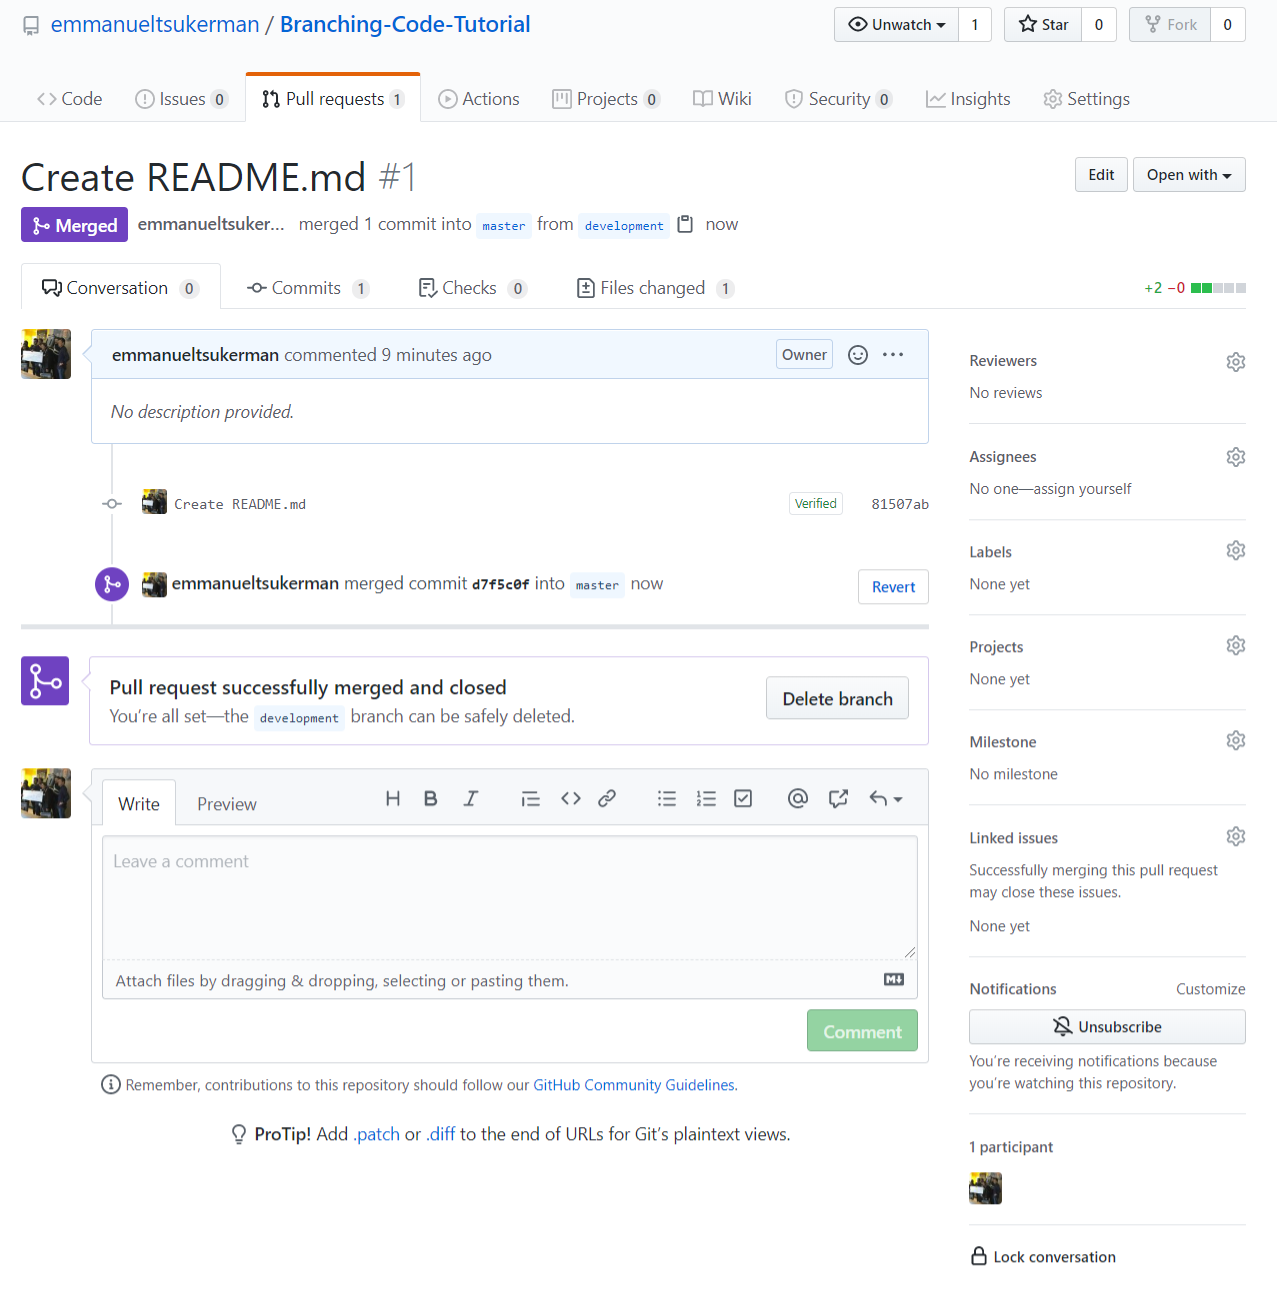
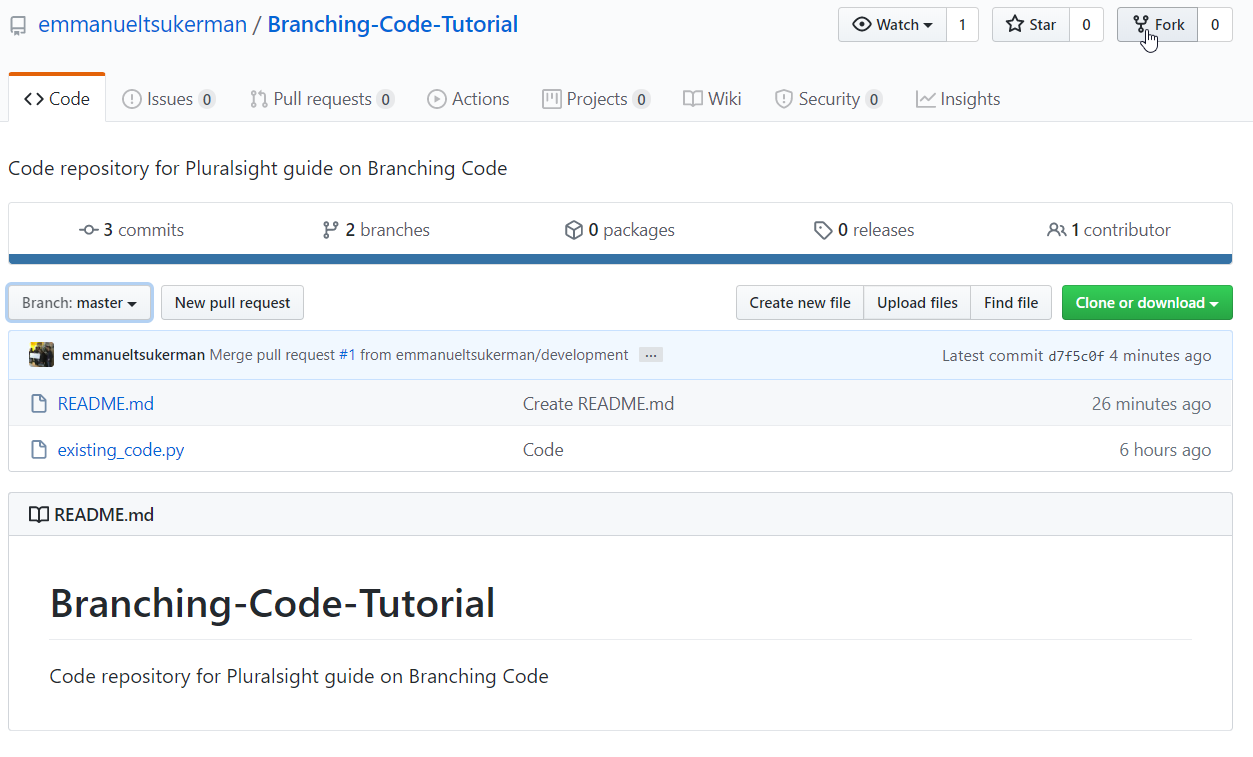
Now that you have completed the merge, the development branch is at the same state as master. You can delete it if you’d like, or keep it for further development.
Branching Code as a Contributor
Suppose you do not have privileged permissions to a repo. You can still contribute! Go to the repo’s page, Branching Code Tutorial Repo, and click Fork:
You’ll see a screen like this one:

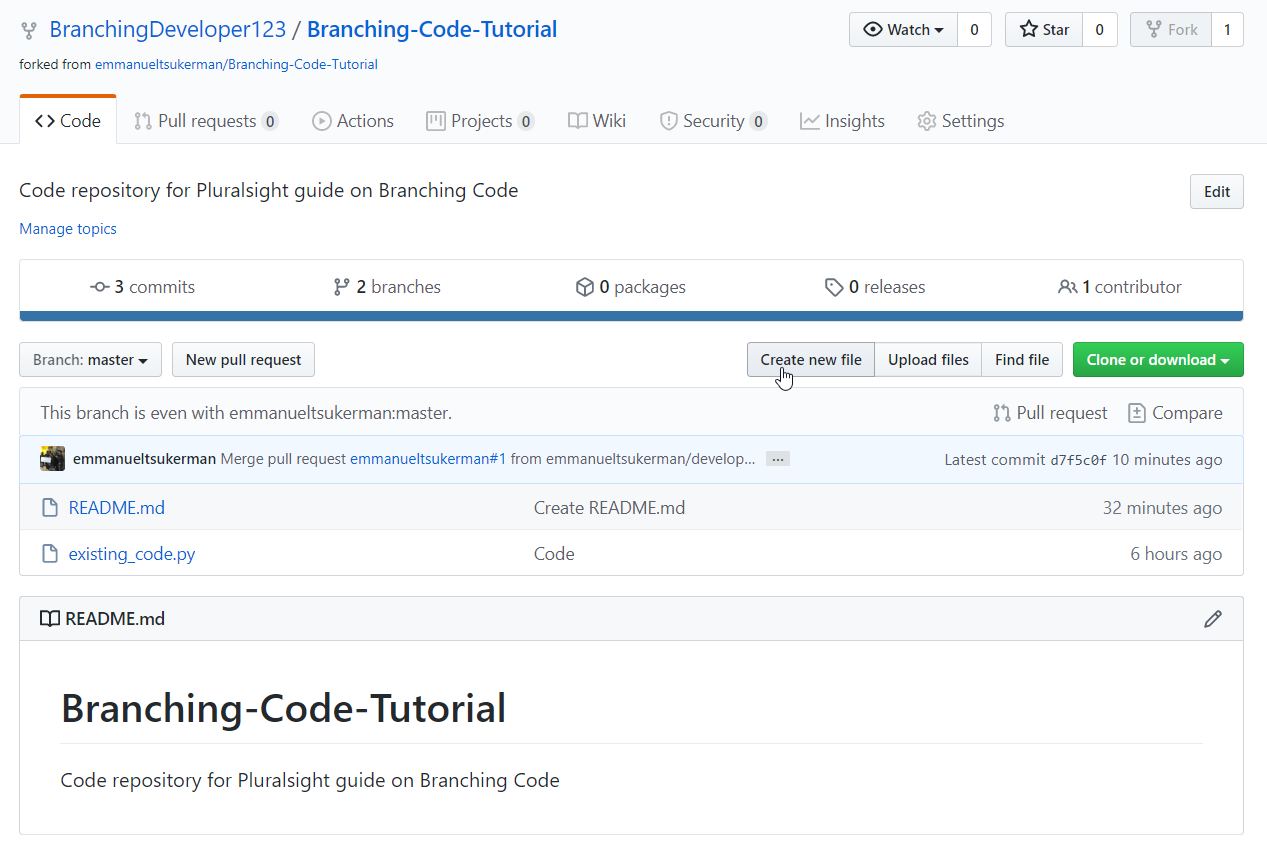
Once the forking is complete, you’ll notice the same repo on your screen, except now the name is slightly altered:

Forking basically creates a copy of the original repo, for which you have complete permissions. What you’re going to do is make changes to the fork and then create a pull request to submit the changes back to the original repo. Click on Create new file.
And then give it the name “hello_world.py” as well as the line of code print (“Hello world!”).
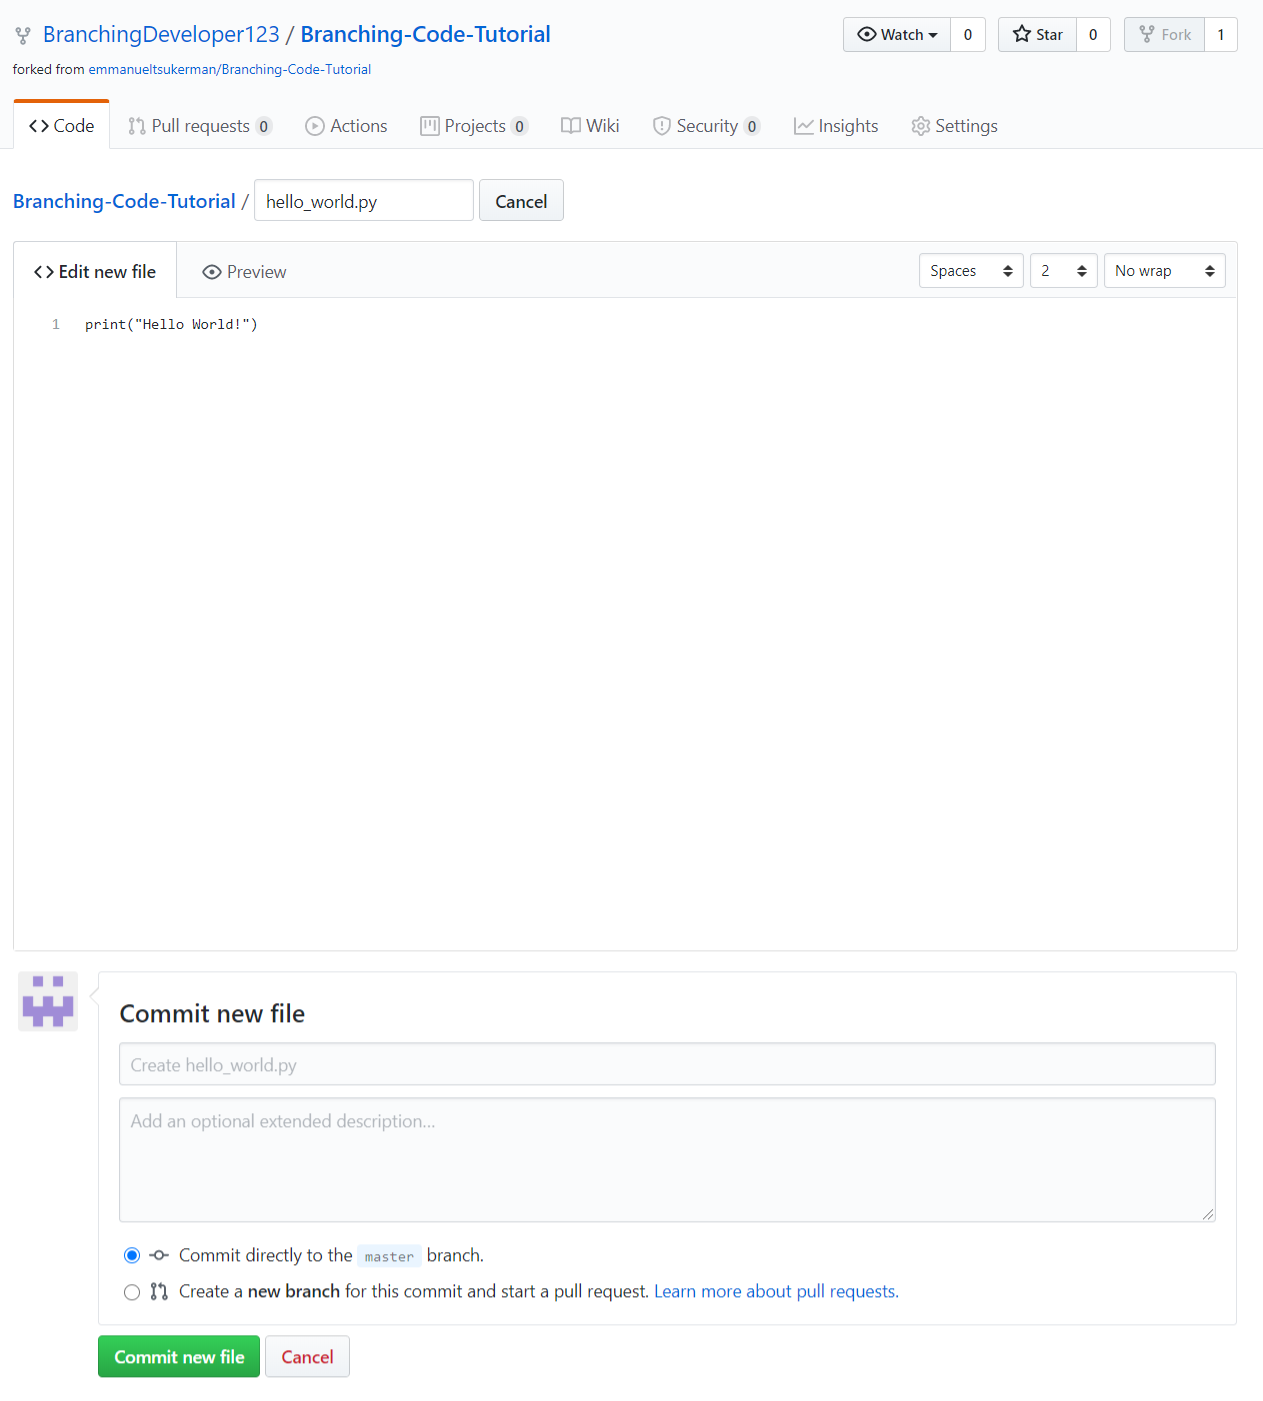
Click Commit new file.
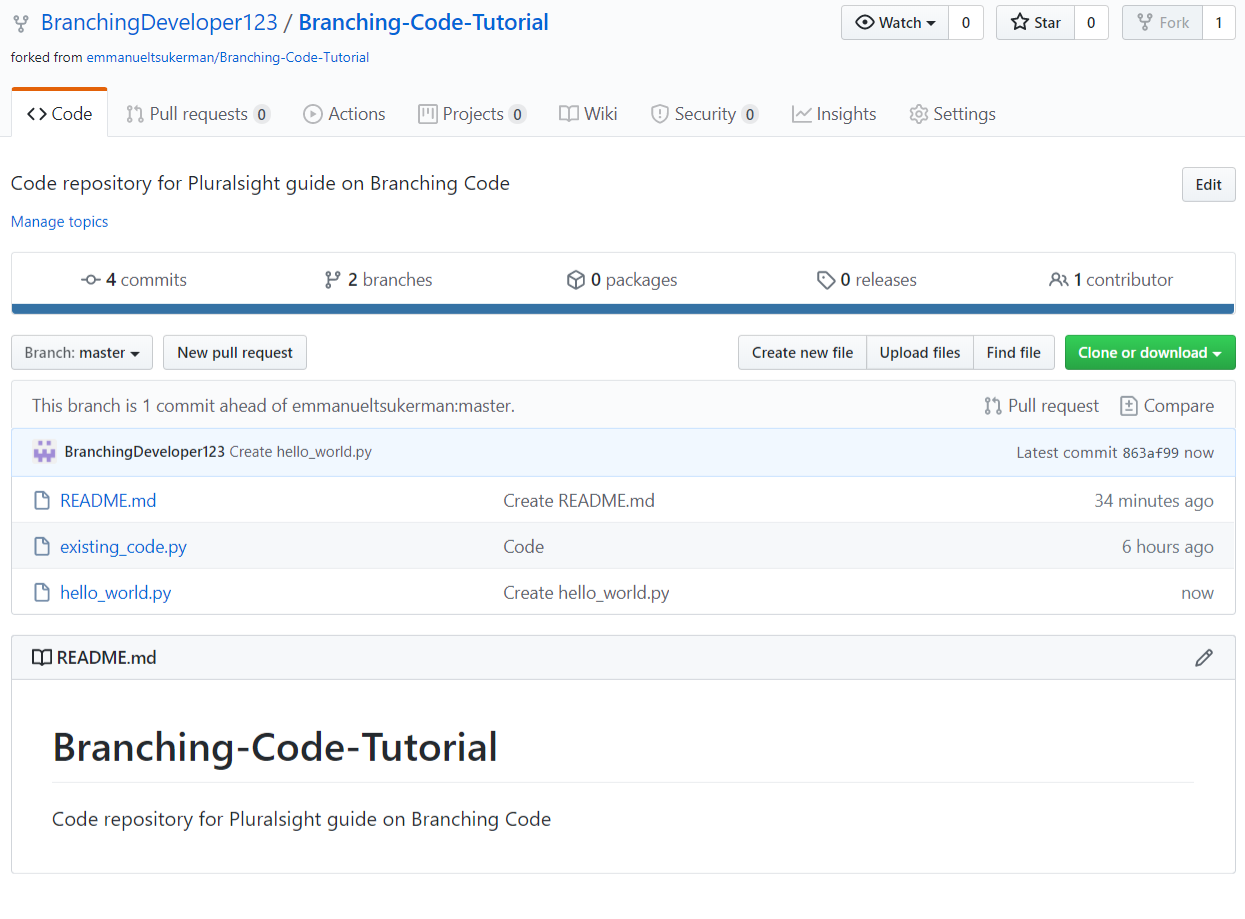
Notice that the branch is being compared to the original repo: "This branch is 1 commit ahead of emmanueltsukerman:master." Click on Pull request.
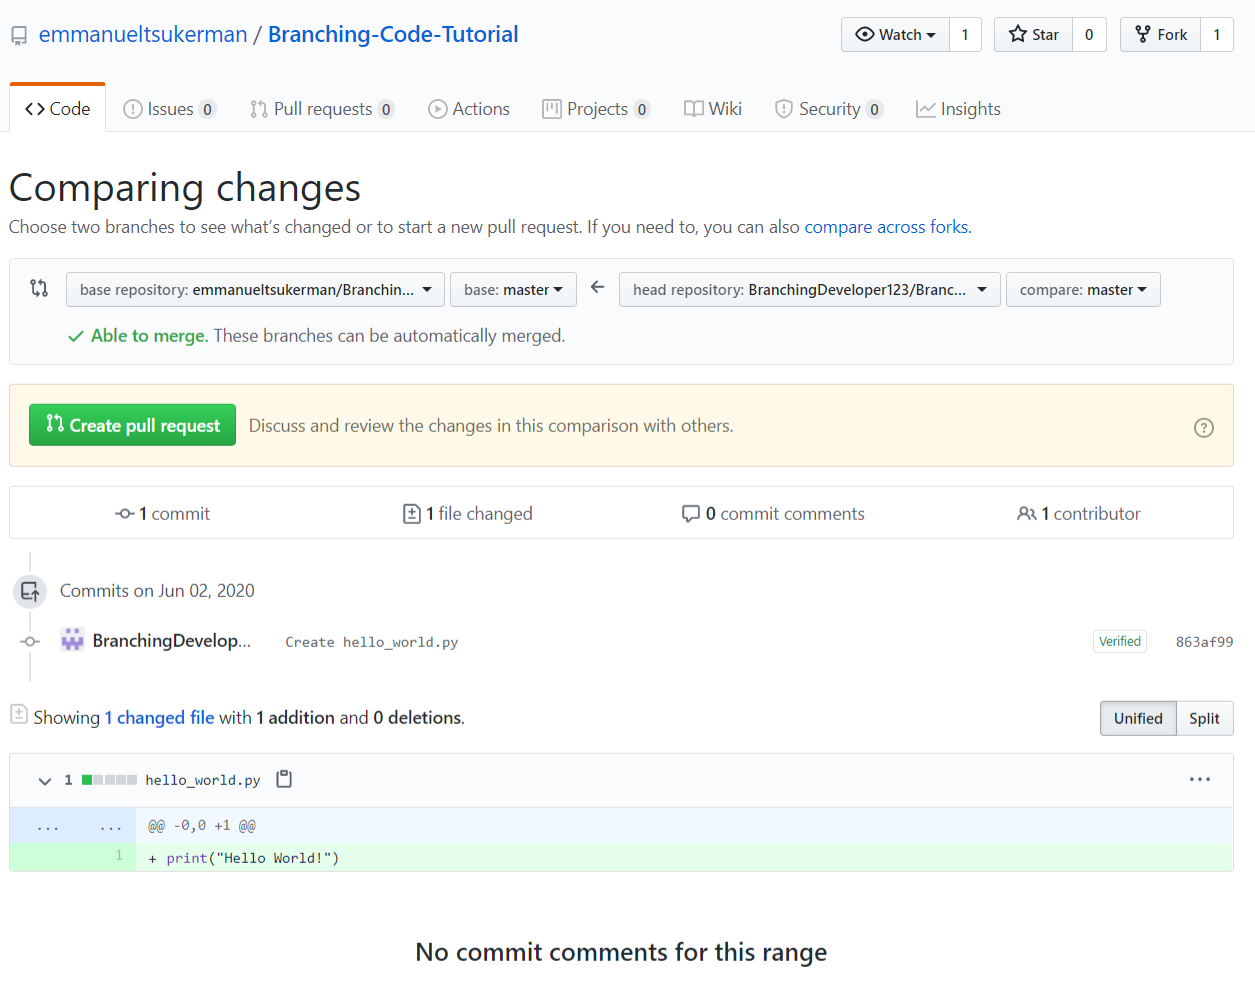
Observe that you can pull request to the original repo. As you can see, making changes to code as a contributor is pretty much the same as for a collaborator, except you make the changes on a forked copy.
Conclusion
As you can see from this guide, branching code is straightforward. It’s a great pleasure to contribute to projects and have a public record of your doing so, and you now have the skills to start contributing. Not only can you contribute to your organization’s projects as a software developer, but even to public open-source projects! If you are interested in doing so, see Code Triage, a website that curates opportunities for contributing to open-source projects. To learn about more advanced aspects of Git, such as rebasing, see the course Git Real. Happy coding!
Advance your tech skills today
Access courses on AI, cloud, data, security, and more—all led by industry experts.
