Getting Started with Amazon Lex
Aug 5, 2020 • 9 Minute Read
Introduction
Virtual agents or bots are one of the hottest trends in technology right now. Integrating a bot allows a user to interact with your app more naturally, either by text messages or speaking. Creating one is not simple. You have to know something about machine learning and natural language processing. The agent needs to be able to parse prompts and generate appropriate responses. Getting accurate content takes time and resources that many businesses don't have. Yet customers are going to expect bots as part of your app. How can you survive and compete with companies that have time and money to spend? This is where Amazon Lex comes in. Lex is a service that is part of AWS for building conversational interfaces for both voice and text interactions.
Using a Pre-Built Bot
Amazon Lex has several blueprints to experiment with pre-built bots. To create one, sign in to the AWS Console and then, from the Services menu, select Amazon Lex. In the next screen, click the blue Get Started button.
The Create your bot screen allows you to create a custom bot or select a pre-built blueprint:
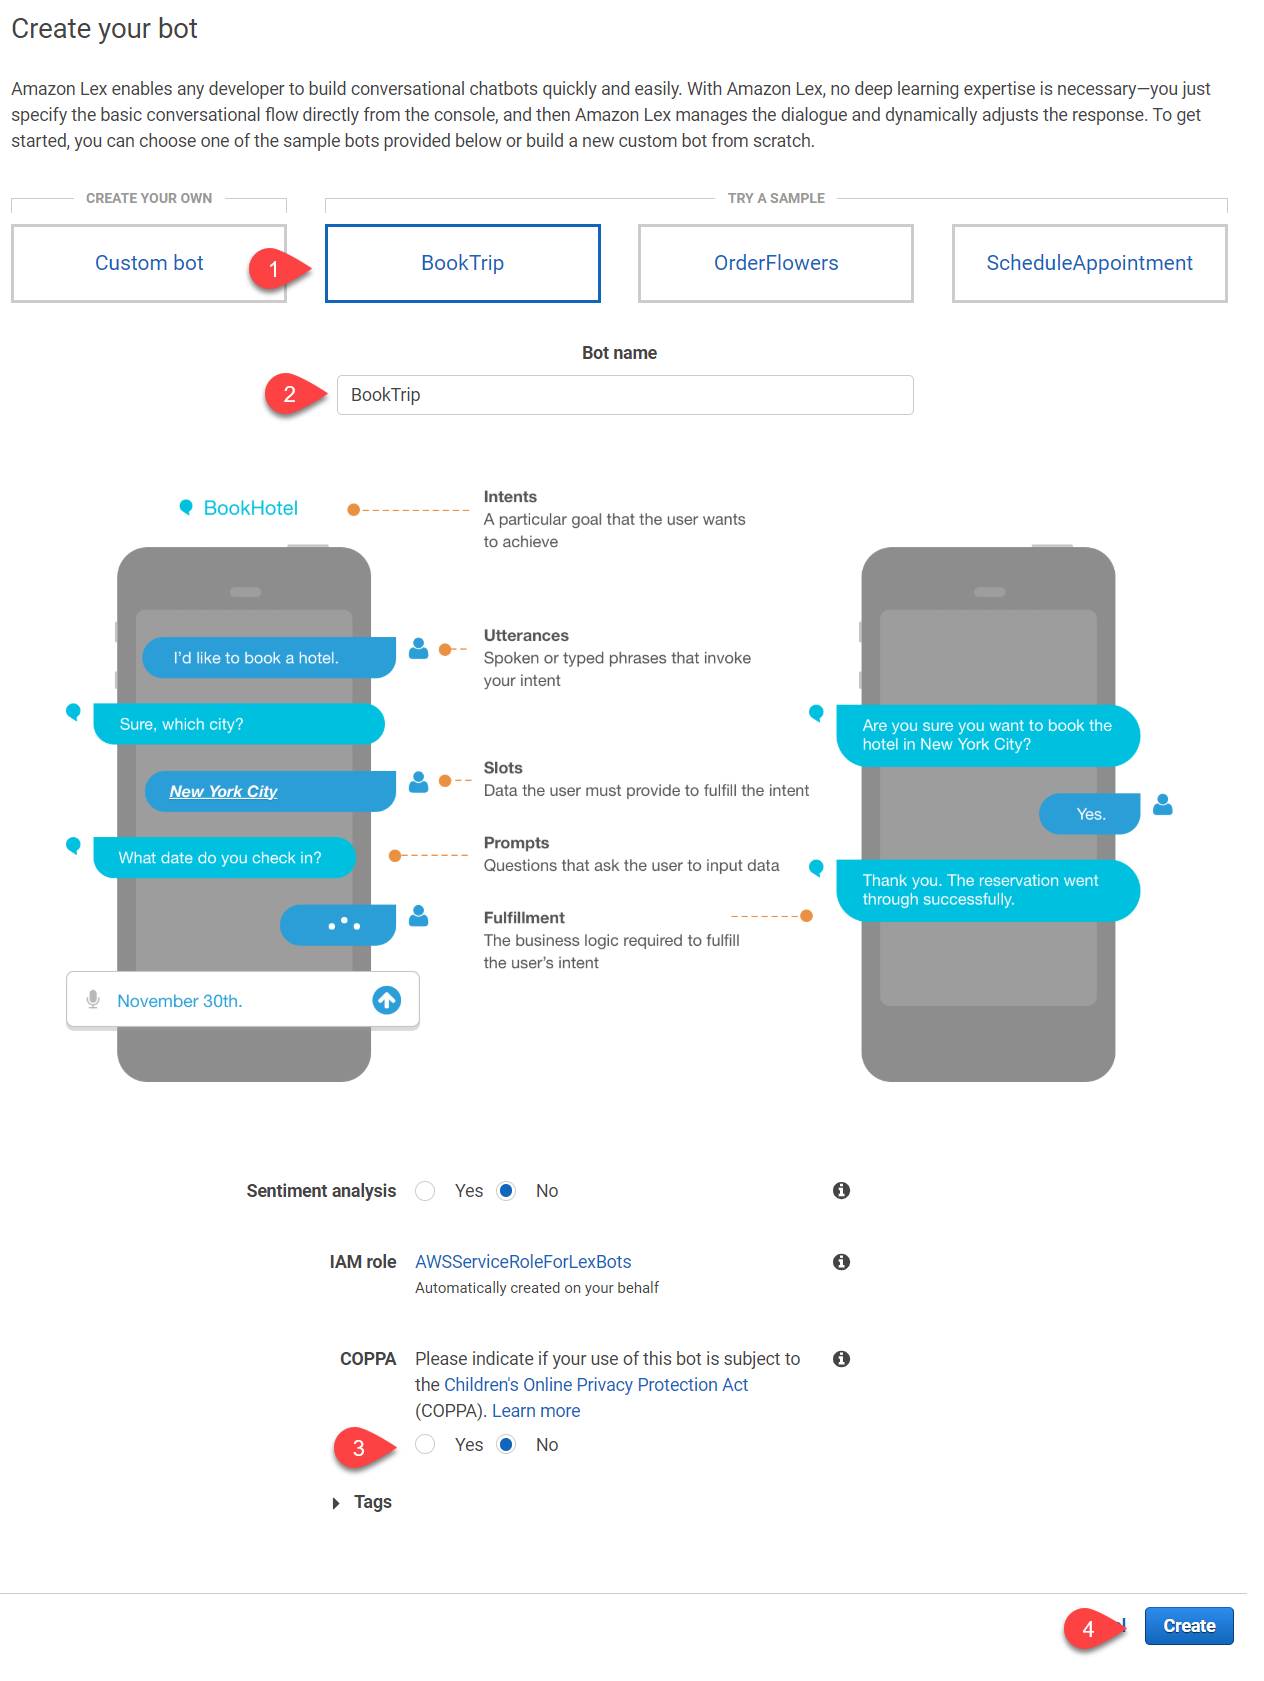
In this screen, select the BookTrip sample (1). Leave the name as BookTrip (2). Select No as this bot is not going to be used by children (3). And finally, click the blue Create button (4).
This will bring up the bot editor. Here you can configure and customize the bot without writing any code. The bot will build in the background, and after a few seconds, you'll see a text area where you can chat with the bot.
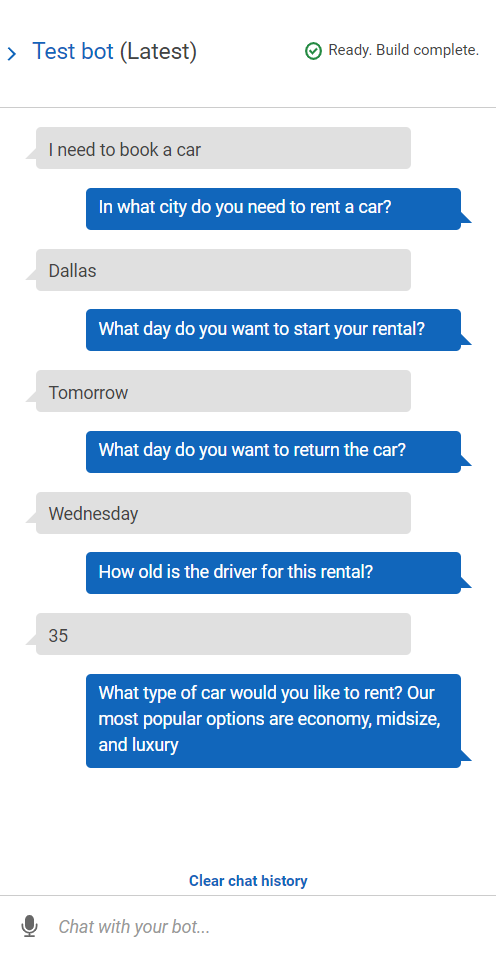
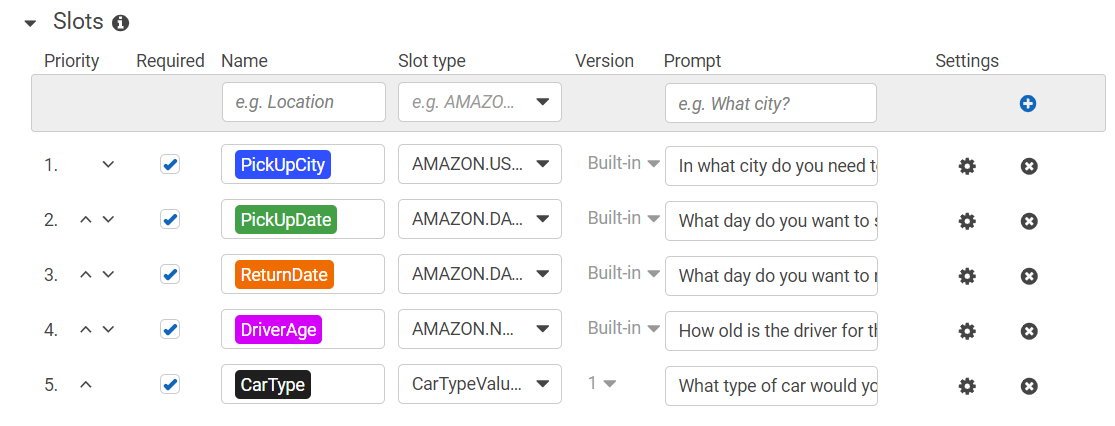
The sample utterances in the editor will trigger prompts from the bot. The bot will then prompt the user to answer the questions in the slots. Each slot has a name, type, and prompt.
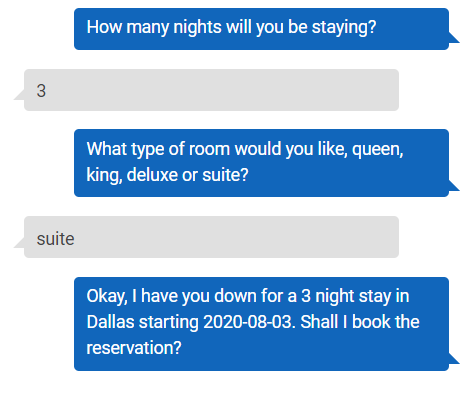
In this conversation, the slots would have a PickUpCity of Dallas and a PickUpDate of 2020-08-02. (This guide was written on August 1, 2020.) Notice how the user does not have to give an exact date but instead can interact with the bot using language as a human would.
After the prompts in the slots have been answered, the confirmation prompt will be shown.
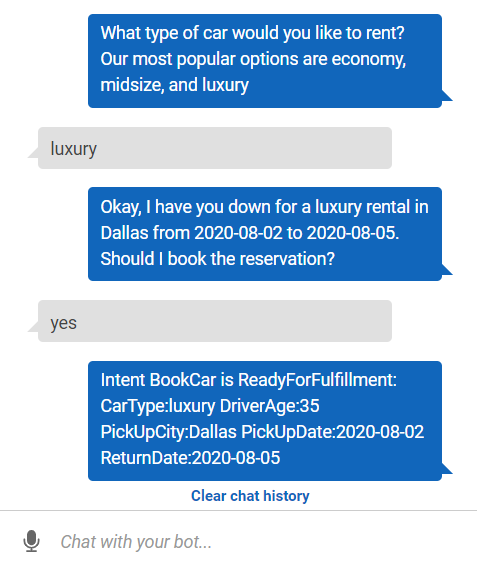
Notice that below the chat window, the slots and their values are displayed.
Customizing an Intent
The utterances, slots, and confirmation are part of an intent, which is like a task for the bot to complete. A bot can have more than one intent. Click on the BookHotel intent in the left sidebar.
This intent has four slots:
- Location
- CheckInDate
- Nights
- RoomType
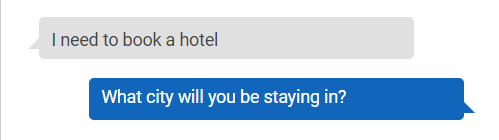
The utterances can also include the names in the slots. If you were to tell the bot, "I need to book a hotel," it would ask for a location.
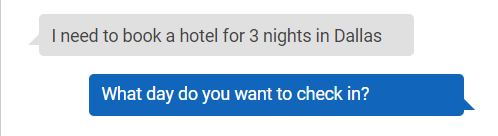
However, if you were to tell it, "I need to book a hotel for three nights in Dallas," it would parse out the location and nights slots and ask for a check-in date.
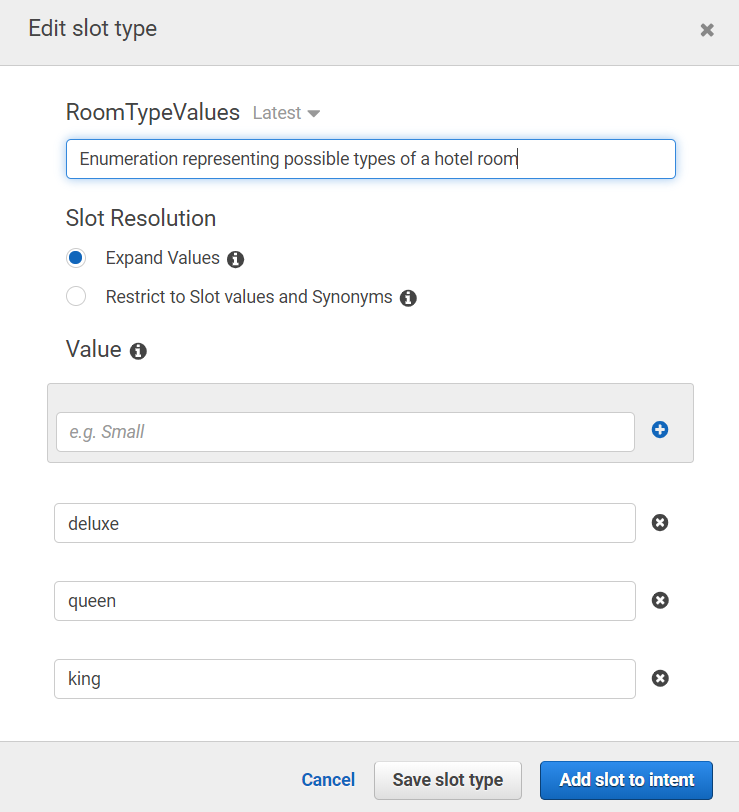
The value for each slot has a type. Lex has a number of commonly used pre-defined types. For example, the location is AMAZON.US_CITY and the check-in date is AMAZON.DATE. Look at the RoomType slot—its type is RoomTypeValue. Click on RoomTypeValue under Slot types in the left sidebar.
You can also add new slots and utterances. Define a new slot with a name of FirstName, a type of AMAZON.US_FIRST_NAME, and a prompt of 'What is your first name?' and click the blue plus icon to add it.

Create a similar slot for LastName. By default, the new slots will be added at the end. You can change the order by using the up and down icons for each slot.
You can also create a new utterance that parses the slots. Simply include the name of the slots in curly braces.

Build the bot and try it out.

The bot parsed the FirstName and LastName slots and displayed the prompt for location.
Publishing a Bot
To publish your bot, simply click the blue Publish button at the top of the editor. Once the bot is finished, you can connect it to a mobile app or integrate it with a number of popular messaging services, such as Slack.
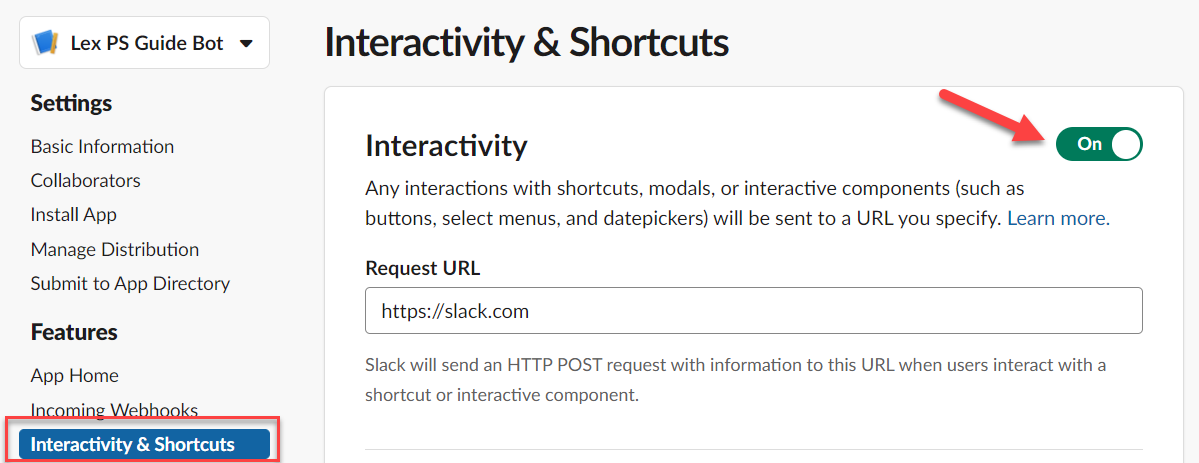
To integrate a Lex bot with Slack, first you'll need to create a new Slack application. You'll need to activate interactivity.
In the Basic Information section, you'll need the client ID, client secret and verification token.
In the Lex editor, select the Channels tab and then Slack in the sidebar. Give your channel a name and select aws/lex for the KMS Key. Choose the bot Alias and then provide the Client Id, Client Secret and Verification Token for the Slack app.
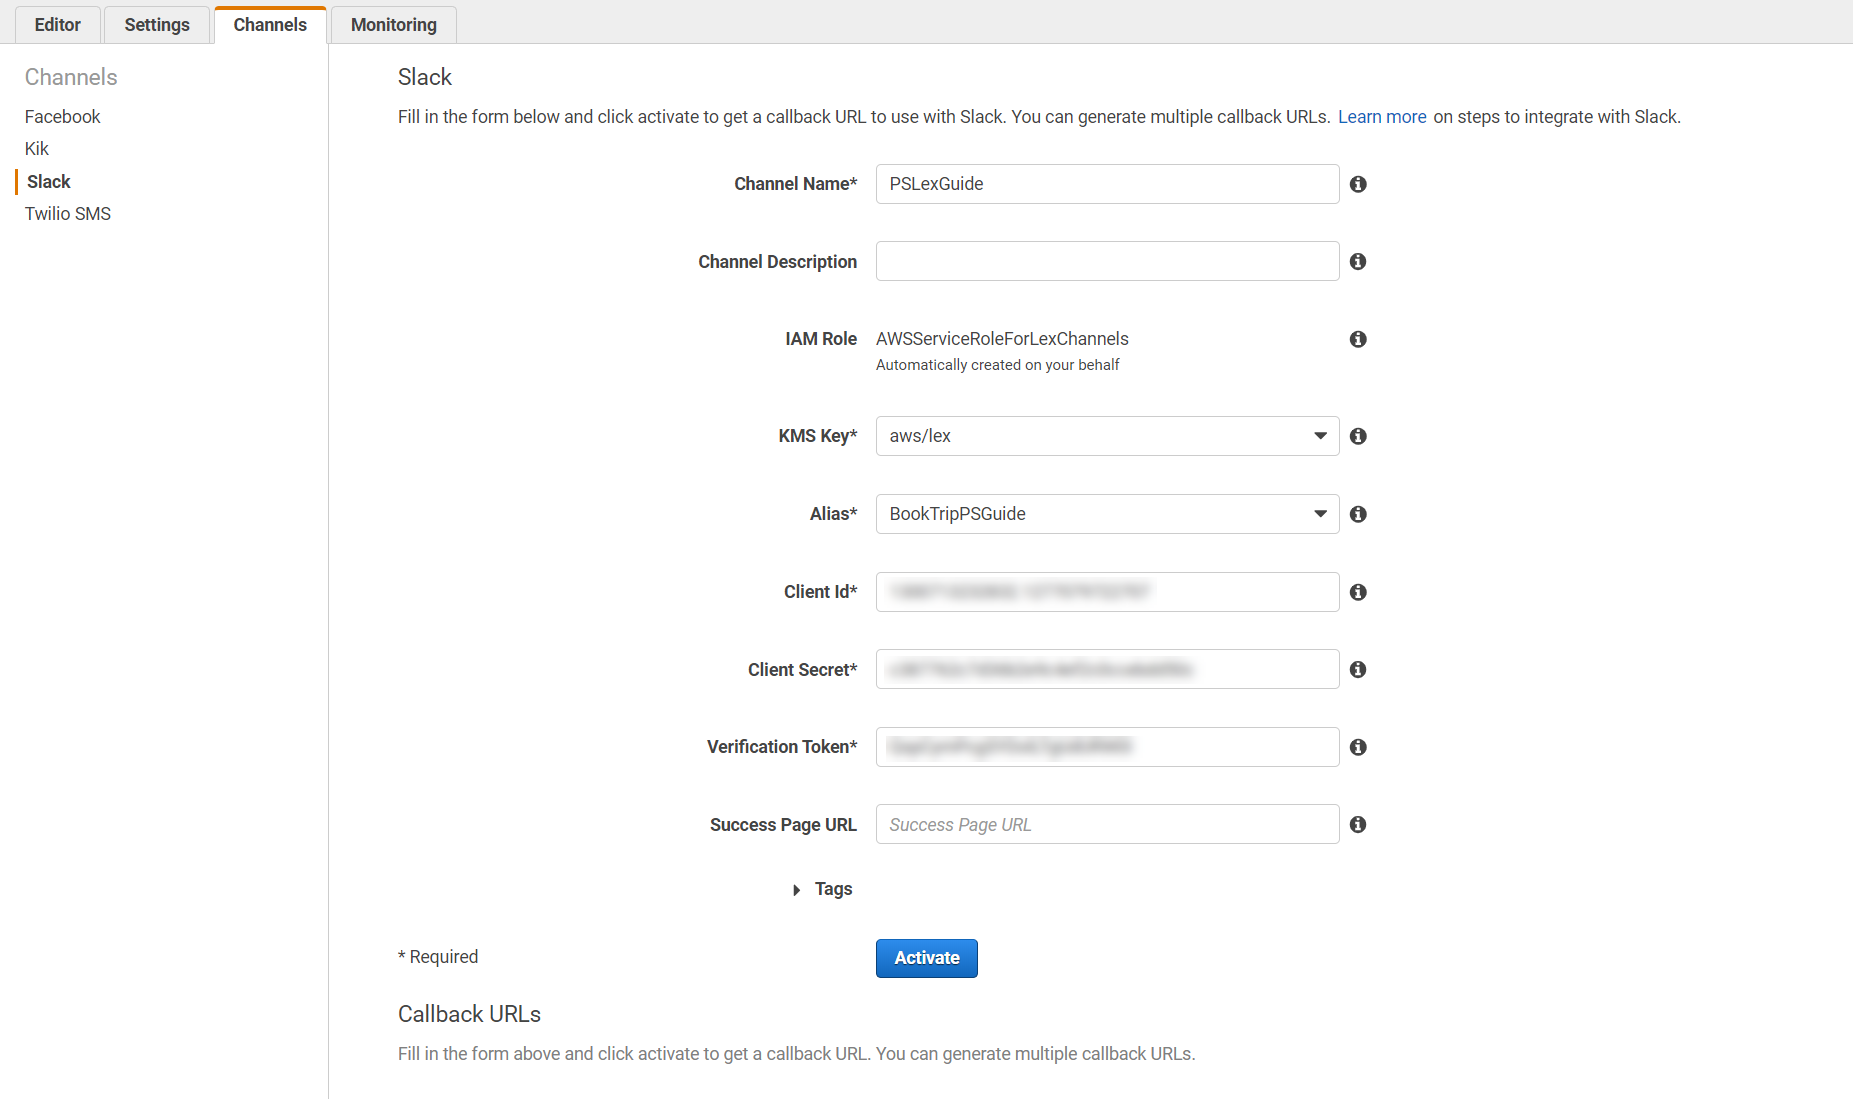
Click the blue Activate button to complete the integration on the AWS side. Note the callback URLs. You'll need those to configure the Slack app.
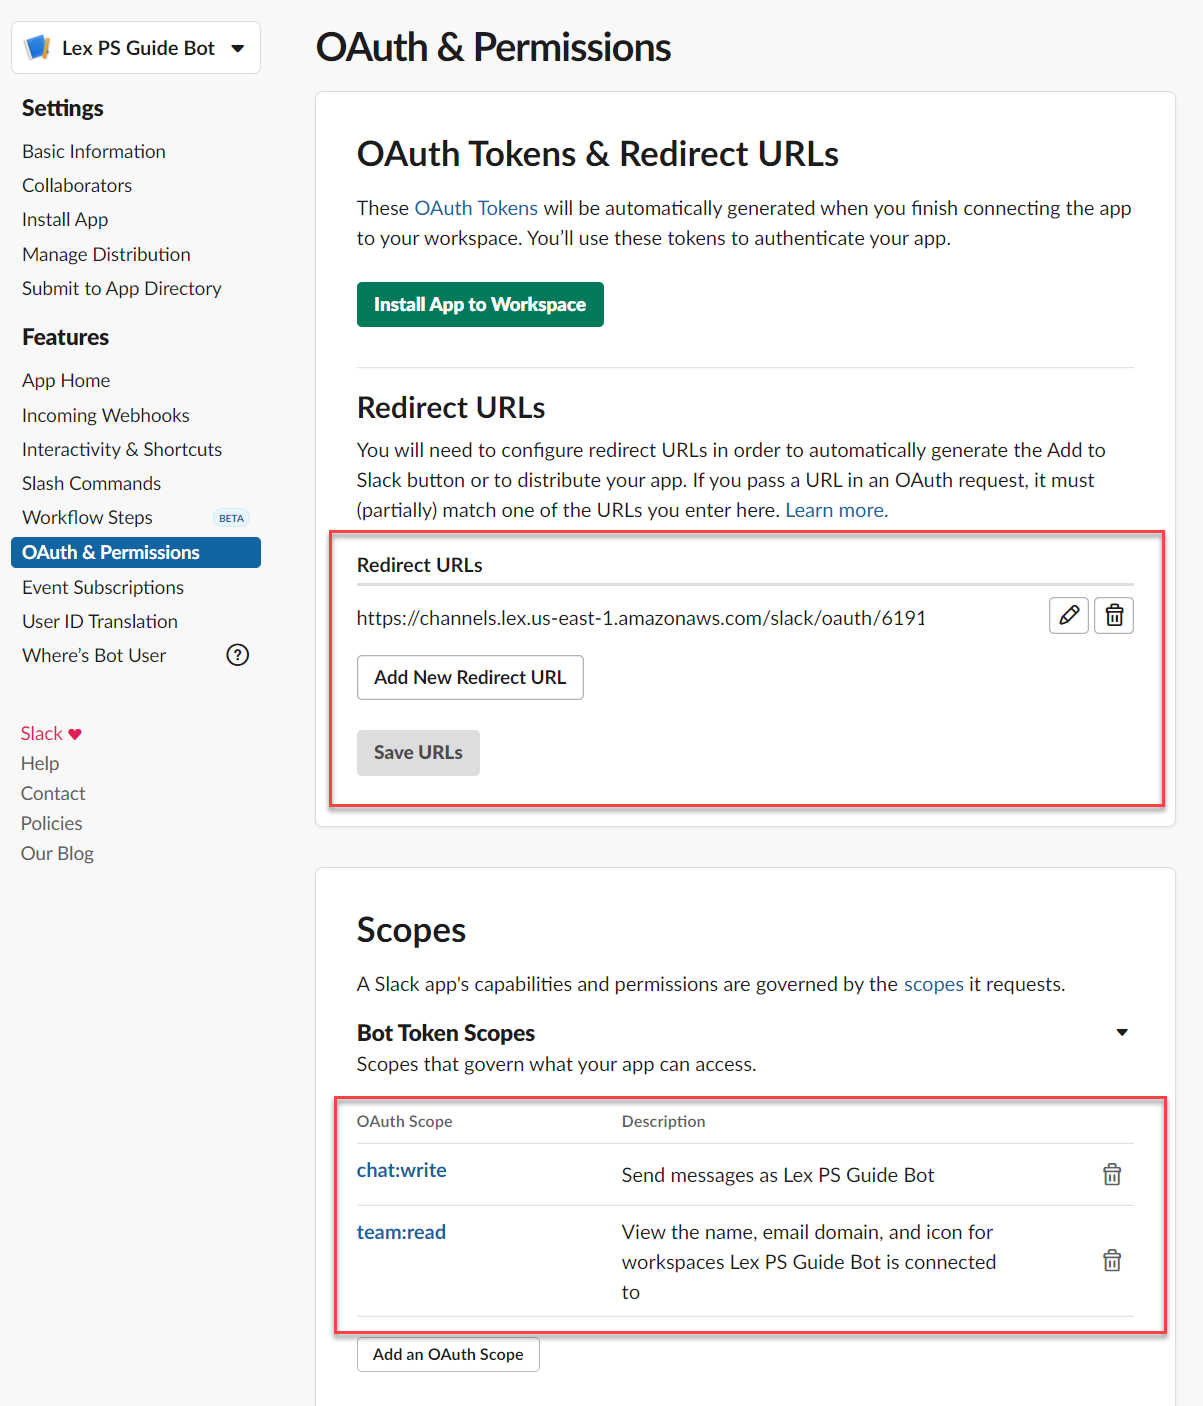
Go back to the Slack app and select OAuth & Permissions from the sidebar. Add a new Redirect URL with the value of the OAuth URL of the Lex bot and click Save URLs. In the Scopes section, add two new scopes: chat:write and team:read.
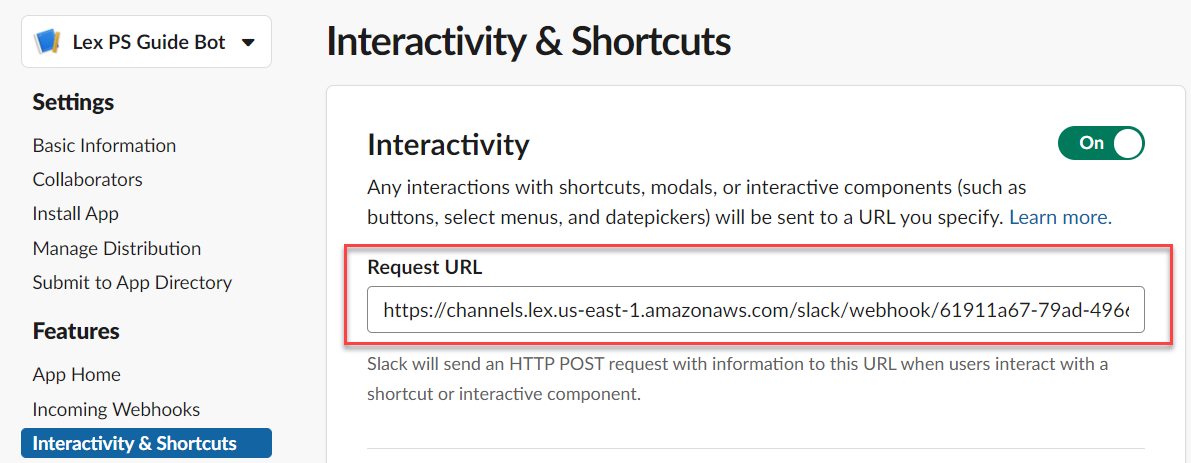
Return to Interactivity & Shortcuts and paste the Postback URL of the Lex bot in the Request URL. Don't forget to click the green Save Changes button at the very bottom of the screen.
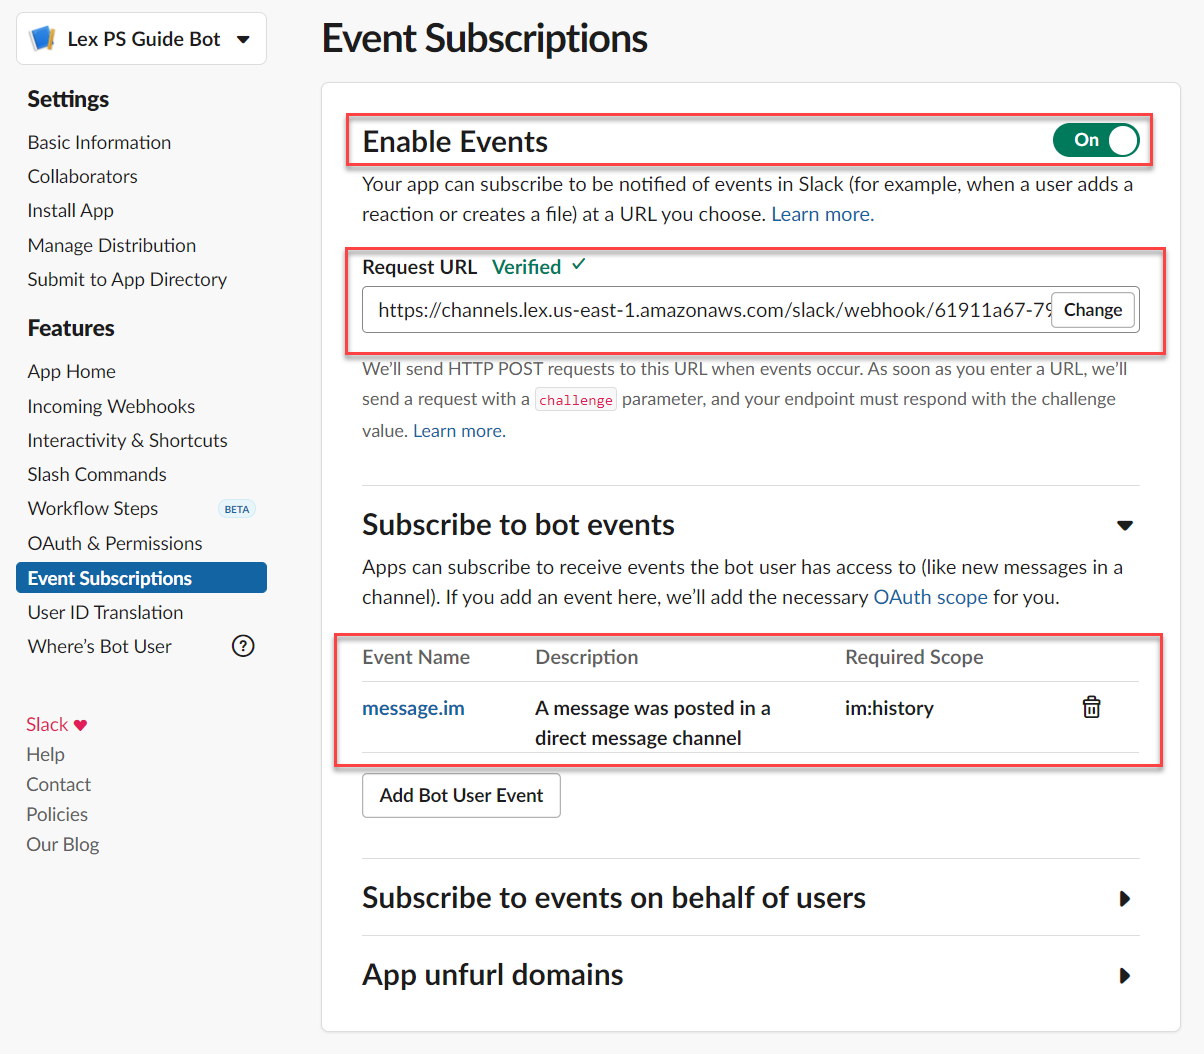
One last step: click Event Subscriptions in the sidebar. Turn the Enable Events switch on. Paste the Postback URL from the Lex bot into the Request URL. Expand the Subscribe to bot events section and add the message.im event. And at the very bottom of the screen, click the green Save Changes button.
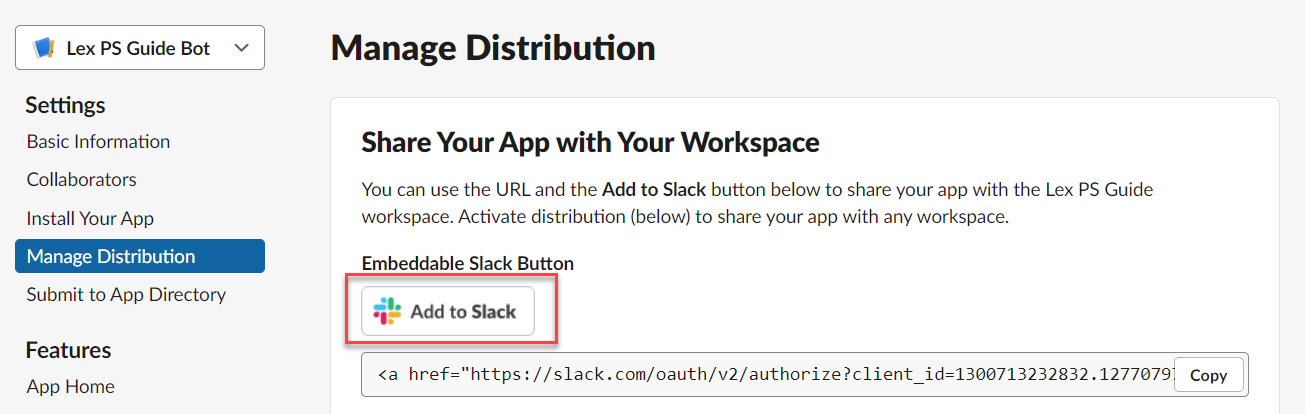
Click Manage Distribution in the sidebar and then the Add to Slack button.
Click Allow to authorize.
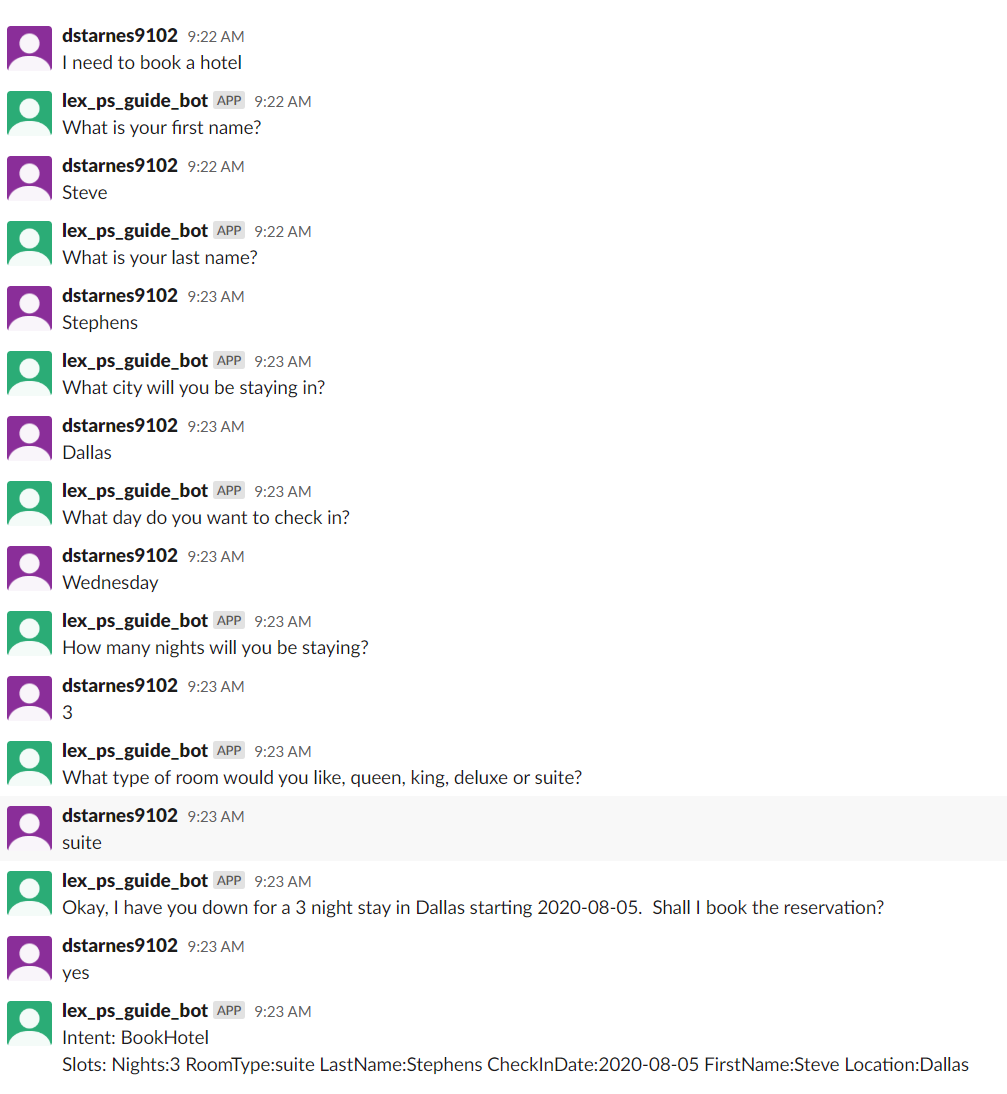
In Slack, search your direct messages for the bot.

You can now chat with your bot .. through Slack!
Conclusion
How much code did you write to create the bot and integrate with Slack? None! Authoring bots with Lex does not require any development. So non-technical workers could create bots. The more advanced can associate bots with Lambda. And there is a REST API as well for deeper integration with your application. You can even deploy a bot as an Alexa skill! Lex is very versatile as well as easy to use. See the documentation at https://docs.aws.amazon.com/lex/index.html. There is something for everyone. Thanks for reading!
Advance your tech skills today
Access courses on AI, cloud, data, security, and more—all led by industry experts.
