Machine Learning with RapidMiner
In this guide, you will learn how to build your first regression and classification model using RapidMiner, a popular data science platform.
Oct 1, 2020 • 8 Minute Read
Introduction
RapidMiner is one of the finest tools for building machine learning models, including deep learning models. According to a KDnuggets 2018 poll, RapidMiner stands at second place, beating R, Excel, and many other known software packages in frequency of use in real projects.
In this guide, you will learn how to build your first regression and classification model using RapidMiner.
Setting Up the Data
To start, download the House Prices: Advanced Regression Techniques training dataset from Kaggle. The dataset has 81 attributes and 1460 records. To focus on machine learning and not data cleaning, create a dataset consisting of only five attributes: OverallQual, LotArea, Street, GarageArea, and SalePrice . These five attributes will be used in building both regression and classification models.
Loading Data in RapidMiner
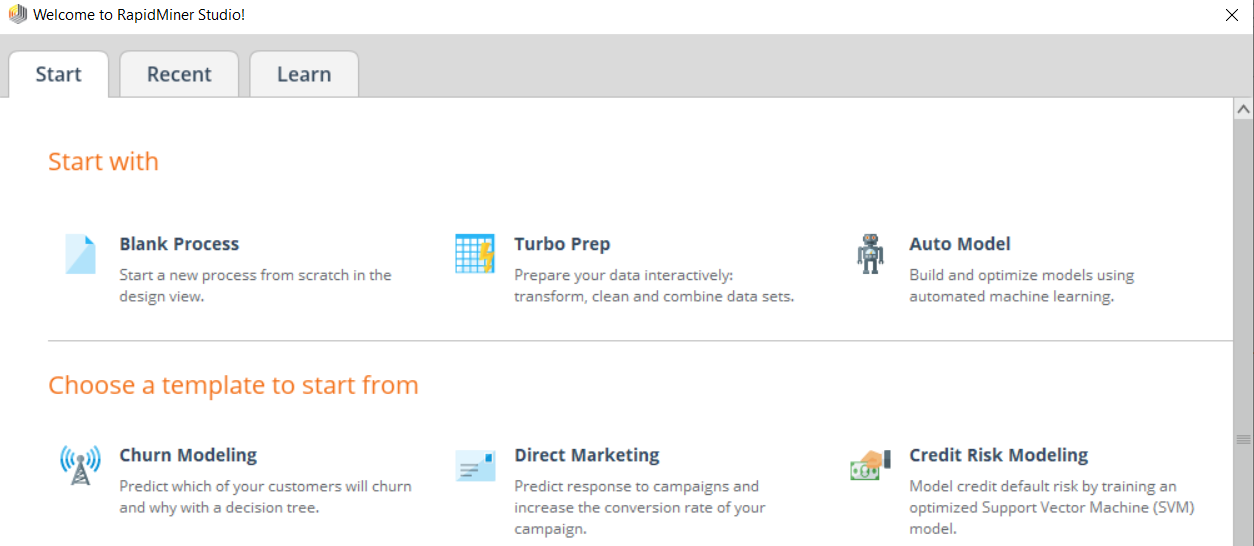
Download RapidMiner Studio, install it on your device, and register yourself. Once you are registered, open the software, which will give you the following dialog box:
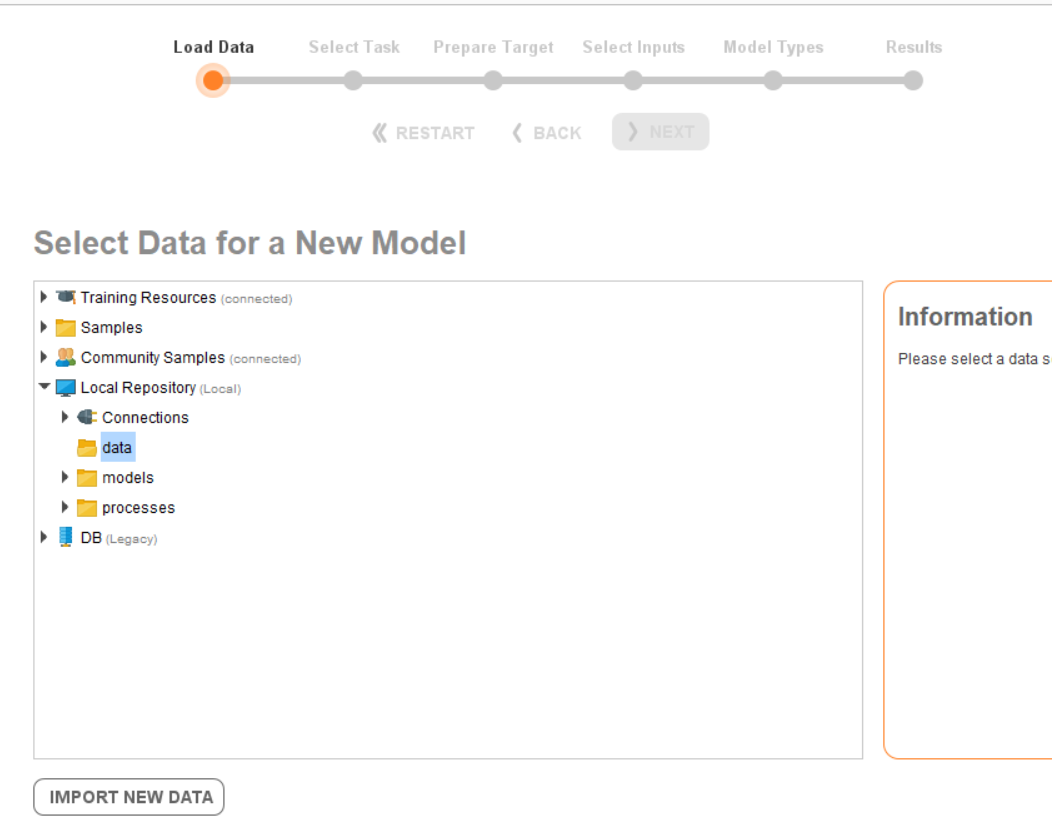
Select Auto Model, which will take you to the following screen:
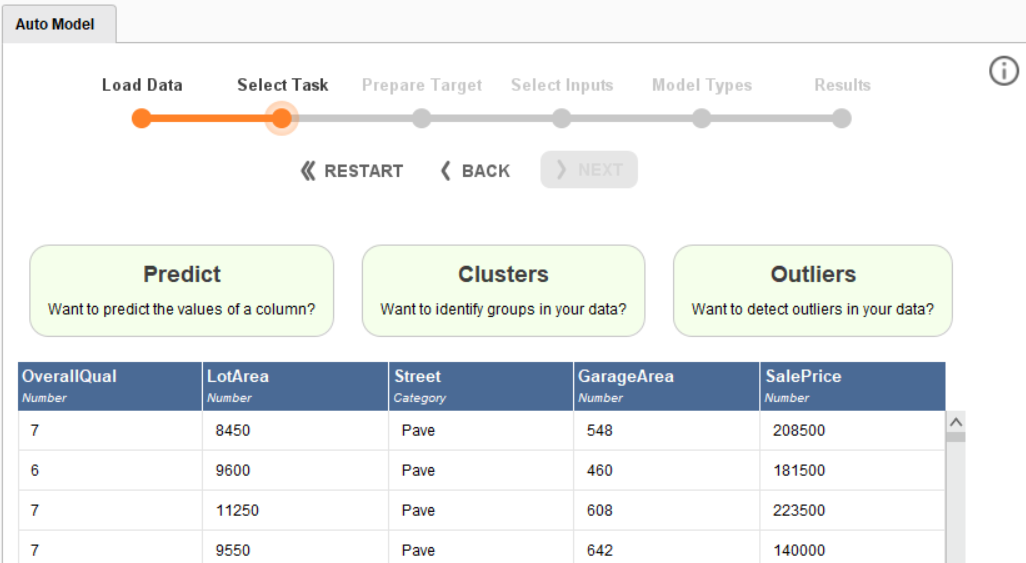
Click the IMPORT NEW DATA button, which will open a new dialog box. Select the location of the dataset, and click Next a few times without changing the data. As the last step, select the current data folder or create a new folder to upload the data into RapidMiner. This will bring you to the first step of building a machine learning model:
Building Your First Regression Model
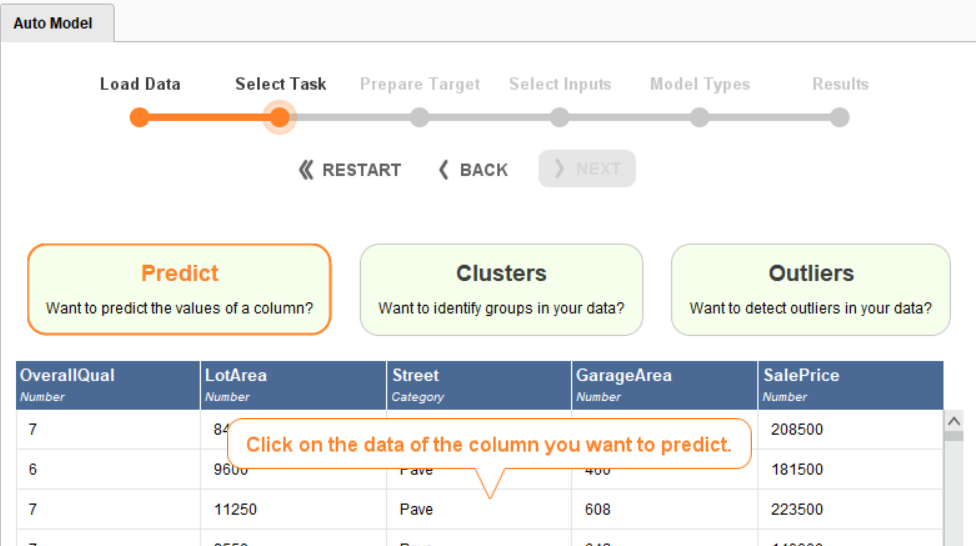
To build the regression model, start by clicking on the Predict button, which will ask you to choose a target column by showing the following pop-up:
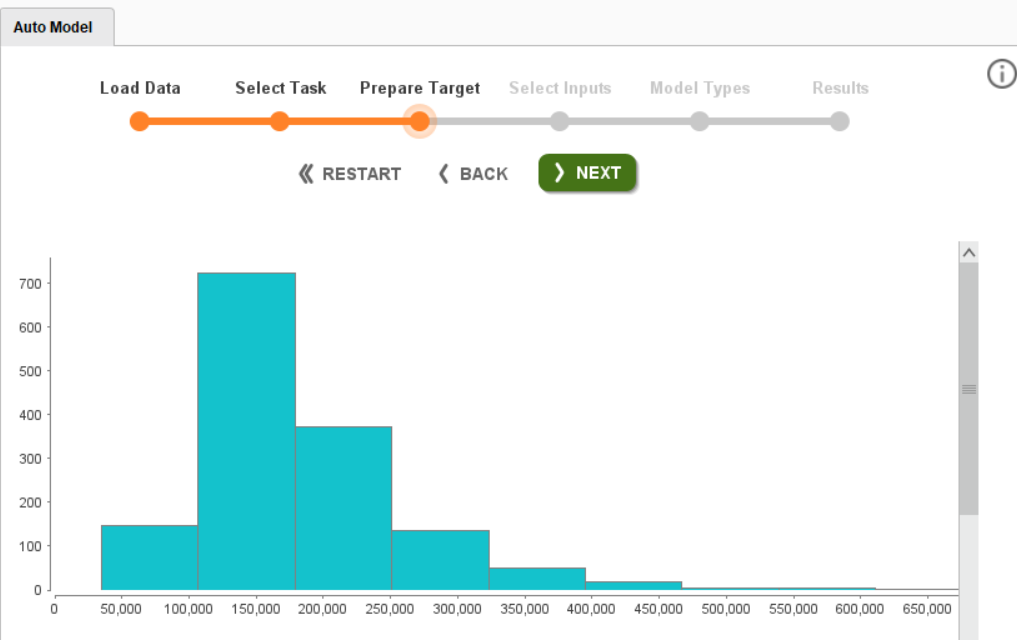
Choose the SalePrice column as the target column and click Next. This will bring you to the next page, Prepare Target:
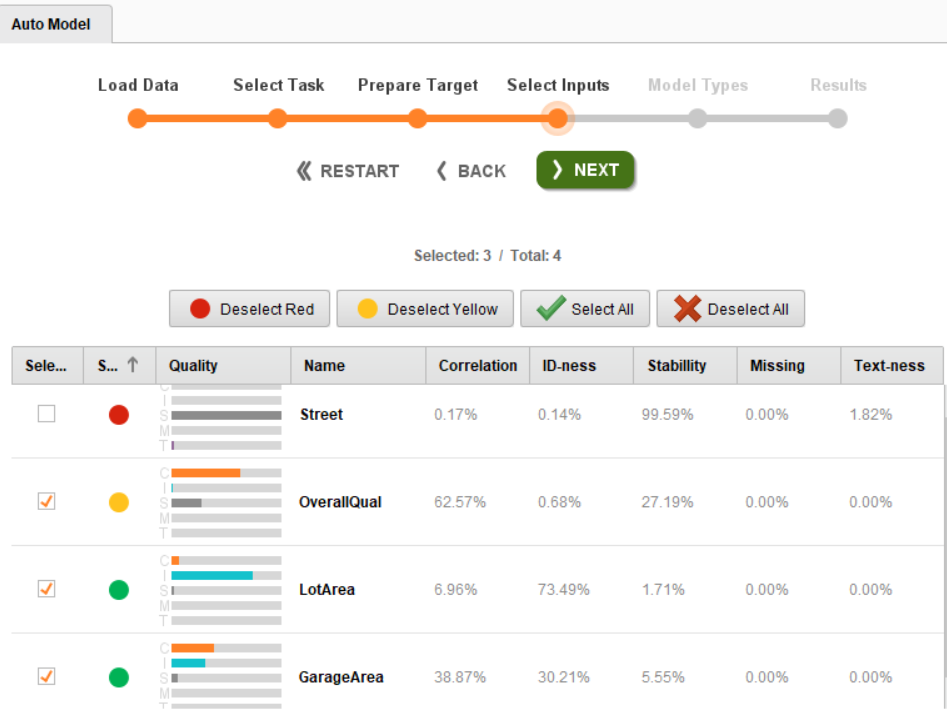
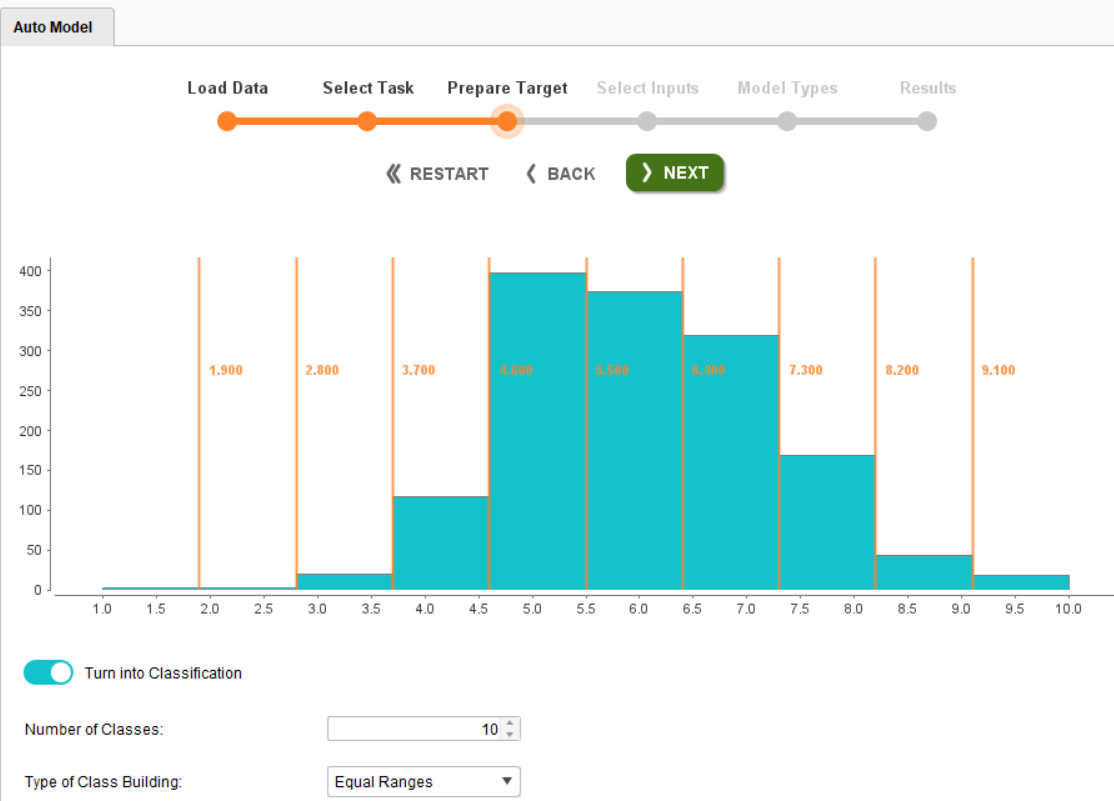
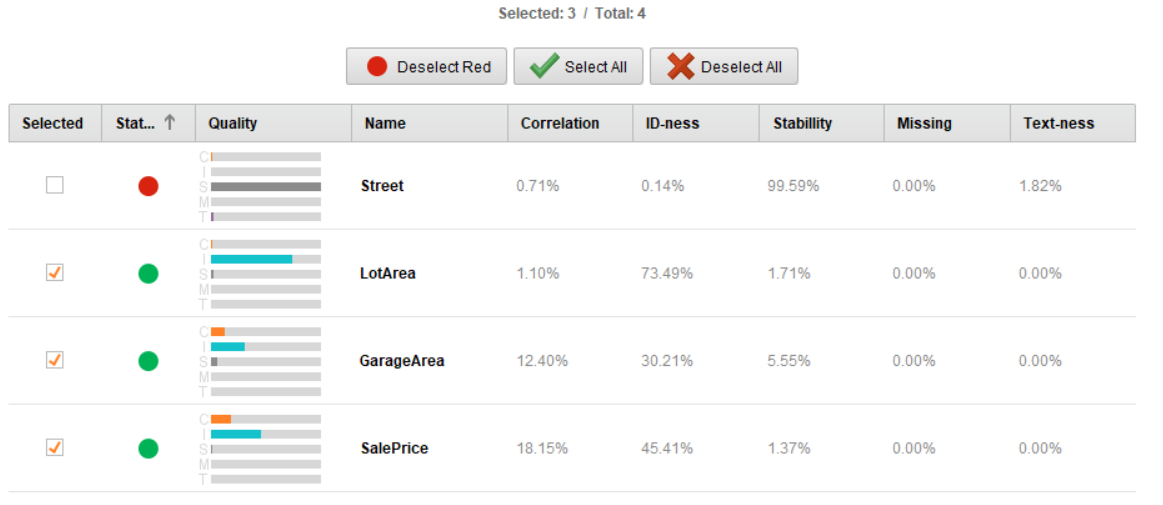
This page provides you the histogram of the target column. Click Next and you will land on the Select Input page. This page provides important information about each independent feature of the dataset.
In the above image, notice that RapidMiner has already discarded the Street attribute and given a positive response for the LotArea and GarageArea attributes and a neutral response for the OverQual attribute. You can discard the attributes that are highlighted with a yellow dot, too. In this case, all three attributes (marked with green and yellow dots) are considered inputs. Click Next to arrive at the next page, Model Types.
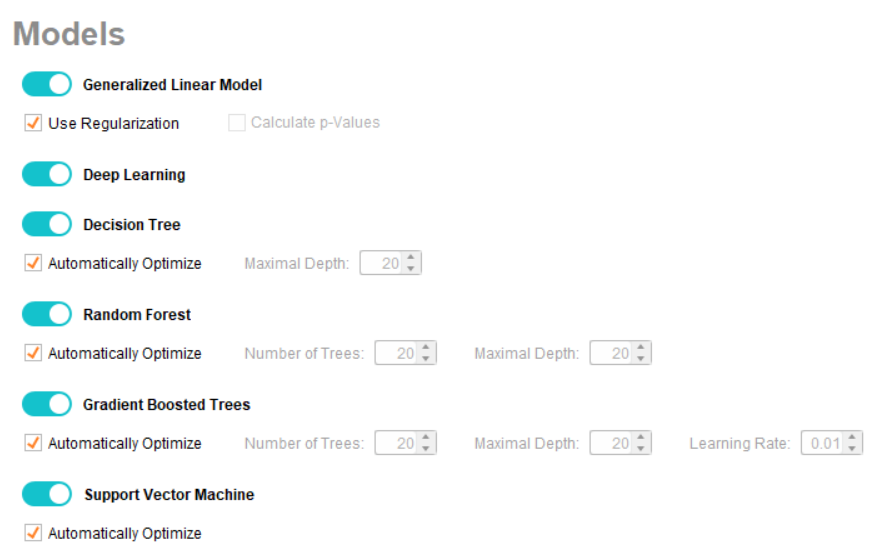
If you are aware of other machine learning tools, you may notice in the above image how convenient RapidMiner has made building machine learning models by providing options to build all the models at once. All you need to do is select the ones necessary for your project. In this case, all the models are selected.
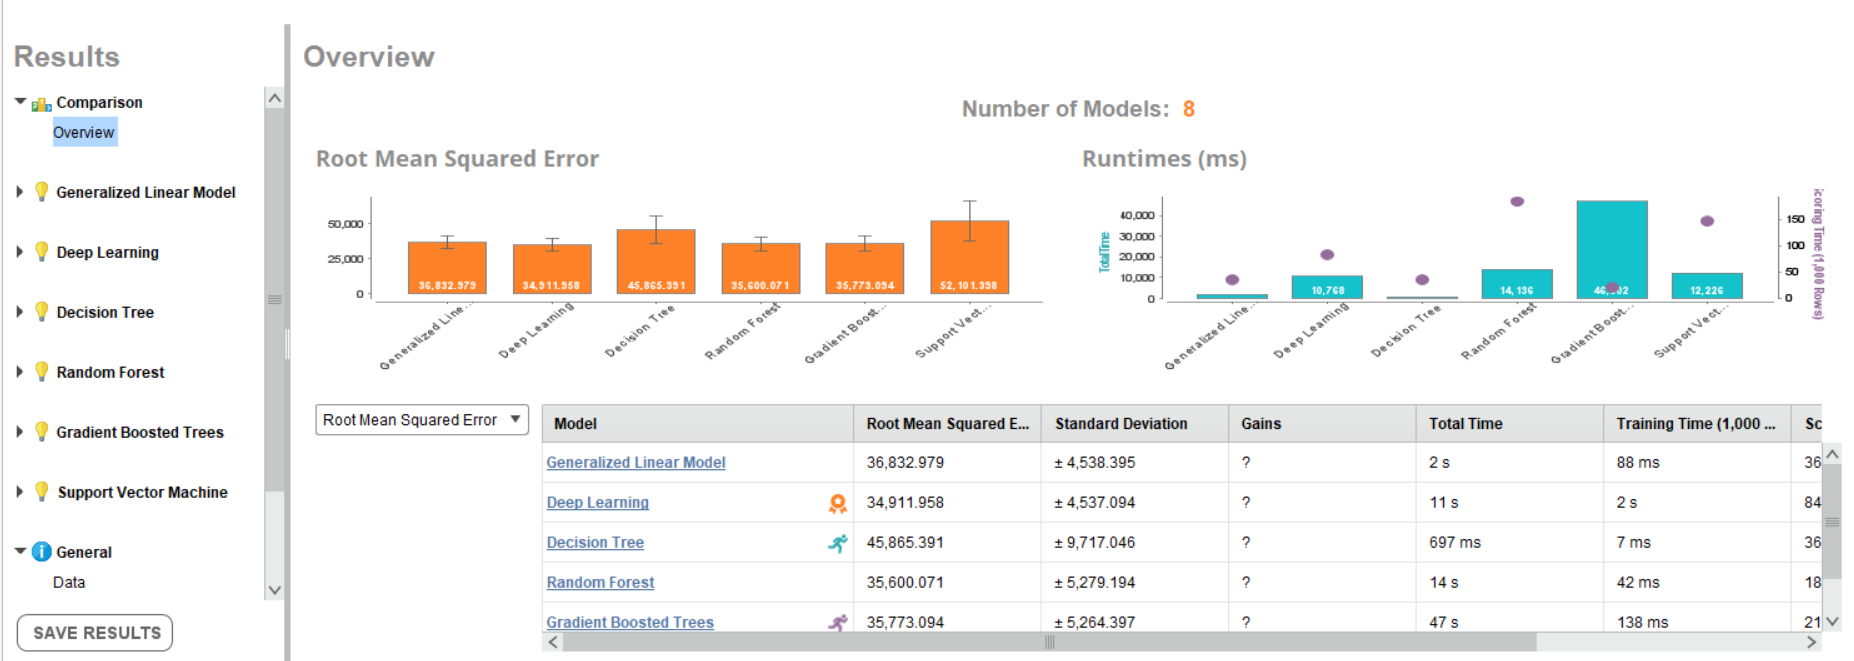
Additionally, on the same page, you have a few options related to data preparation. You can apply those functions as needed. Once everything is set, click Run. After all the models are built, you will observe a page similar to this:
This page provides an overview of a selected metric (available metrics are root mean squared error, absolute error, relative error, squared error, and correlation), runtimes in milliseconds, and indicates which model has the best performance (orange badge), fastest total time (running stick figure in blue), and fastest scoring time (running stick figure in purple).
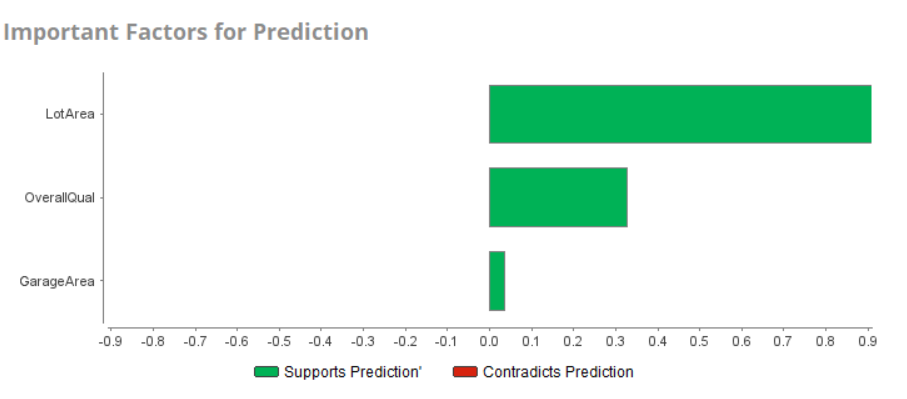
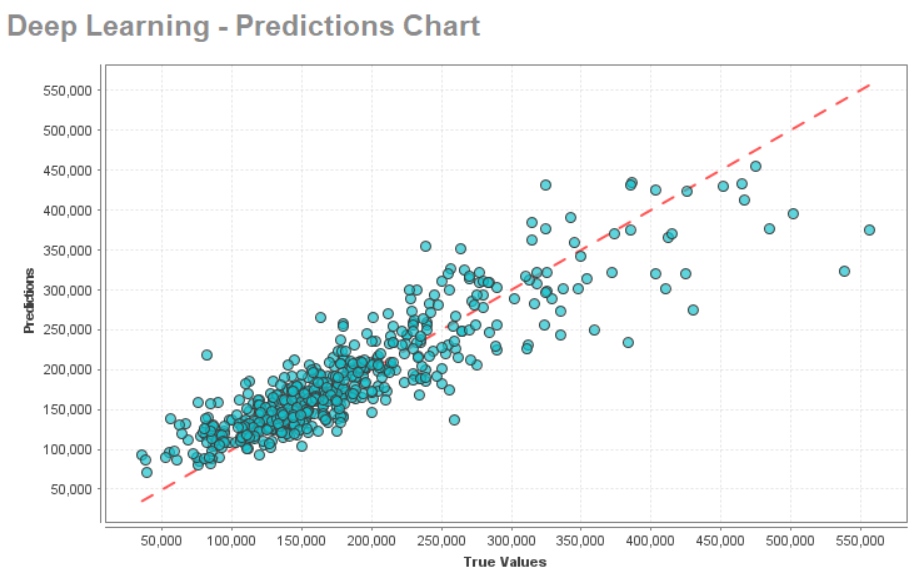
For this dataset, the deep learning model provided the best performance. You can review the complete model details, data prediction, and much more under the Deep Learning drop-down menu available on the left-hand side of the overview page. These two figures show the importance of attributes and the prediction chart for this data set:
Finally, you can deploy the deep learning model and export it for future use.
Building Your First Classification Model
To build a classification model, most of the steps will be similar to building a regression model. To begin with, select the same dataset with five attributes and click Next. Click Predict and select OverallQual attribute as your target attribute.
On the Prepare Target page, you will notice that the OverQual attribute has only 10 classes spread across integers 1 to 10. By default, RapidMiner builds a regression model. To switch to the classification side, toggle the button underneath the histogram Turn into Classification and change the Number of Classes from 2 to 10.
When all the above changes are completed, click Next. On the Select Inputs page, you have three supportive attributes and only one non-supportive attribute.
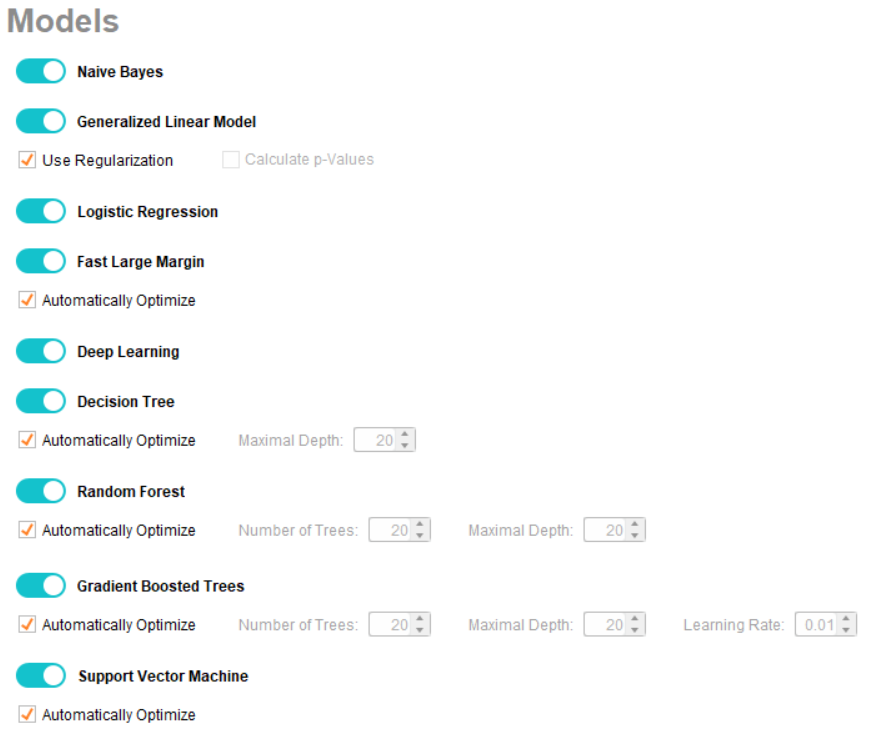
Click Next to arrive at the Model Types page. Since you are building a classification model, you will receive a new list of models as shown below:
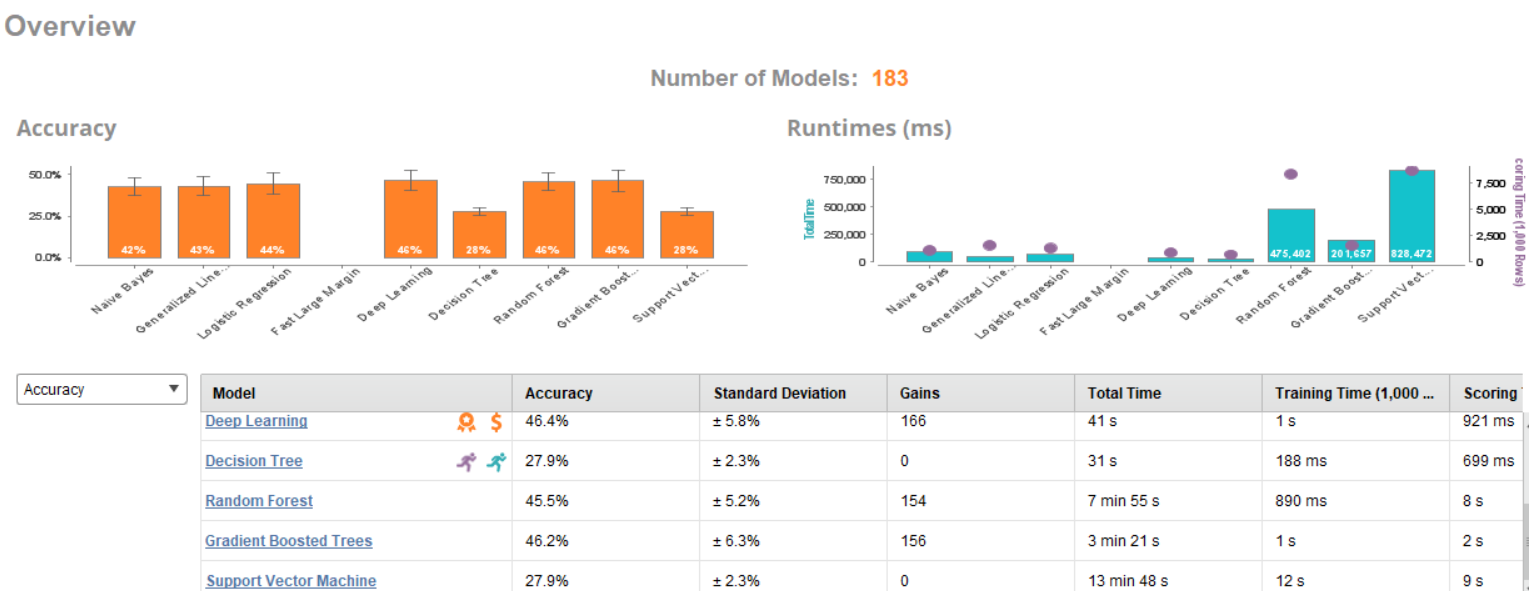
You can select any number of models from this list. For now, all of the models are selected. You also have a data preparation column, similar to the regression scenario. Click Run, and once all the models are built, you will see this overview page:
For this dataset, the deep learning model is again the best performer and also provides the best gain (orange dollar sign icon). The weights associated with each attribute are shown below:
You can further optimize this or other models as needed and export them for future use.
Conclusion
RapidMiner helps you build multiple predictive models with just a few clicks and thus has an edge over other machine learning languages like Python and R. You can use RapidMiner to quickly test commonly known models on your dataset and later customize the best performing model. To learn more about RapidMiner, go through the RapidMiner: Getting Started course on Pluralsight.
Advance your tech skills today
Access courses on AI, cloud, data, security, and more—all led by industry experts.

