Getting Started with Android on Android Studio
Get started with Android application development using Android Studio. This tutorial is for beginners who have yet to create an Android application. Learn the basics of the Android Studio platform today!
Jan 10, 2019 • 4 Minute Read
Introduction
In this guide, I am going to help you get started with Android application development using Android Studio. This tutorial is for beginners who have yet to create an Android applications. As such, I aim to teach you the very basics of the Android Studio platform.
Below are the basic requirements you should have prior to getting started.
Prerequisites
-
The latest Java Development Kit(JDK). At the time of writing, JDK8 was the latest JDK. Install it here
-
2 GB RAM minimum, 8 GB RAM recommended. We'll need RAM for running our Android Virtual Device (AVD) emulator and processing our code.
-
The latest version of Android Studio. Get it from here.
Let's look at the basic Android App.
Install Android Studio
Follow the Android Studio installer instructions. Keep track of the location where the system puts the Android files. This makes accessing your files easier.
Start your first Android application
- Go to File -> New Project
- Choose the "Empty Activity" from the available list of Activities displayed in the window. Think of an activity as a page of your application. Each activity comprises design and code.
- Give your activity a name (anything will do for now). The Android gradle will construct your application now. You should see something like this.
- You will see a corresponding .xml file generated automatically under the res/layout folder. By default, this layout folder will contain the XML files associated with any activities that you create. We'll use the XML layout file to create our User Interface (UI).
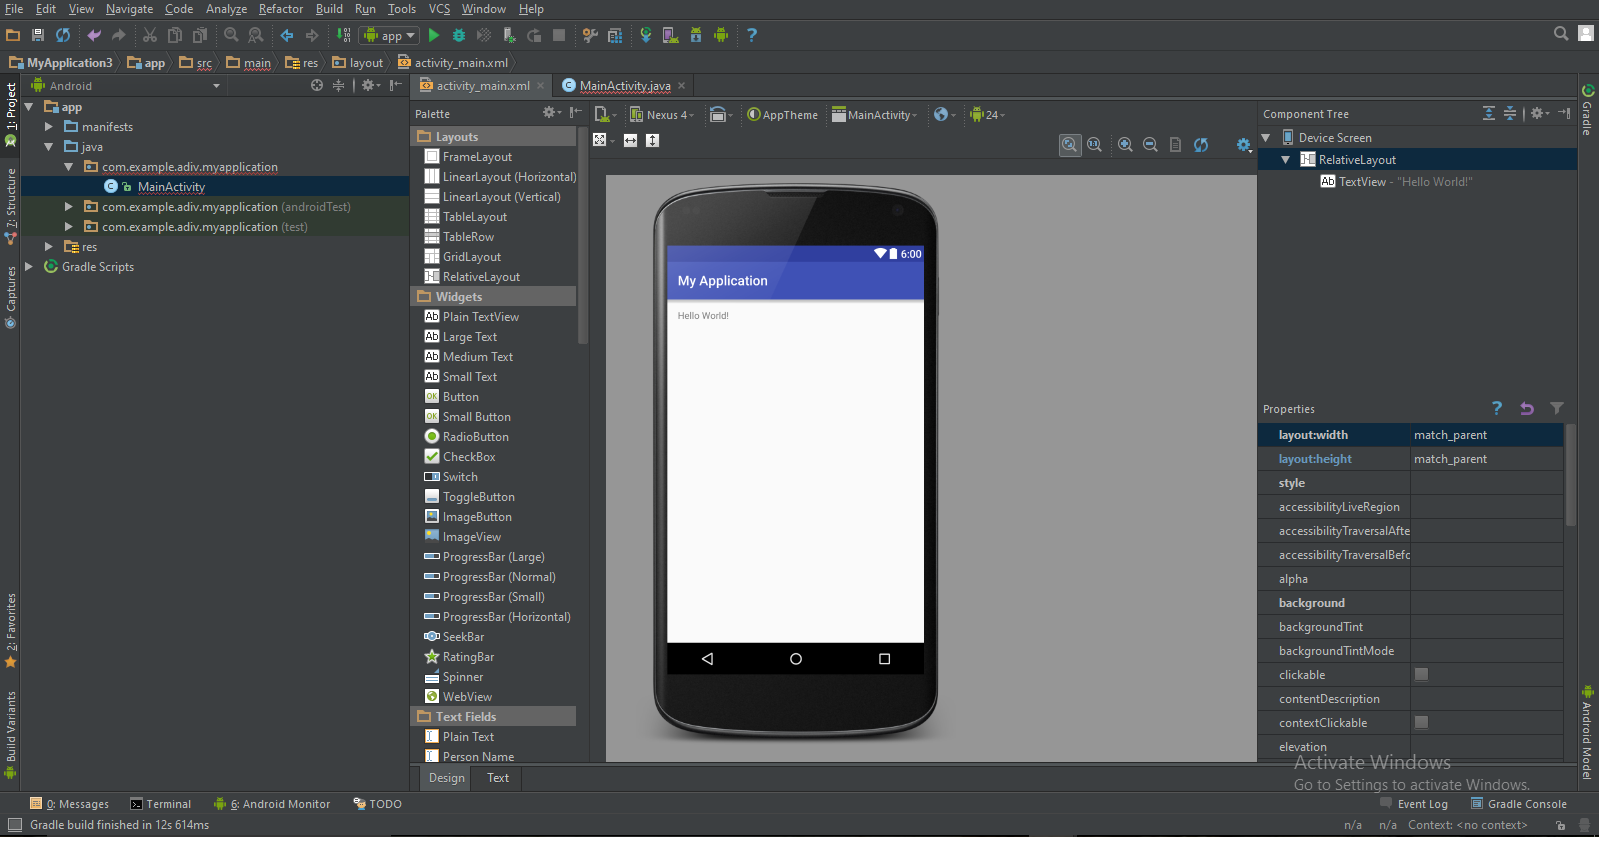
- When the project loads, you will be presented with activity_main.xml, the default design page when the project is created, and with activity.java, which is the Java class that is associated with your activity and its design components. Let's look at the activity_main.xml file for now.
- The activity_main.xml is the designer page for your Android application. To the left of the designer window, you will be presented with the palette from which you can drag and drop the controls. For example, you can see various layouts,like the standard RelativeLayout, widgets, such as Buttons, text fields like TextViews, and much more.
- At the bottom of the designer window you will find two navigators, titled Design and Text. You can see them in the image above. Use these tabs to switch between the code-based XML (or Extensible Markup Language) editor and your drag-and-drop UI editor.
By default, you should have a designer with the Sample Text, "Hello World", displayed. Believe it or not, this is a fully-functional Android application. No code necessary! Let's test it out.
Run your basic "Hello World" application
To run and see how the app works
-
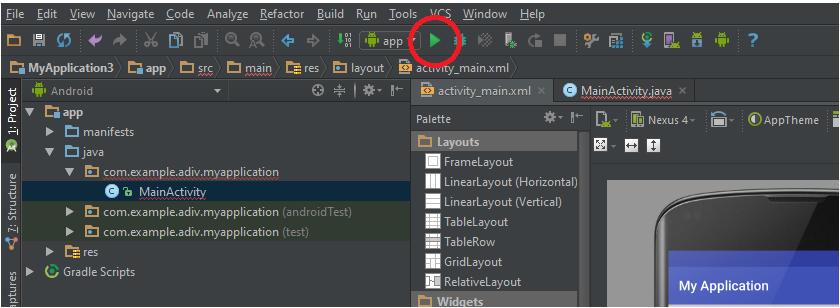
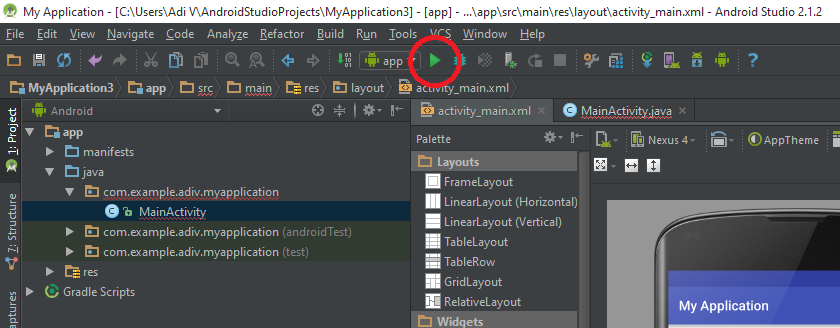
Go to the "Run" option. This looks like a green play button in the top Menu toolbar. Click "Run".
-
You need to run your application on an Android device or an emulator. If you don't have an Android device available, create a new Emulator in the window that is presented. Check out this step-by-step guide on building your emulator. Be aware that the AVD requires Intel's HAXM software; in Windows, this may conflict with the pre-installed Hyper-V. You may need to disable Hyper-V to continue.
-
Wait for the application to build. Once the build process is complete, you will have the emulator (or USB-connected Android device) running the application. The screen should show your app name at the top with "Hello World" as the dominant text.
I hope this will help you get started with Android app development using Android Studio. We'll look at the various components of the Application in my next guide on this topic.
Thank you for reading. Don't hesitate to write to me if you need specific help.
Advance your tech skills today
Access courses on AI, cloud, data, security, and more—all led by industry experts.
