Building a Serverless Web App on AWS Services
Build a simple serverless web application using the AWS Services including AWS DynamoDB, AWS Lambda, AWS API Gateway, AWS S3, and AWS CloudFront.
Jan 10, 2019 • 43 Minute Read
Introduction
In this tutorial, you'll learn to build a simple web application using the following AWS Services:
- AWS DynamoDB as the database
- AWS Lambda to create functions that will read and write from/to the database
- AWS API Gateway to create the REST API that the web application will use
- AWS S3 to host the web application
- AWS CloudFront to deliver the web application from a location near to the user's location.
Here's the architecture diagram:
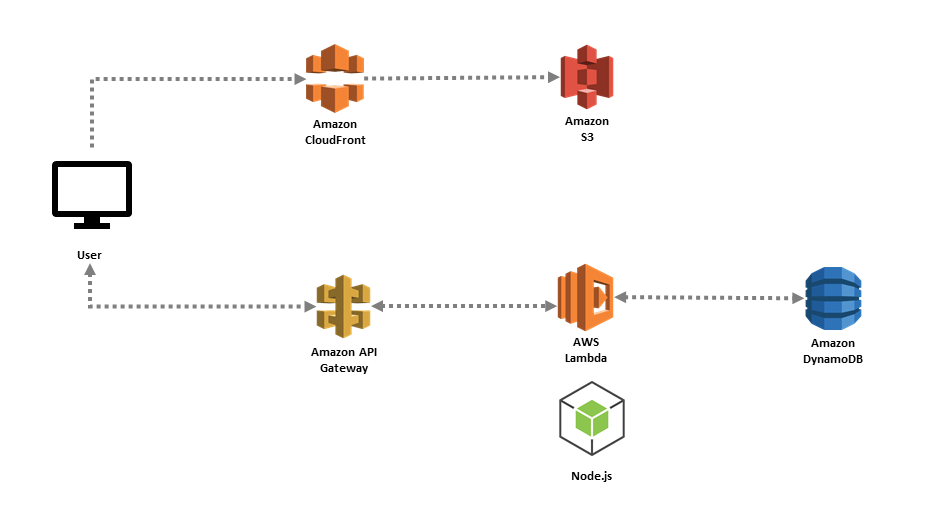
For the lambda functions, we will use a Node.js runtime environment with the Javascript SDK.
Everything will be made from the AWS Management Console, without external frameworks, SDK, or command-line interfaces (CLI).
Sample WebApp and Credit
The sample web app allows you to create/edit/delete courses. This is how it looks like:
It's a single-page application made with React and Redux. The credit for this application goes to Aries McRae. For this guide, I just modified his React CRUD boilerplate.
You can clone the app from this GitHub repository and test it locally with the included Express server.
This guide won't explain how the app is made. So don't worry if you are unfamiliar with React and Redux, as this tutorial will focus on building the API and setting up all the AWS services.
How it works
The API works with two data structures, course and author:
      Course:
{
    id: "web-components-shadow-dom",
    title: "Web Component Fundamentals",
    watchHref: "http://www.pluralsight.com/courses/web-components-shadow-dom",
    authorId: "cory-house",
    length: "5:10",
    category: "HTML5"
}

Author:
{
  id: 'cory-house',
  firstName: 'Cory',
  lastName: 'House'
}
Of course, you'll need an AWS account. If you don't have one, sign up here. Registration is free, and all the services used in this tutorial are within the AWS Free Tier, but you'll need to enter a credit card number in case you exceed that free tier.
The most difficult step is verification, in which an automated system will call you, and you have to enter a PIN code. It doesn't always work and you may have to ask the support team to call you to verify your account.
Once you have created your account, you automatically sign up for all services in AWS. However, it's a good practice to create an admin user instead of using your root account for day-to-day operations. Follow the steps in this guide to do this.
Now let's start by creating the tables to store the app information in DynamoDB.
Storing data in DynamoDB
DynamoDB is a fully-managed NoSQL database that stores the data in key-value pairs, like a JSON object:
      {
  "ID": 1,
  "Title": "Introduction to Angular 5",
  "Category": "web-dev"
}
There are no schemas so every record can have a different structure. The only restriction is that the field(s) defined as the partition key must be present in all the records.
Based on this partition key, DynamoDB store data in different drives. An efficient distribution will make accessing the data as fast as possible, so it's important to choose a good partition key.
This way, the partition key can become the primary key, but you can also use a combination of a partition key and a sort key as a primary key. For example, if you have multiple records with the same course ID (the partition key), you can add a timestamp as a sort key to form a unique combination. In addition, you can also have secondary indexes for any other field (or combination of fields) to make queries more efficient.
DynamoDB gives you a lot of options. You can learn more about it in the developer guide, but for now, let's dive into creating a database for our API.
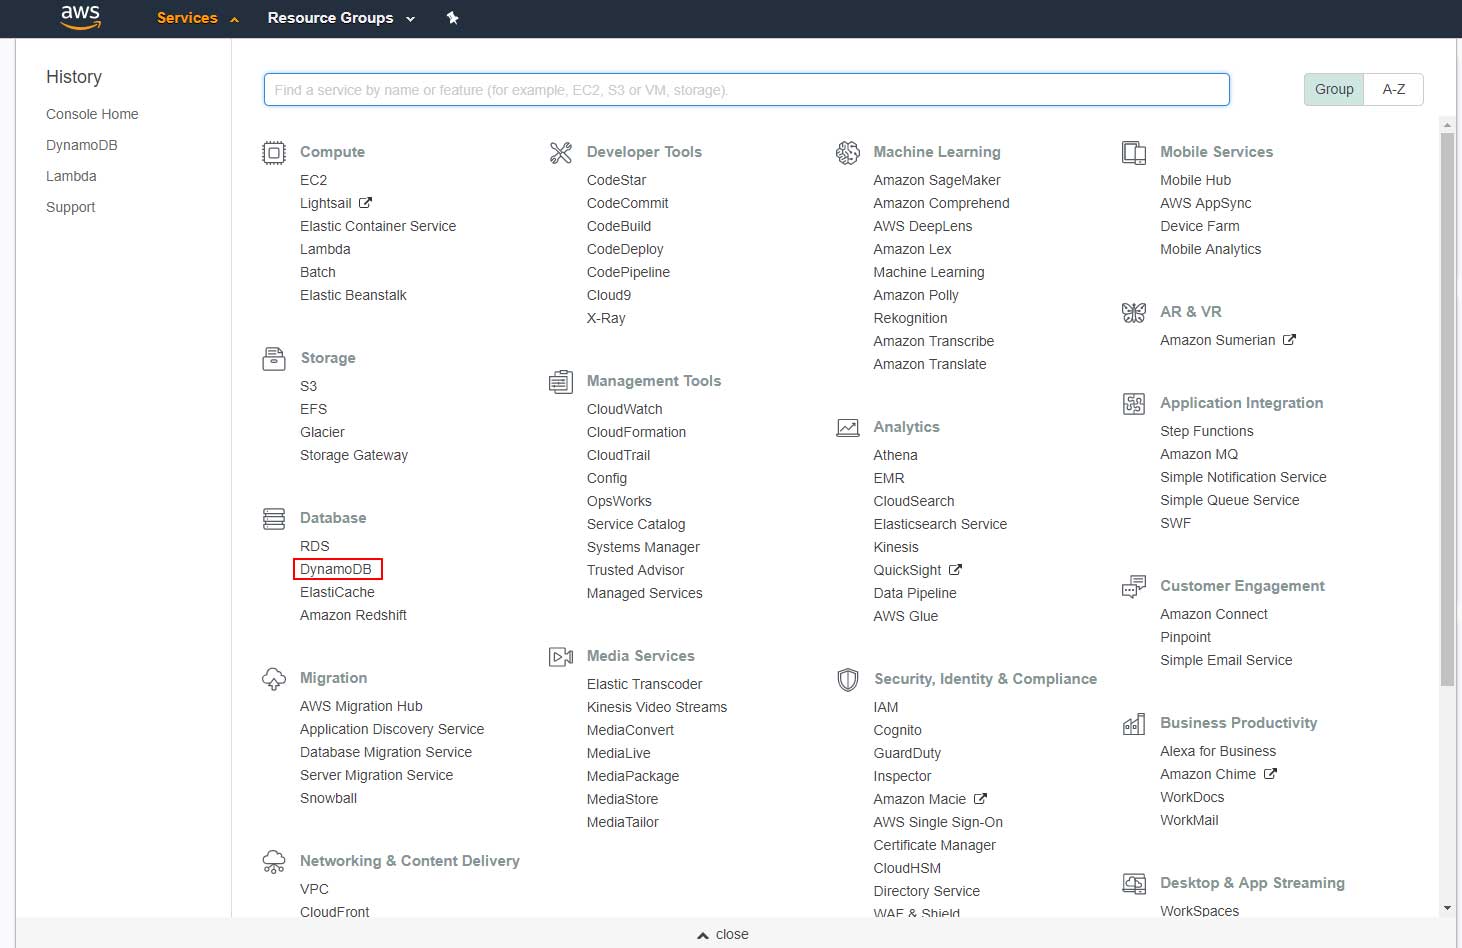
Open the Services menu and choose DynamoDB:
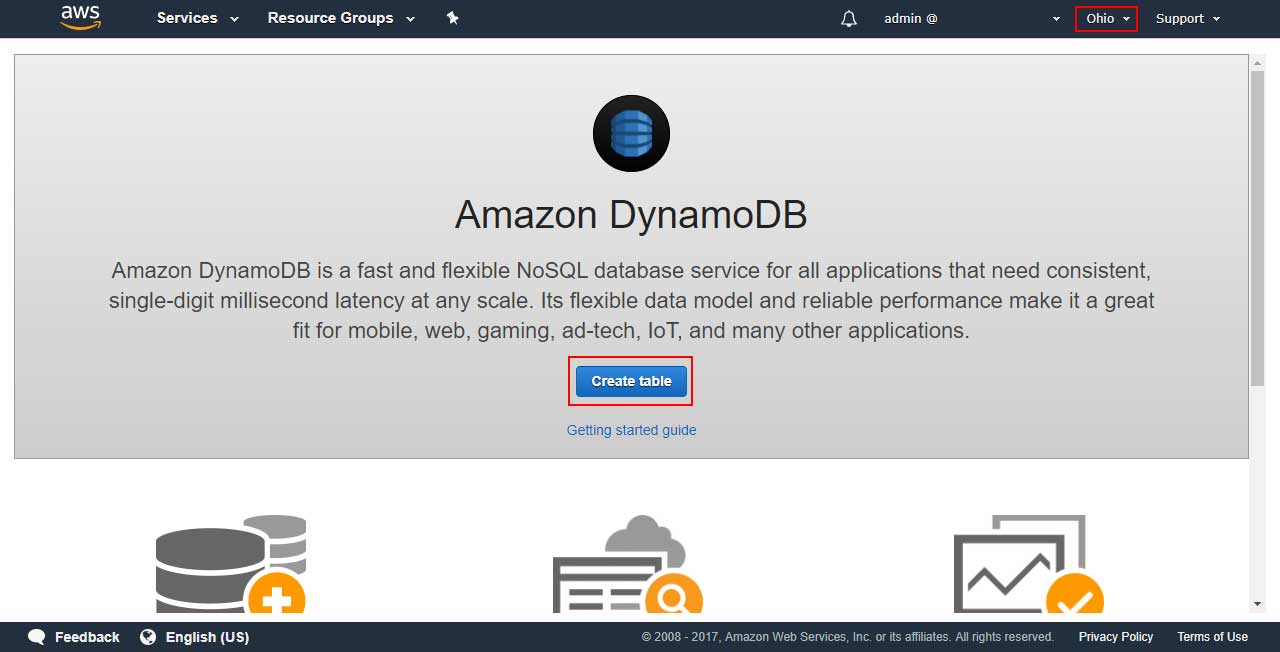
Make sure you're in the correct AWS region (there's a DynamoDB database per region) and click on Create table:
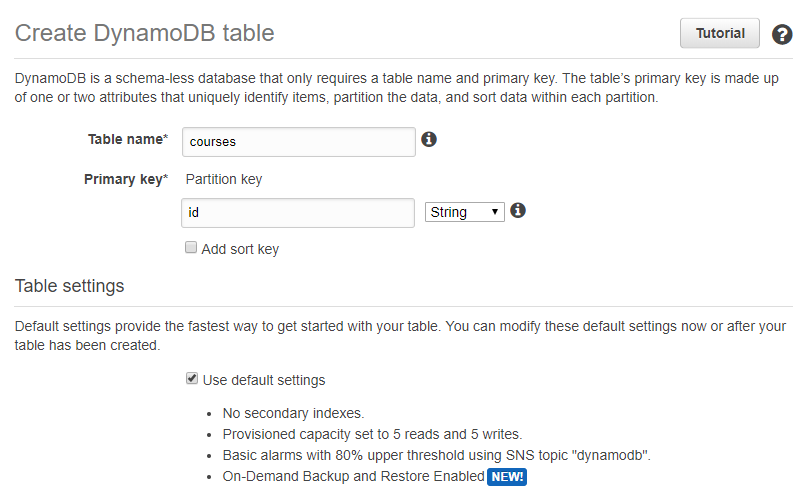
Enter the following information, leave the default settings checked and click on Create:
- Table name: courses
- Primary key: id
If you see the following message:

Your AWS account does not currently have the DynamoDBAutoscaleRole, but there's no problem if you're not going to use the auto-scaling service or if you're not sure what it is. If you want to use it, follow the documentation link to add the AmazonDynamoDBFullAccess and a custom inline policy to create the autoscale role automatically when you create a new table with auto scaling the first time, it's all in the documentation.
It might take a few seconds, but you should see a confirmation page like the following:
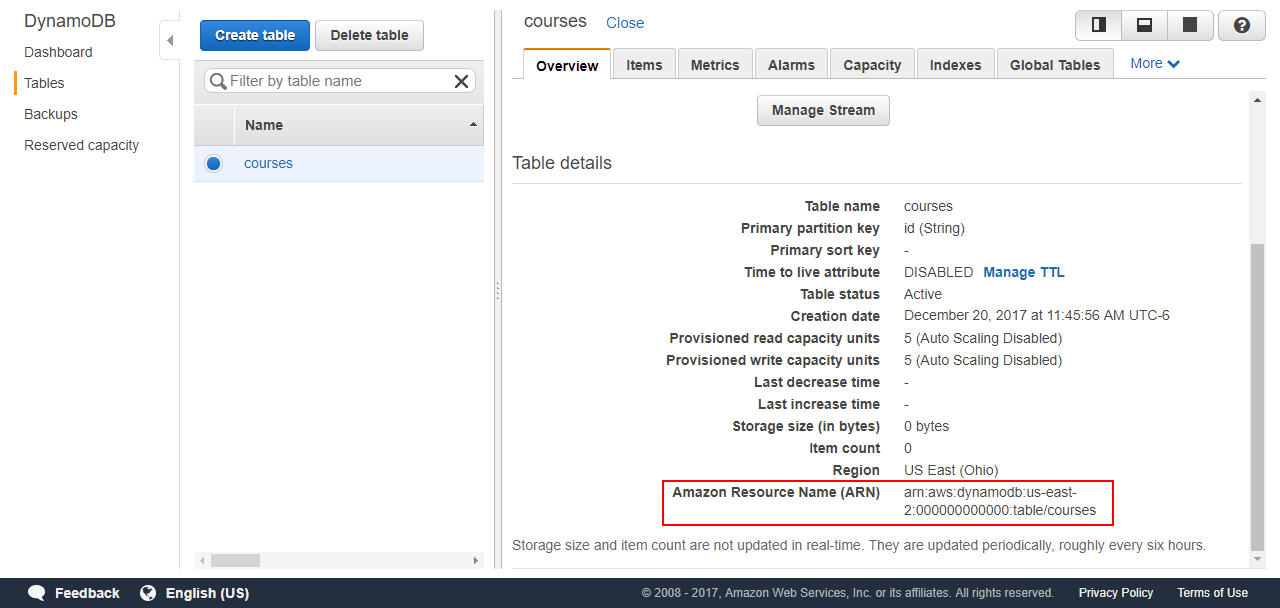
Take note of the table's Amazon Resource Name (ARN), you'll need it later.
In the Items tab you can query your table or add items:
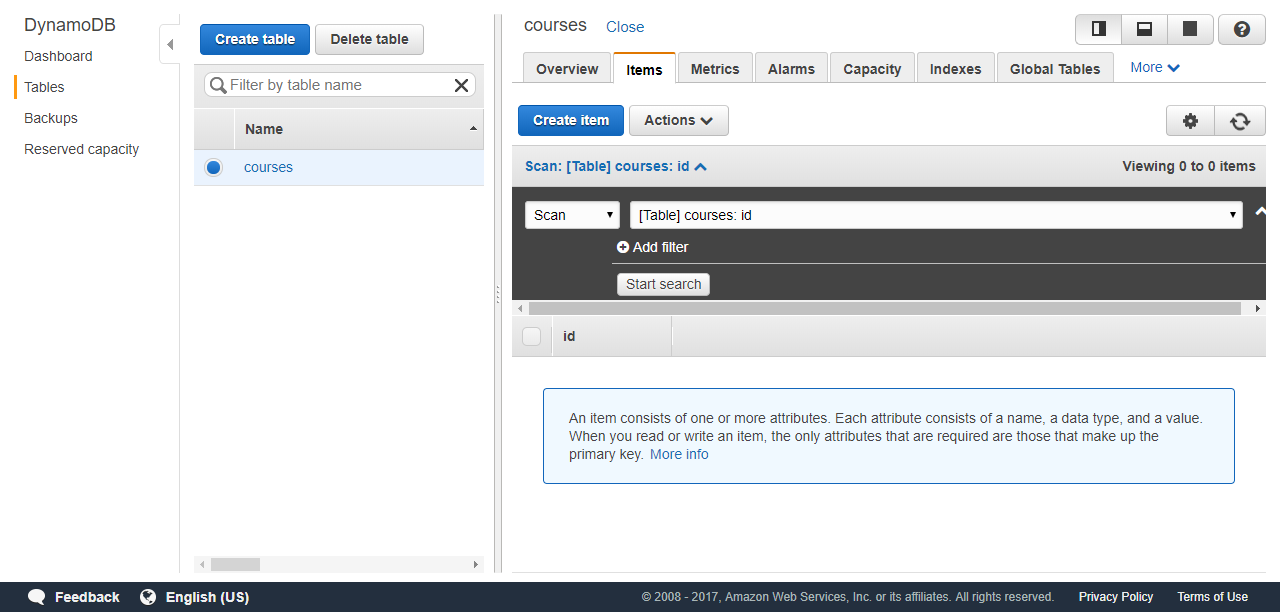
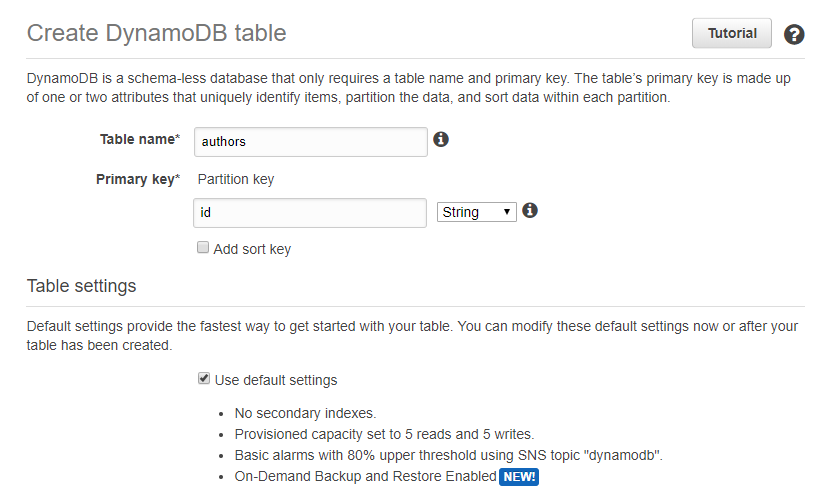
I'm going to leave it empty for now, but I'll add items to this table when the application is finished. Meanwhile, I'll go ahead and create a new table for the authors with the following information:
- Table name: authors
- Primary key: id
After the table is created, take note of its ARN.
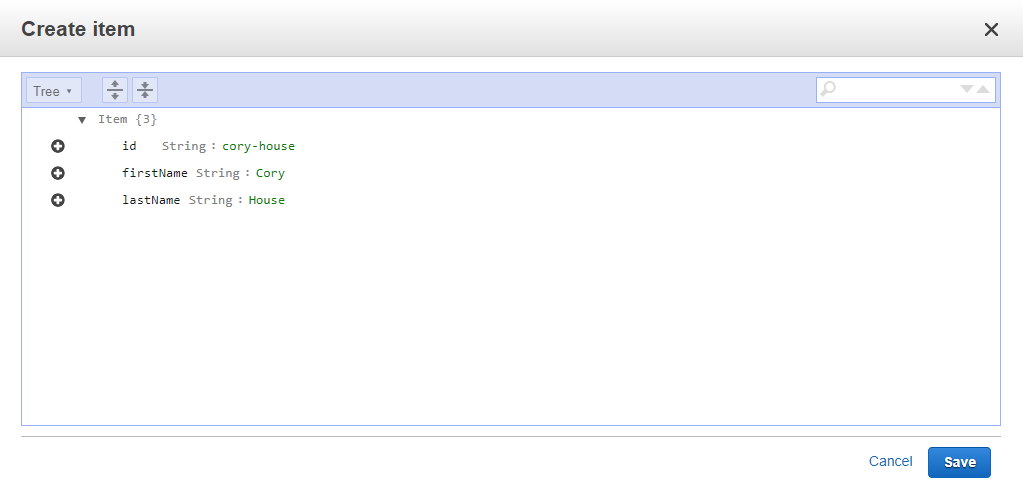
Now, in the Items tab, create some authors, for example:
      {
  "id": "cory-house",
  "firstName": "Cory",
  "lastName": "House"
},
{
  "id": "samer-buma",
  "firstName": "Samer",
  "lastName": "Buma"
},
{
  "id": "deborah-kurata",
  "firstName": "Deborah",
  "lastName": "Kurata"
}
Now let's create the lambda functions that will use these tables.
Creating lambda functions
AWS Lambda is a service that allows you to run functions upon certain events, for example, when data is inserted in a DynamoDB table or when a file is uploaded to S3.
In this case, a lambda function will be run whenever a request hits one of the API endpoints you'll set up in the next section.
At the time of this writing, a lambda function can be written in Node.js, Python, Java, or C#. This tutorial will use Node.js.
You can learn more about AWS Lambda in the developer documentation.
We'll create six lambda functions:
- get-all-authors to return all the users in the database
- get-all-courses to return all the courses in the database
- get-course to return only one course
- save-course to create a new course
- update-course to update a course
- delete-course to delete a course
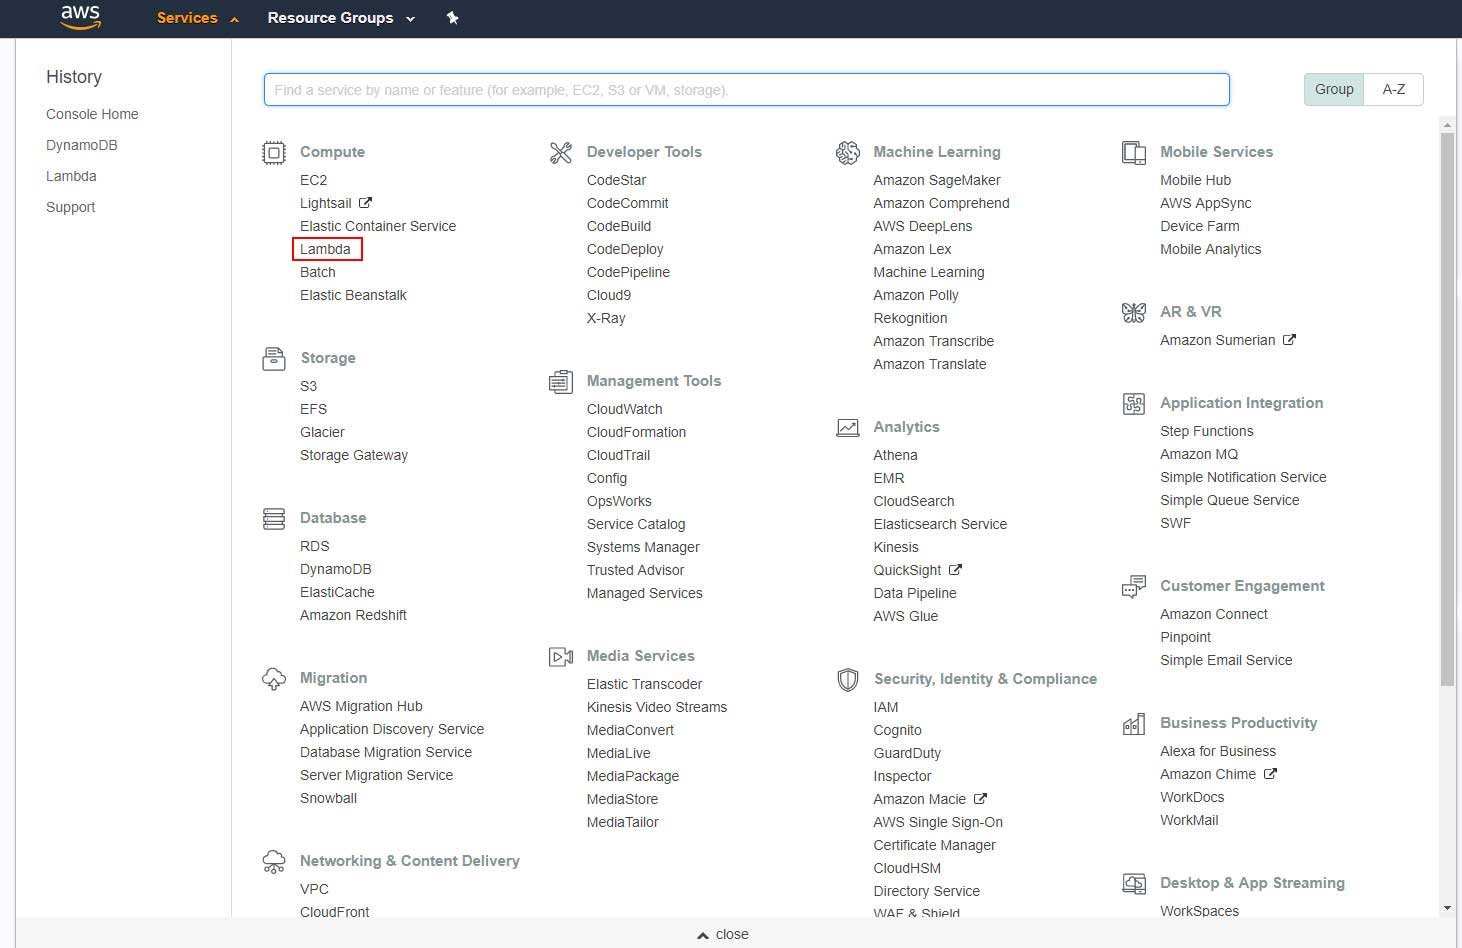
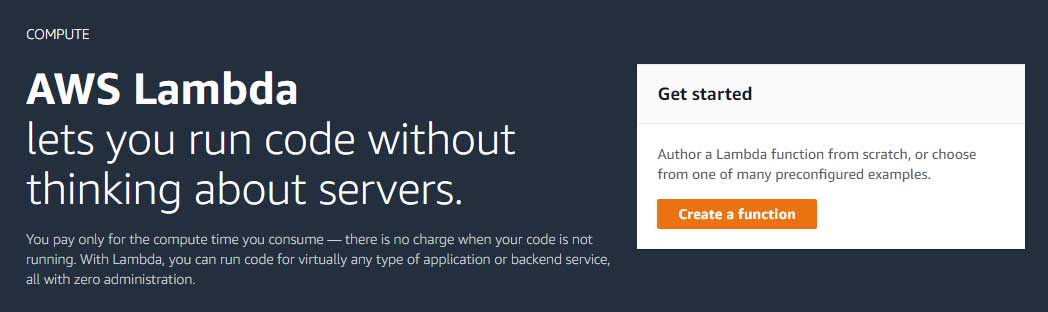
Let's start by creating the get-all-authors function. Open the Services menu and choose Lambda:
Click on :Create a function*:
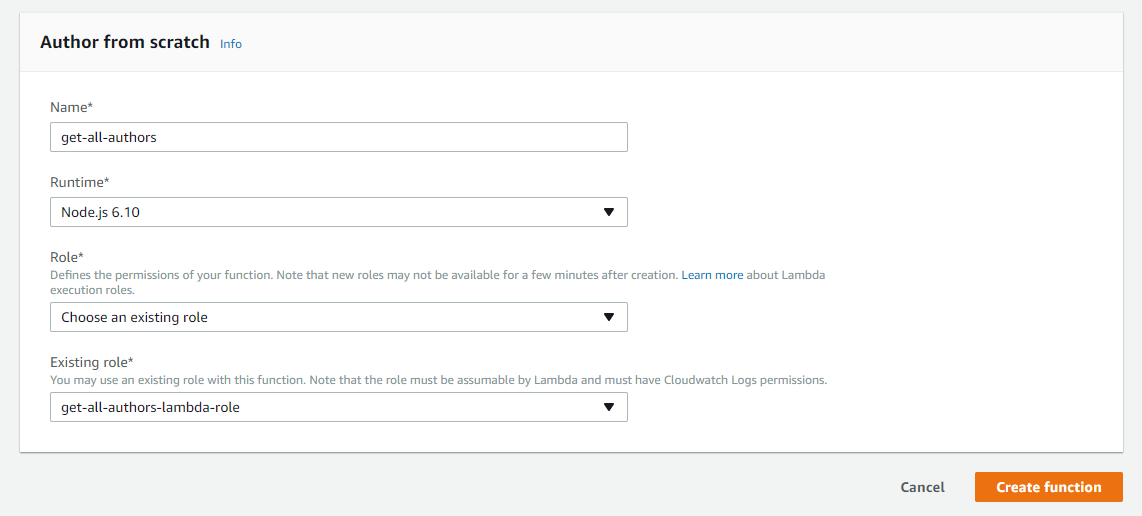
And then, with the Author from scratch option selected, enter the following:
- Name: get-all-authors
- Runtime: Node.js 6.10 (or a superior version)
- Role: Create a custom role
When selecting the option Create a custom role, a new window will open to allow you to create a new role.
Alternatively, you could choose the option Create a new role from a template(s) and choose the policy template Simple Microservice permissions. This template will give you permissions to read, create, update, and delete items from any table:
      {
    "Version": "2012-10-17",
    "Statement": [
        {
            "Effect": "Allow",
            "Action": [
                "dynamodb:DeleteItem",
                "dynamodb:GetItem",
                "dynamodb:PutItem",
                "dynamodb:Scan",
                "dynamodb:UpdateItem"
            ],
            "Resource": "arn:aws:dynamodb:region:accountId:table/*"
        }
    ]
}
However, this is not good practice; custom services should require as few permissions as possible to reduce overhead and maximize privacy and security.
So in the window to create a new role, enter get-all-authors-lambda-role as the role name:
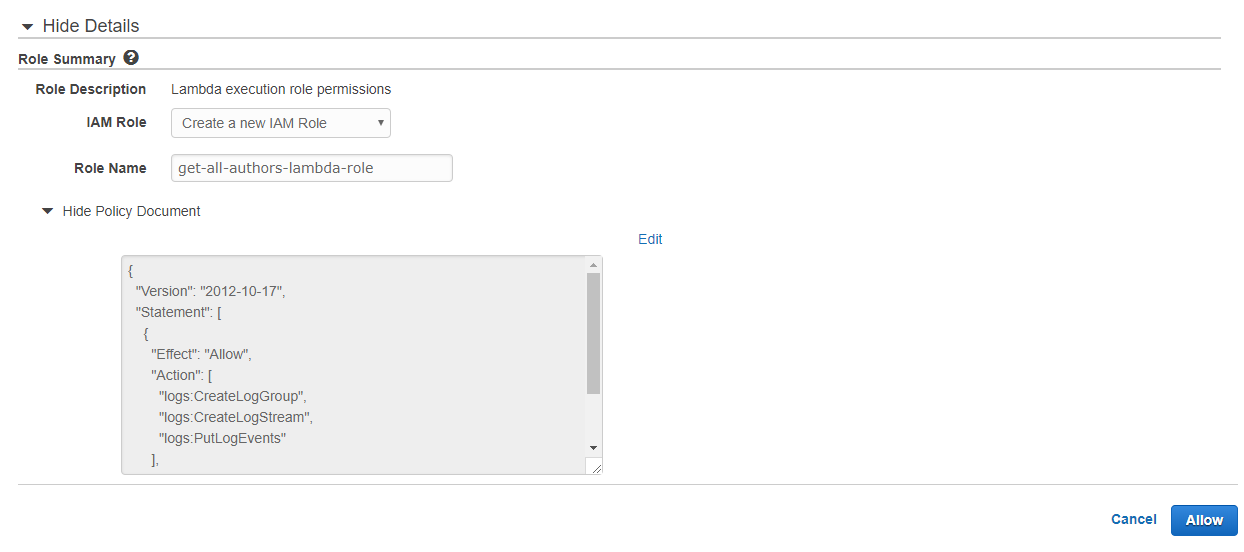
At this point, it will only give you permissions to write to the CloudWatch logs, so click on the Edit link and modify the policy document so it looks like this:
      {
    "Version": "2012-10-17",
    "Statement": [
        {
            "Effect": "Allow",
            "Action": [
                "logs:CreateLogGroup",
                "logs:CreateLogStream",
                "logs:PutLogEvents"
            ],
            "Resource": "arn:aws:logs:*:*:*"
        },
        {
            "Effect": "Allow",
            "Action": "dynamodb:Scan",
            "Resource": "<YOUR_ARN_FOR_THE_AUTHORS_TABLE>"
        }
    ]
}
Just replace the DynamoDB Scan Resource field with the ARN of your author's table. This will give you permissions to perform a scan operation to read all the items of the author's table only.
Finally, click on the Allow button.
Back to the window to create the lambda function, choose the role get-all-authors-lambda-role in the Existing role option and click on Create function:
After the lambda function is created, scroll down to the Function code section:
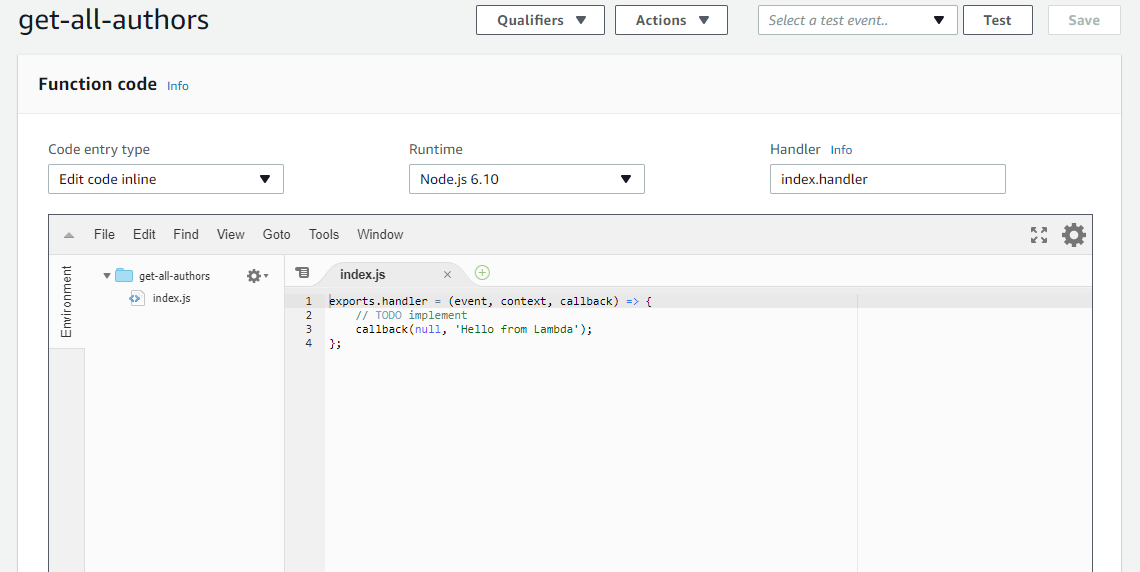
Enter the following code:
      const AWS = require("aws-sdk");
const dynamodb = new AWS.DynamoDB({
  region: "<YOUR_AWS_REGION_CODE>",
  apiVersion: "2012-08-10"
});

exports.handler = (event, context, callback) => {
  const params = {
    TableName: "authors"
  };
  dynamodb.scan(params, (err, data) => {
    if (err) {
      console.log(err);
      callback(err);
    } else {
      callback(null, data);
    }
  });
};
First, you require the AWS SDK and create a DynamoDB instance passing the code of the region where the database is located, for example us-east-2 for Ohio (find out your region code here), and the API version (2012-08-10 is the latest at the time of writing this tutorial).
The exported function receives three parameters:
- event — an object that is used to pass data to the handler.
- context— an object that provides runtime information about the Lambda function being executed.
- callback— a function to return information to the caller (if it's called, otherwise the return value is null). The callback takes two parameters:
- error — an object that provides the result of a failed execution. When a Lambda function succeeds, you can pass null as the first parameter.
- result — an object that provides the result of a successful execution. The result provided must be JSON.stringify-compatible. If an error is provided, this parameter is ignored.
Inside the handler function, you execute a scan operation to get all the items of the authors table.
Any error that occurs is passed to the callback function. Otherwise, the callback is executed passing the data returned.
Keep in mind that the scan operation will return up to one MB of data. If there is more data available, a LastEvaluatedKey value is included in the results along with the number of items exceeding the limit to continue the scan in a subsequent operation.
You can know more about the available methods of the AWS Javascript SDK for DynamoDB in the API documentation.
Now click Save. Then, if you click on the Test button, a window to configure some input properties will open:
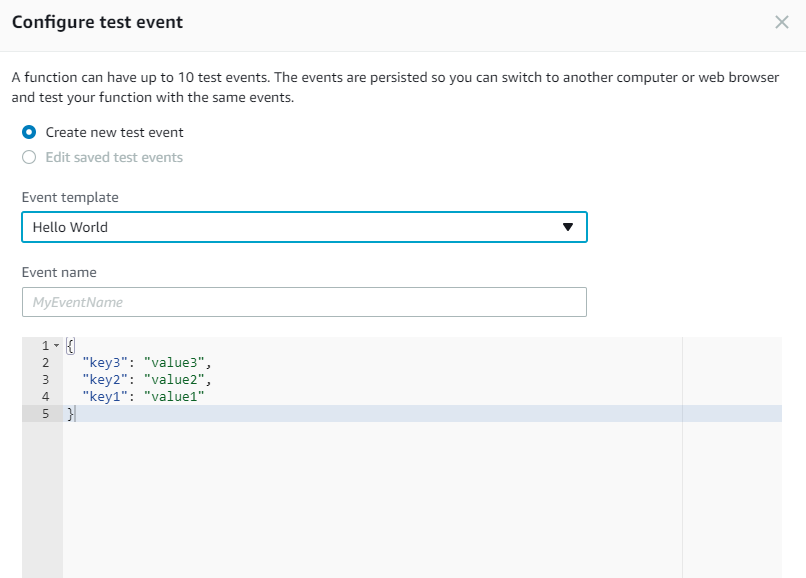
This function does not take any parameters so give it a name and just click on Create and then on Test one more time.
You can check the execution results at the top of the page:
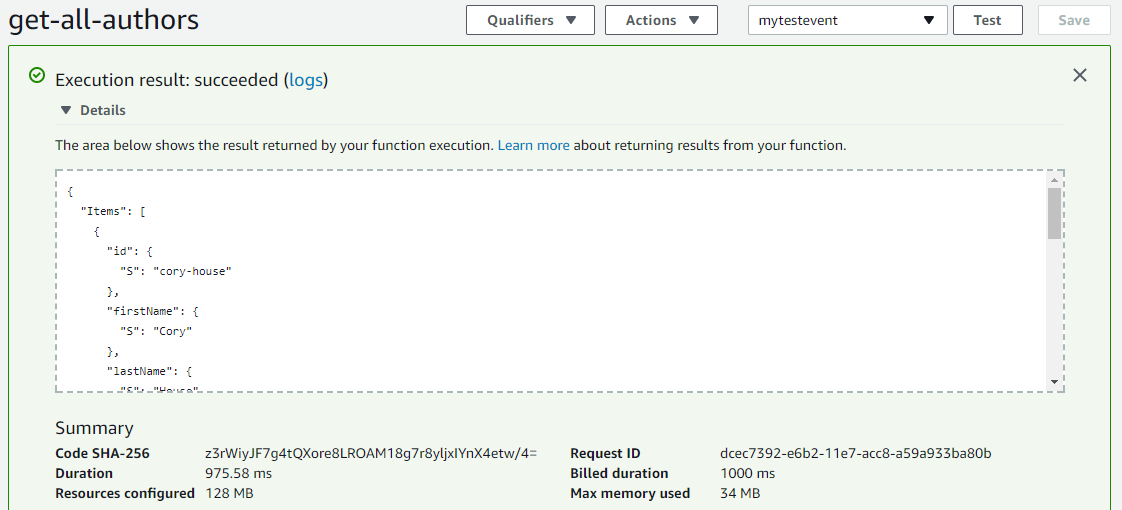
Or in the Execution Results tab below the code editor:
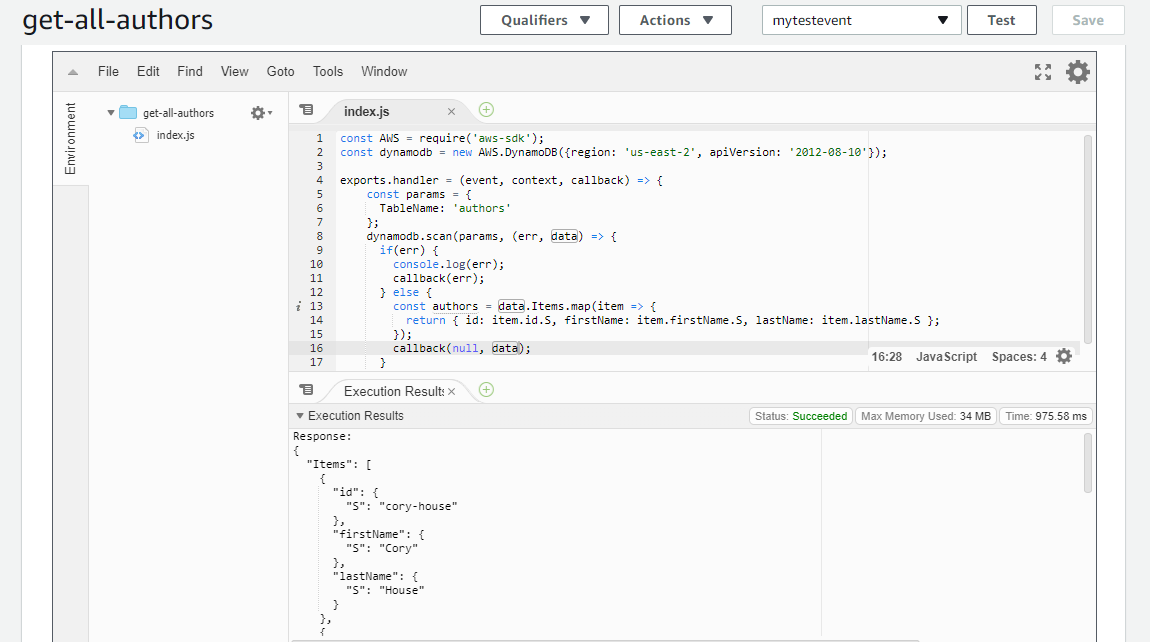
This is a sample output:
      {
  "Items": [
    {
      "id": {
        "S": "cory-house"
      },
      "firstName": {
        "S": "Cory"
      },
      "lastName": {
        "S": "House"
      }
    },
    {
      "id": {
        "S": "samer-buma"
      },
      "firstName": {
        "S": "Samer"
      },
      "lastName": {
        "S": "Buma"
      }
    },
    {
      "id": {
        "S": "deborah-kurata"
      },
      "firstName": {
        "S": "Deborah"
      },
      "lastName": {
        "S": "Kurata"
      }
    }
  ],
  "Count": 3,
  "ScannedCount": 3
}
As you can see, every key/value pair inside Items also contains the type (S for String), so let's modify the format with a map function to only return the key and the value for each item.
Replace the code of the else block inside the callback function of scan with the following:
      // ...

exports.handler = (event, context, callback) => {
    ...
    dynamodb.scan(params, (err, data) => {
      if(err) {
        ...
      } else {
        const authors = data.Items.map(item => {
          return { id: item.id.S, firstName: item.firstName.S, lastName: item.lastName.S };
        });
        callback(null, authors);
      }
    });
};
If you save and then test the function once again, you'll get as result a much cleaner object:
  {
    id: "cory-house"
Now follow the Functions link at the top of the page. Your function should appear on the dashboard:
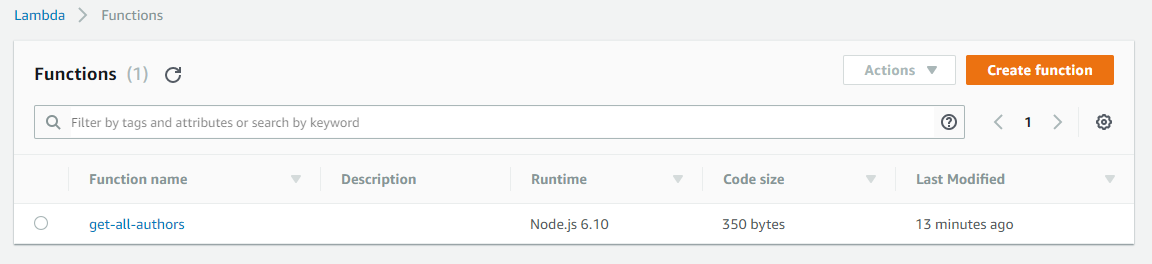
Next, we need to create the rest of the functions with their corresponding roles and policies. Of course, you can create one role with a full access policy and use it for all your functions, but remember, that is not the recommended approach. Custom roles that minimize the number of permissions are better in the long run.
You can also create the policies and roles from the Identity and Access Management (IAM) console with the visual editor, first creating a policy with required permission and then creating the role that will contain that policy.
But probably it's faster to enter the policy manually and have AWS create both the policy and the role for you. So here are the policies and the code for each function.
The policy to create a new course:
      {
    "Version": "2012-10-17",
    "Statement": [
        {
            "Effect": "Allow",
            "Action": [
                "logs:CreateLogGroup",
                "logs:CreateLogStream",
                "logs:PutLogEvents"
            ],
            "Resource": "arn:aws:logs:*:*:*"
        },
        {
            "Effect": "Allow",
            "Action": "dynamodb:PutItem",
            "Resource": "<YOUR_ARN_FOR_THE_COURSES_TABLE>"
        }
    ]
}
And the code for the corresponding lambda function (save-course):
      const AWS = require("aws-sdk");
const dynamodb = new AWS.DynamoDB({
  region: "<YOUR_AWS_REGION_CODE>",
  apiVersion: "2012-08-10"
});

const replaceAll = (str, find, replace) => {
  return str.replace(new RegExp(find, "g"), replace);
};

exports.handler = (event, context, callback) => {
  const id = replaceAll(event.title, " ", "-").toLowerCase();
  const params = {
    Item: {
      id: {
        S: id
      },
      title: {
        S: event.title
      },
      watchHref: {
        S: `http://www.pluralsight.com/courses/${id}`
      },
      authorId: {
        S: event.authorId
      },
      length: {
        S: event.length
      },
      category: {
        S: event.category
      }
    },
    TableName: "courses"
  };
  dynamodb.putItem(params, (err, data) => {
    if (err) {
      console.log(err);
      callback(err);
    } else {
      callback(null, {
        id: params.Item.id.S,
        title: params.Item.title.S,
        watchHref: params.Item.watchHref.S,
        authorId: params.Item.authorId.S,
        length: params.Item.length.S,
        category: params.Item.category.S
      });
    }
  });
};
To test this function, you can configure a test event with the following data:
      {
  "title": "Web Component Fundamentals",
  "authorId": "cory-house",
  "length": "5:10",
  "category": "HTML5"
}
To update a course we're also going to use the putItem operation so the policy is the same and you can reuse the role of the previous function.
The code for the corresponding lambda function (update-course) is also similar, with the only difference being that the id and watchHref fields are not generated:
      const AWS = require("aws-sdk");
const dynamodb = new AWS.DynamoDB({
  region: "<YOUR_AWS_REGION_CODE>",
  apiVersion: "2012-08-10"
});

exports.handler = (event, context, callback) => {
  const params = {
    Item: {
      id: {
        S: event.id
      },
      title: {
        S: event.title
      },
      watchHref: {
        S: event.watchHref
      },
      authorId: {
        S: event.authorId
      },
      length: {
        S: event.length
      },
      category: {
        S: event.category
      }
    },
    TableName: "courses"
  };
  dynamodb.putItem(params, (err, data) => {
    if (err) {
      console.log(err);
      callback(err);
    } else {
      callback(null, {
        id: params.Item.id.S,
        title: params.Item.title.S,
        watchHref: params.Item.watchHref.S,
        authorId: params.Item.authorId.S,
        length: params.Item.length.S,
        category: params.Item.category.S
      });
    }
  });
};
To test this function, you can configure a test event with the following data:
      {
  "id": "web-component-fundamentals",
  "title": "Web Component Fundamentals",
  "authorId": "cory-house",
  "length": "5:03",
  "category": "HTML5",
  "watchHref": "http://www.pluralsight.com/courses/web-components-shadow-dom"
}
The policy to get all the courses:
      {
    "Version": "2012-10-17",
    "Statement": [
        {
            "Effect": "Allow",
            "Action": [
                "logs:CreateLogGroup",
                "logs:CreateLogStream",
                "logs:PutLogEvents"
            ],
            "Resource": "arn:aws:logs:*:*:*"
        },
        {
            "Effect": "Allow",
            "Action": "dynamodb:Scan",
            "Resource": "<YOUR_ARN_FOR_THE_COURSES_TABLE>"
        }
    ]
}
And the code for the corresponding lambda function (get-all-courses):
      const AWS = require("aws-sdk");
const dynamodb = new AWS.DynamoDB({
  region: "<YOUR_AWS_REGION_CODE>",
  apiVersion: "2012-08-10"
});

exports.handler = (event, context, callback) => {
  const params = {
    TableName: "courses"
  };
  dynamodb.scan(params, (err, data) => {
    if (err) {
      console.log(err);
      callback(err);
    } else {
      const courses = data.Items.map(item => {
        return {
          id: item.id.S,
          title: item.title.S,
          watchHref: item.watchHref.S,
          authorId: item.authorId.S,
          length: item.length.S,
          category: item.category.S
        };
      });
      callback(null, courses);
    }
  });
};
The policy to get one course:
      {
    "Version": "2012-10-17",
    "Statement": [
        {
            "Effect": "Allow",
            "Action": [
                "logs:CreateLogGroup",
                "logs:CreateLogStream",
                "logs:PutLogEvents"
            ],
            "Resource": "arn:aws:logs:*:*:*"
        },
        {
            "Effect": "Allow",
            "Action": "dynamodb:GetItem",
            "Resource": "<YOUR_ARN_FOR_THE_COURSES_TABLE>"
        }
    ]
}
And the code for the corresponding lambda function (get-course):
      const AWS = require("aws-sdk");
const dynamodb = new AWS.DynamoDB({
  region: "<YOUR_AWS_REGION_CODE>",
  apiVersion: "2012-08-10"
});

exports.handler = (event, context, callback) => {
  const params = {
    Key: {
      id: {
        S: event.id
      }
    },
    TableName: "courses"
  };
  dynamodb.getItem(params, (err, data) => {
    if (err) {
      console.log(err);
      callback(err);
    } else {
      callback(null, {
        id: data.Item.id.S,
        title: data.Item.title.S,
        watchHref: data.Item.watchHref.S,
        authorId: data.Item.authorId.S,
        length: data.Item.length.S,
        category: data.Item.category.S
      });
    }
  });
};
To test this function, you can configure a test event with the following data:
      {
  "id": "web-component-fundamentals"
}
The policy to delete a course:
      {
    "Version": "2012-10-17",
    "Statement": [
        {
            "Effect": "Allow",
            "Action": [
                "logs:CreateLogGroup",
                "logs:CreateLogStream",
                "logs:PutLogEvents"
            ],
            "Resource": "arn:aws:logs:*:*:*"
        },
        {
            "Effect": "Allow",
            "Action": "dynamodb:DeleteItem",
            "Resource": "<YOUR_ARN_FOR_THE_COURSES_TABLE>"
        }
    ]
}
And the code for the corresponding lambda function (delete-course):
      const AWS = require("aws-sdk");
const dynamodb = new AWS.DynamoDB({
  region: "<YOUR_AWS_REGION_CODE>",
  apiVersion: "2012-08-10"
});

exports.handler = (event, context, callback) => {
  const params = {
    Key: {
      id: {
        S: event.id
      }
    },
    TableName: "courses"
  };
  dynamodb.deleteItem(params, (err, data) => {
    if (err) {
      console.log(err);
      callback(err);
    } else {
      callback(null, data);
    }
  });
};
To test this function, you can configure a test event with the following data:
      {
  "id": "web-component-fundamentals"
}
And these are all the functions you'll need. Now let's expose them to the world via a REST API.
Setting up API Gateway
API Gateway is a service that allows creating a REST API fully managed by AWS that acts as the front-end for other services.
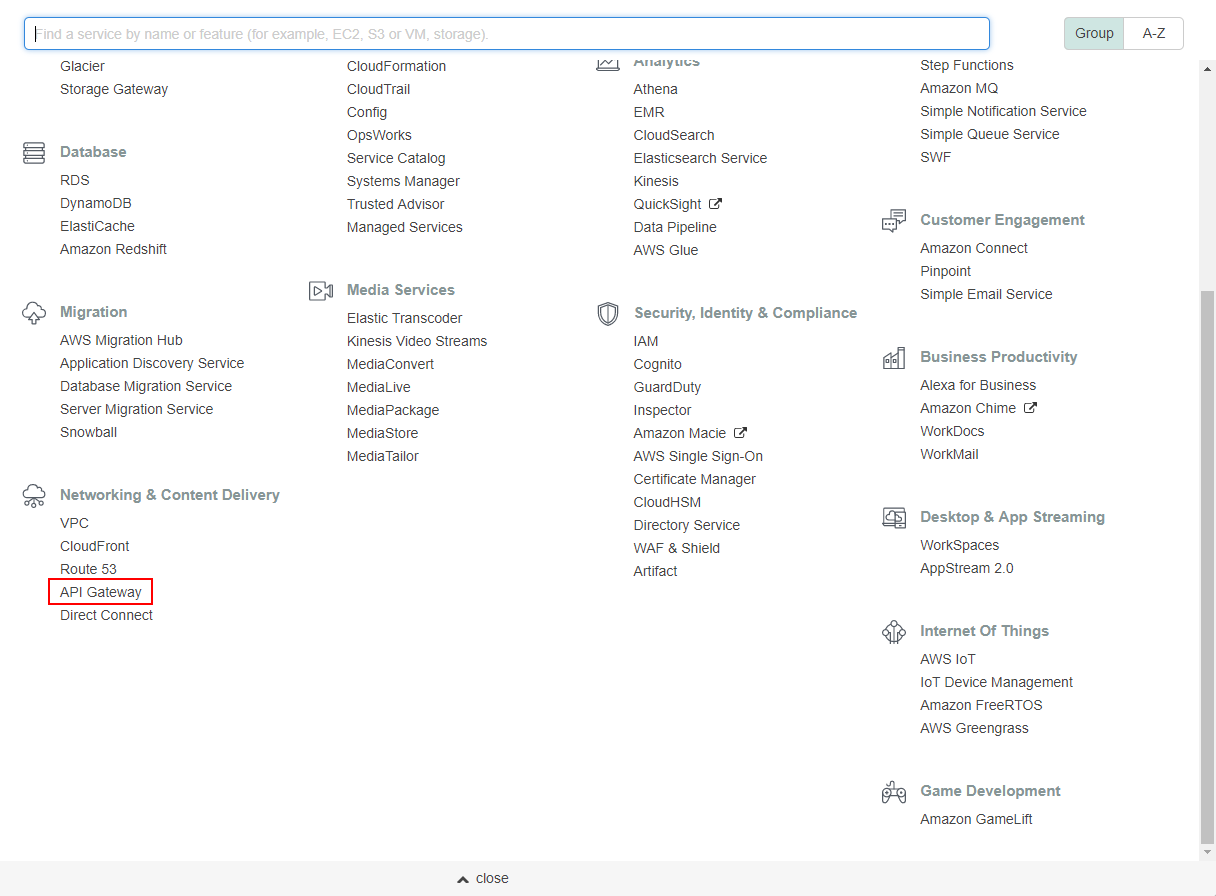
Open the Services menu and choose API Gateway:
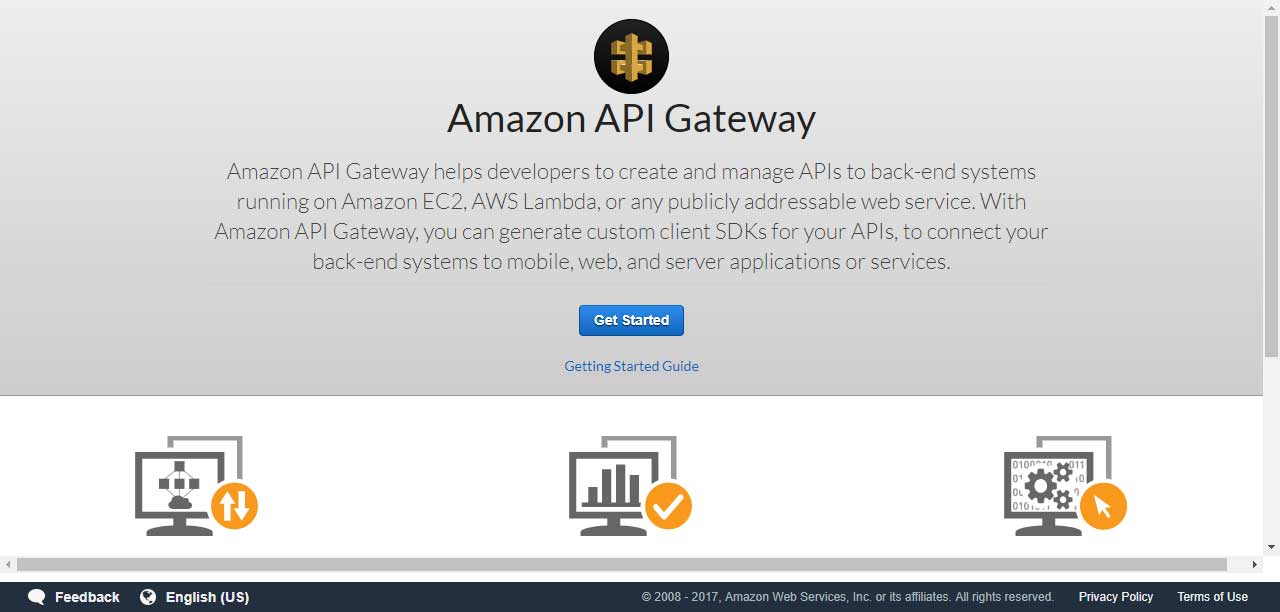
Press Get started:
You can create an API with a Swagger file here we're going to create the API manually, so choose to create a New API and give it a name:
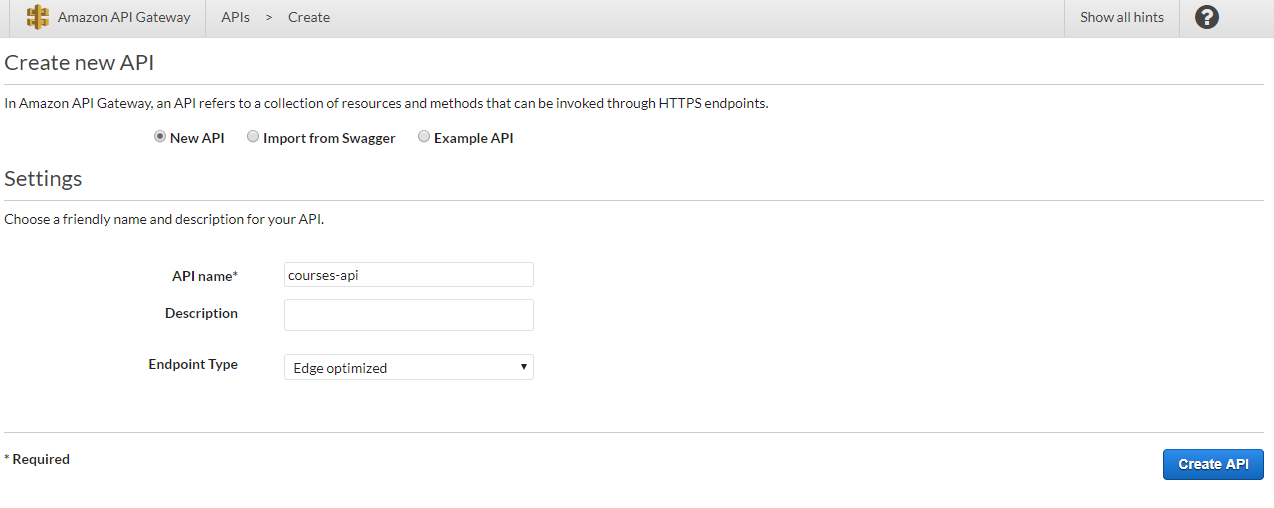
This will create a new API and you'll be ready to start adding resources (URL paths) and methods (GET, POST, etc.):
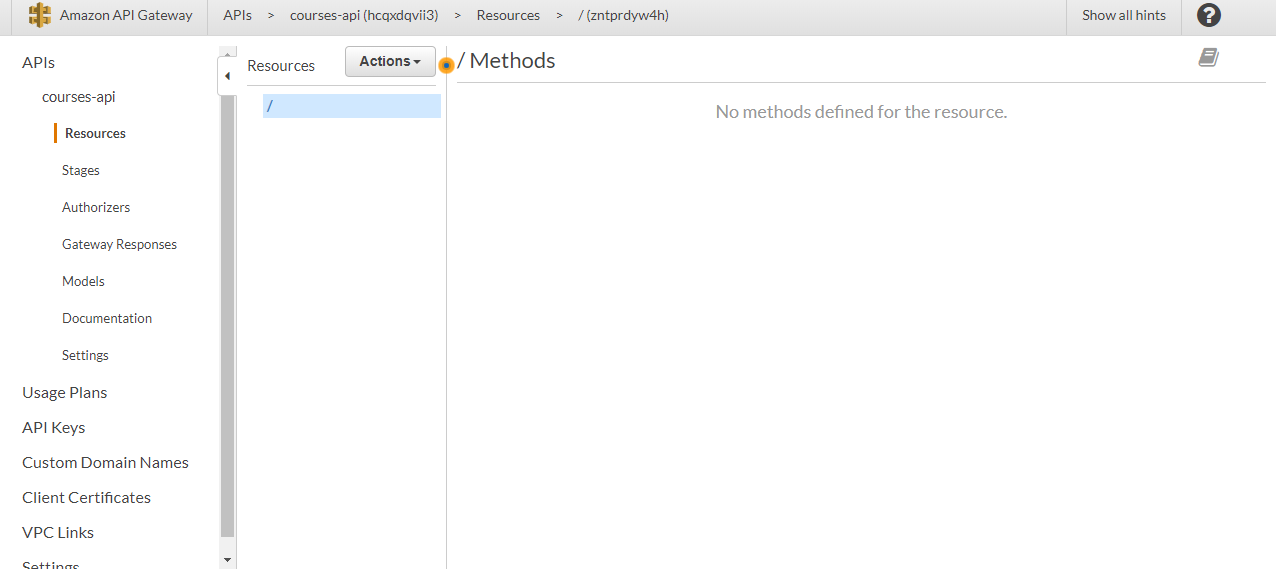
Now open the Actions menu and choose Create Resource. Enter a resource name and check the option Enable API Gateway CORS:
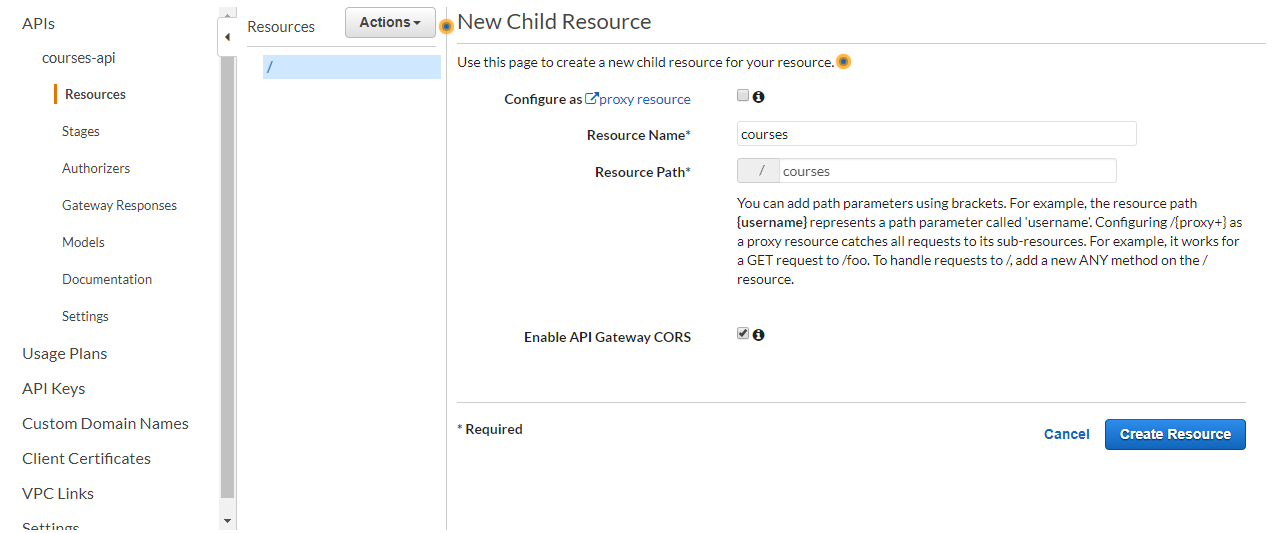
By default, the URL path will be created from the resource name. Cross-origin resource sharing (CORS) is a mechanism that allows a web page to request resources hosted in another domain (which is going to be our case here). With this mechanism, the server sends some headers to tell the application that is OK to access the resources on that different server.
Next, click on Create Resource:
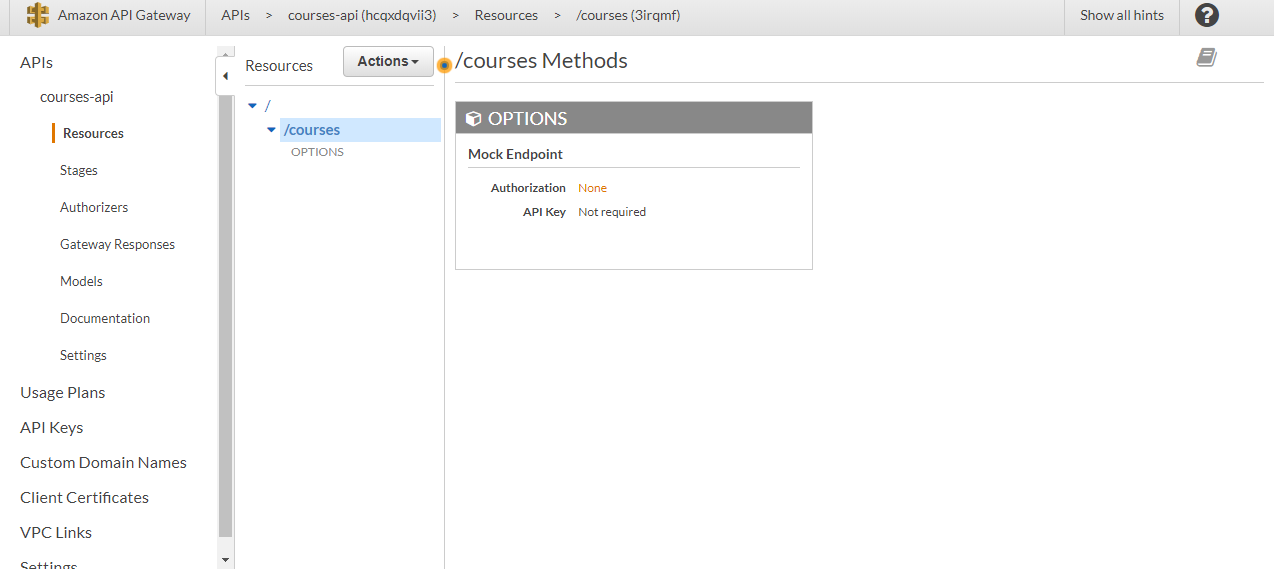
An Options endpoint is created because the client sends a preflight request to see if the resource is available and if it contains the CORS headers:
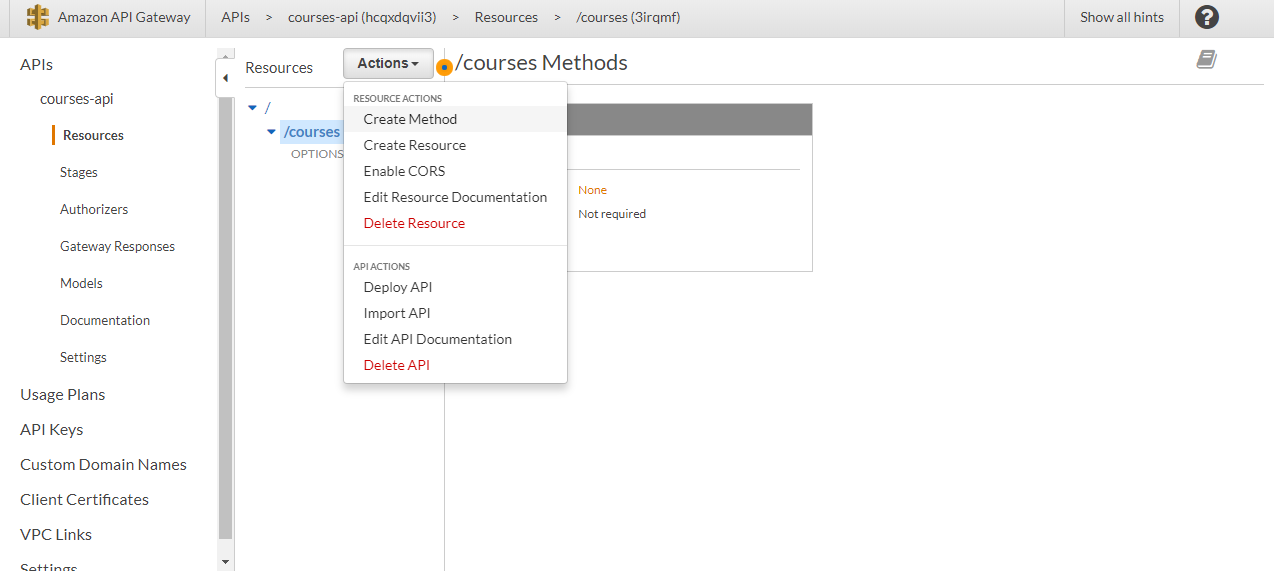
Now to start adding methods to the /courses endpoint, select it (don't select the root / endpoint), open the Actions menu and click on Create Method option:
We're going to start with the POST method, so select this option and click on the check icon next to the menu to set up the method:
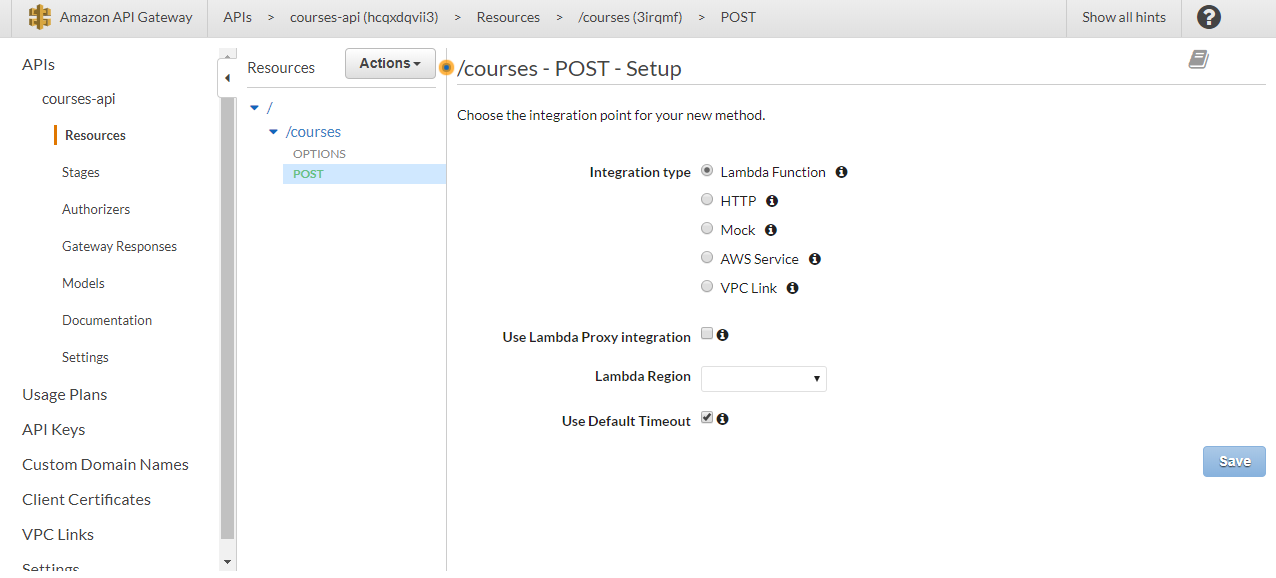
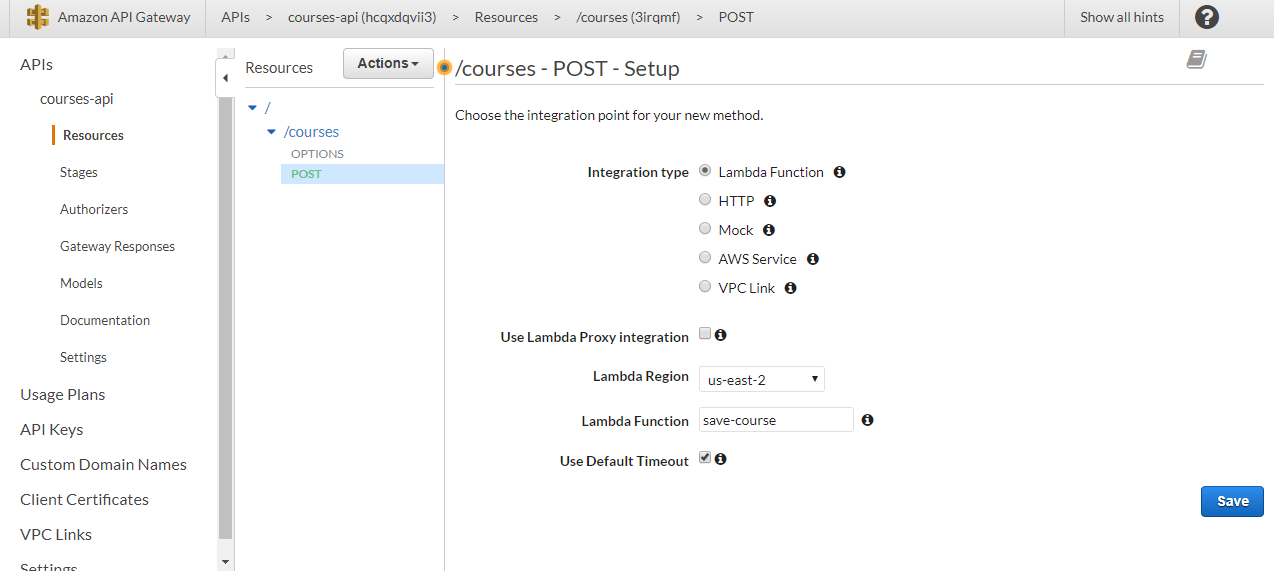
As the Integration type choose Lambda Function, then the region where you created your lambda functions, and enter the name of the function that will be associated to this method (save-course):
Confirm the permission to invoke the lambda function:

By default, API Gateway will pass the request body to the lambda function and return to the client the object returned by the lambda function. Since the client is going to send exactly what the lambda function expects and the lambda function is going to do the same, there's no need to configure any request or response body mapping templates.
However, probably it's a good idea to use a model to validate the request.
So go to the Models section and click on Create:

Give it a name, enter application/json as the Content type, and as the model schema, enter the following:
      {
  "$schema": "http://json-schema.org/schema#",
  "title": "CourseInputModel",
  "type": "object",
  "properties": {
    "title": {"type": "string"},
    "authorId": {"type": "string"},
    "length": {"type": "string"},
    "category": {"type": "string"}
  },
  "required": ["title", "authorId", "length", "category"]
}
Models use the JSON Schema specification. You can learn more about it here.
Click on Create model and back to the POST method click on Method Request:
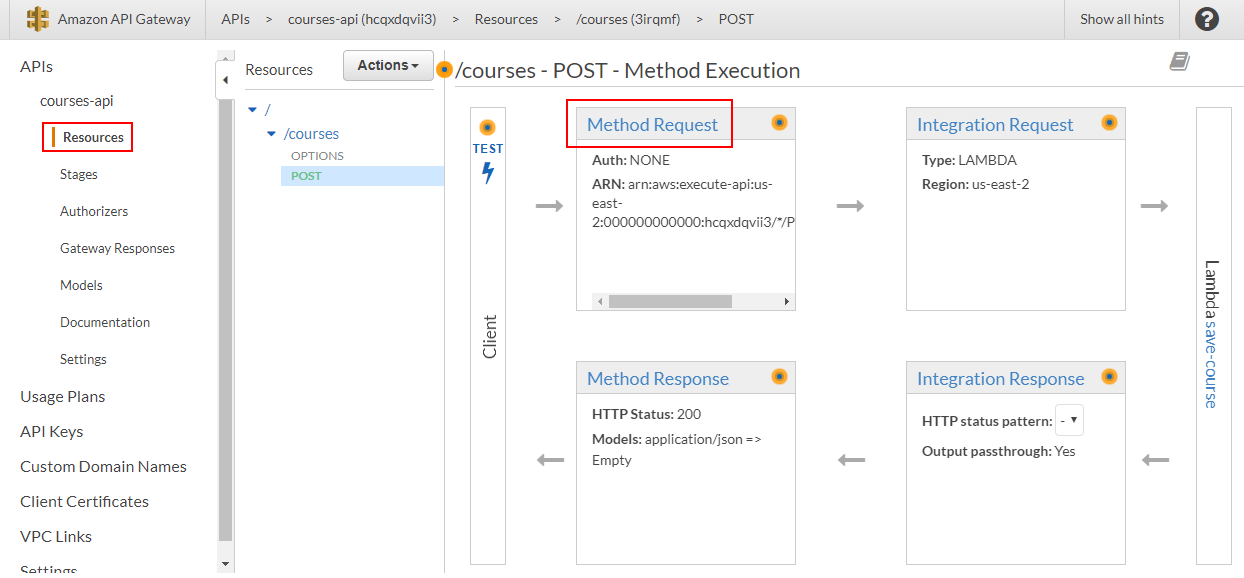
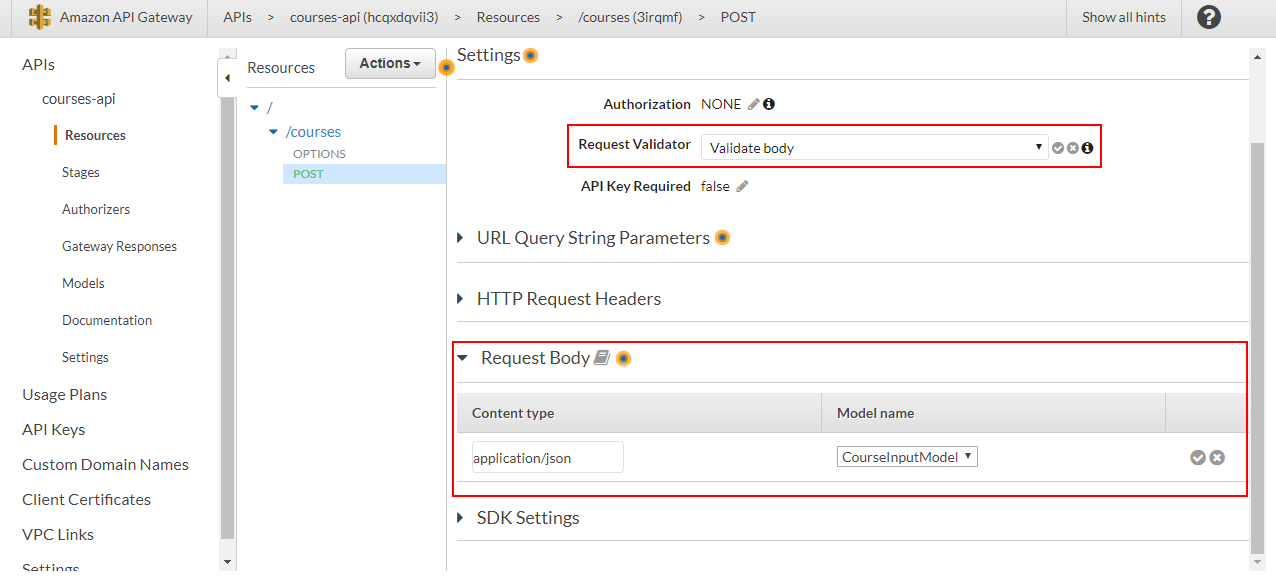
In Request Validator choose the option Validate body, in the Request Body section add the model for the application/json content type and confirm all these choices:
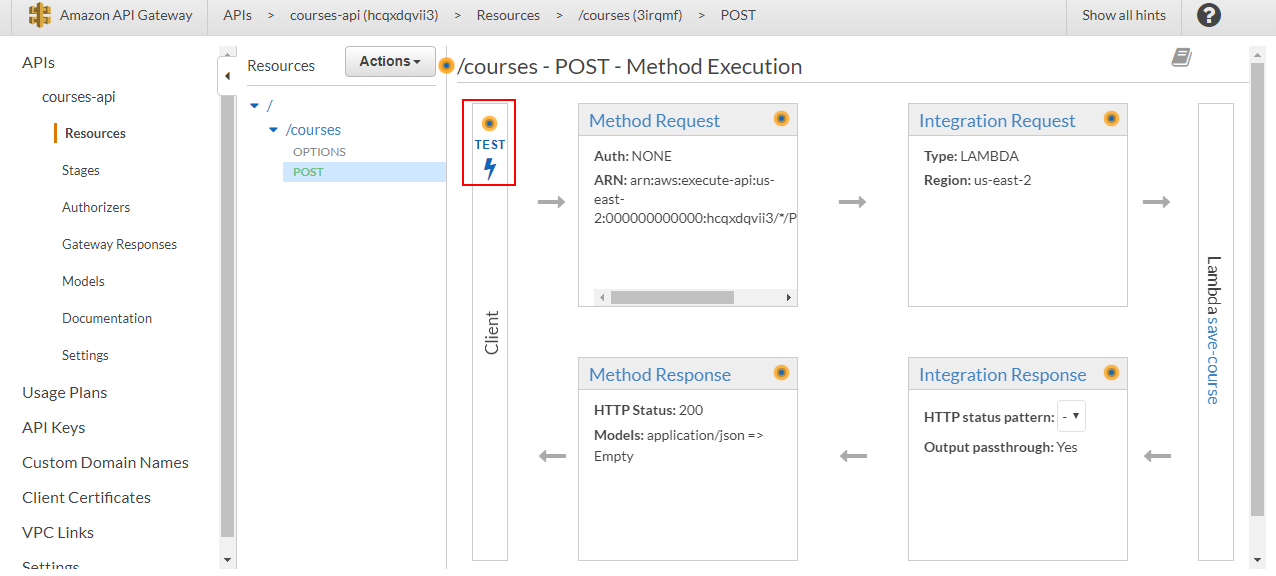
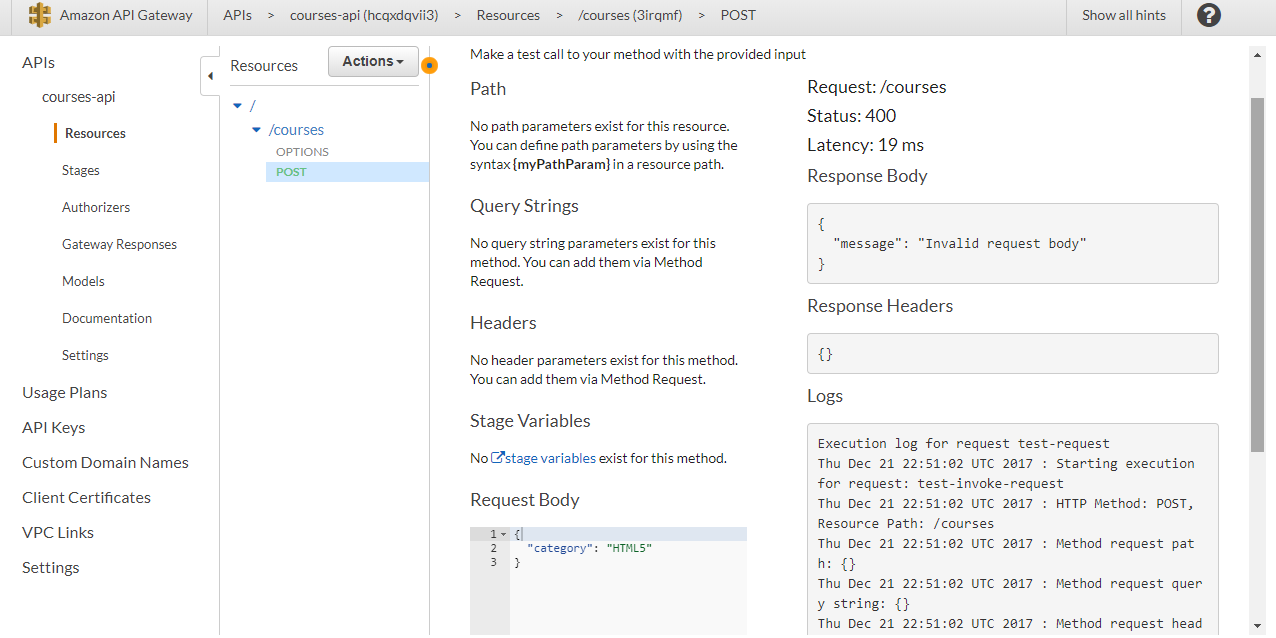
Now if you click on TEST:
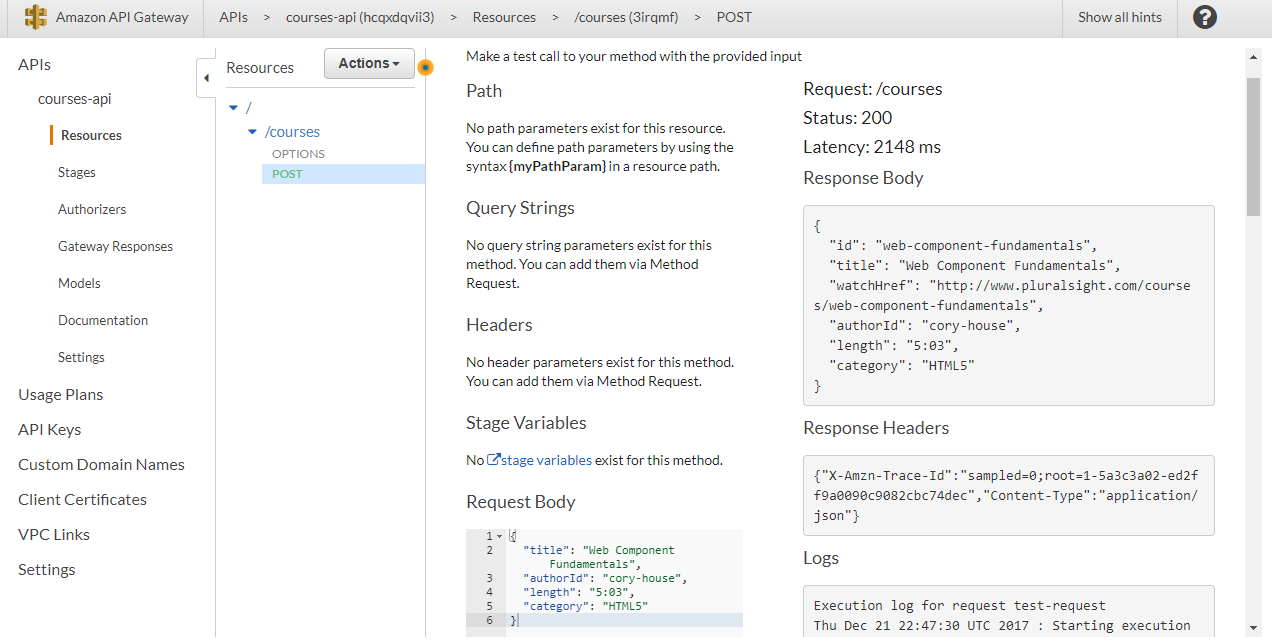
You can test the POST endpoint by entering a request body like:
      {
  "title": "Web Component Fundamentals",
  "authorId": "cory-house",
  "length": "5:03",
  "category": "HTML5"
}
Everything should work correctly:
If you remove one or more attributes of the request, an error should be returned:
Moving on, we are also going to need a path like courses/web-component-fundamentals, where web-component-fundamentals corresponds to the ID of the course we want to update, delete or select one course.
Select the course resource and from the Actions menu, create another resource, this time just adding a path variable using brackets (and enabling CORS):
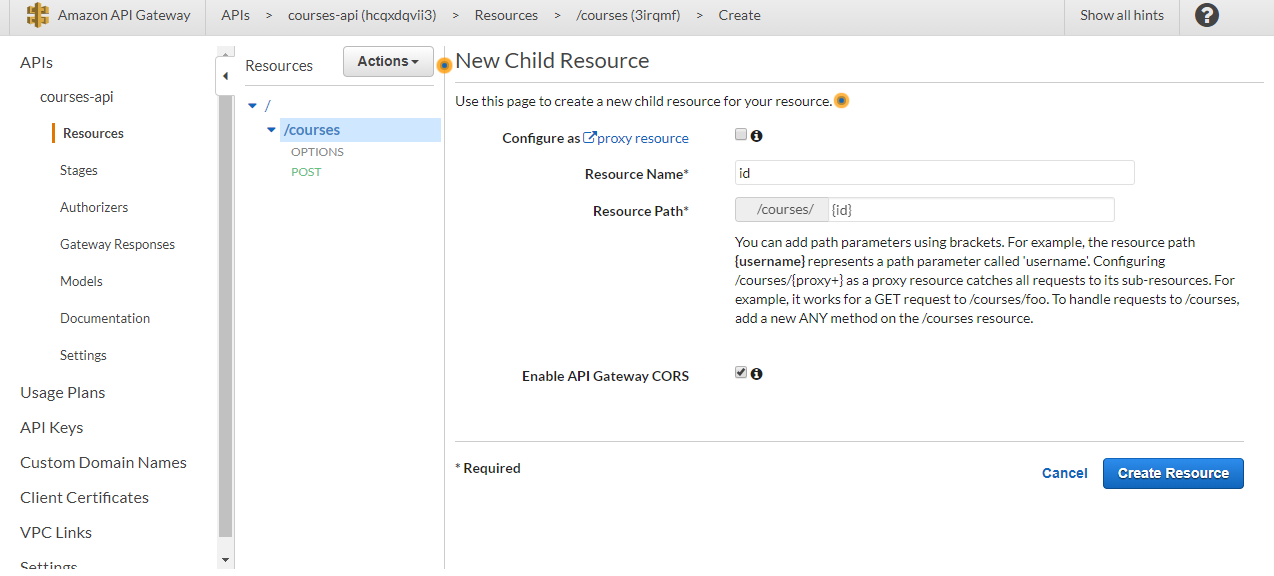
Click on Create resource to create it:
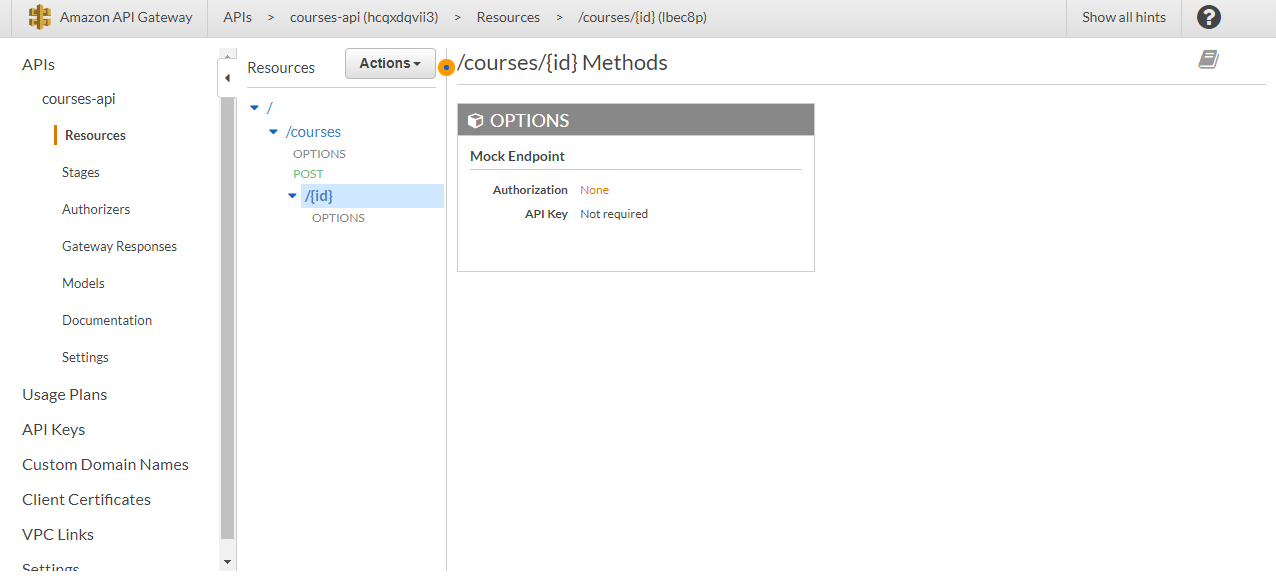
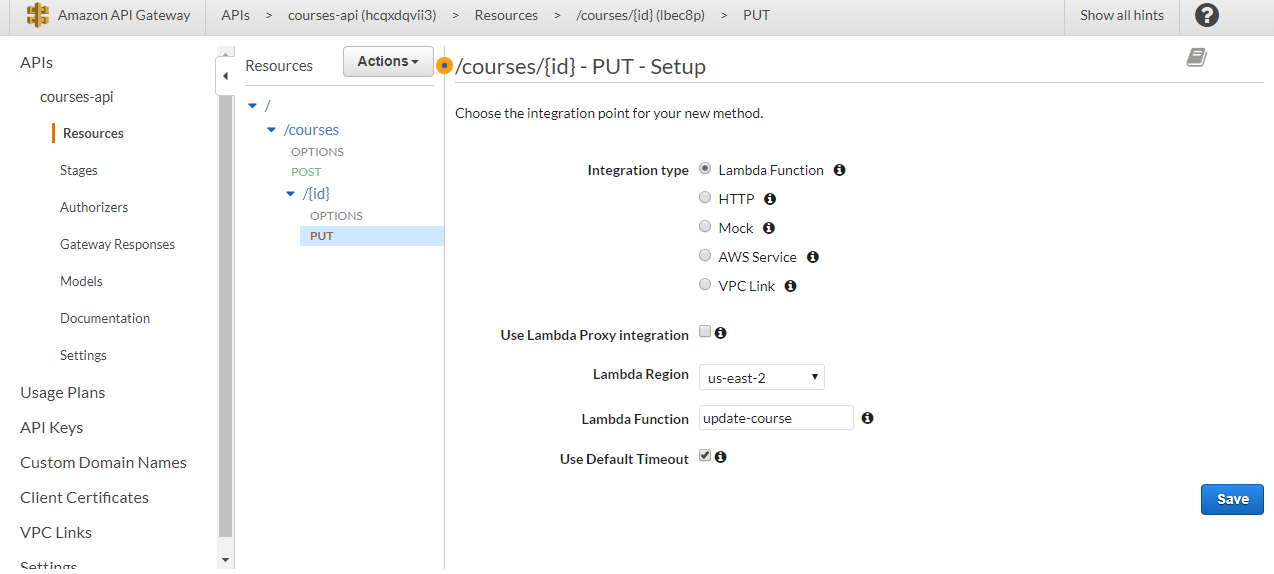
Next, create a PUT method and link it to the update-course lambda function:
Now the thing with this operation is that the ID of the course is in the URL, and the rest of the attributes are in the request body.
In this case, we'll have to use a body mapping template to send all the information as the lambda function requires it.
So select the PUT method and click on Integration Request:
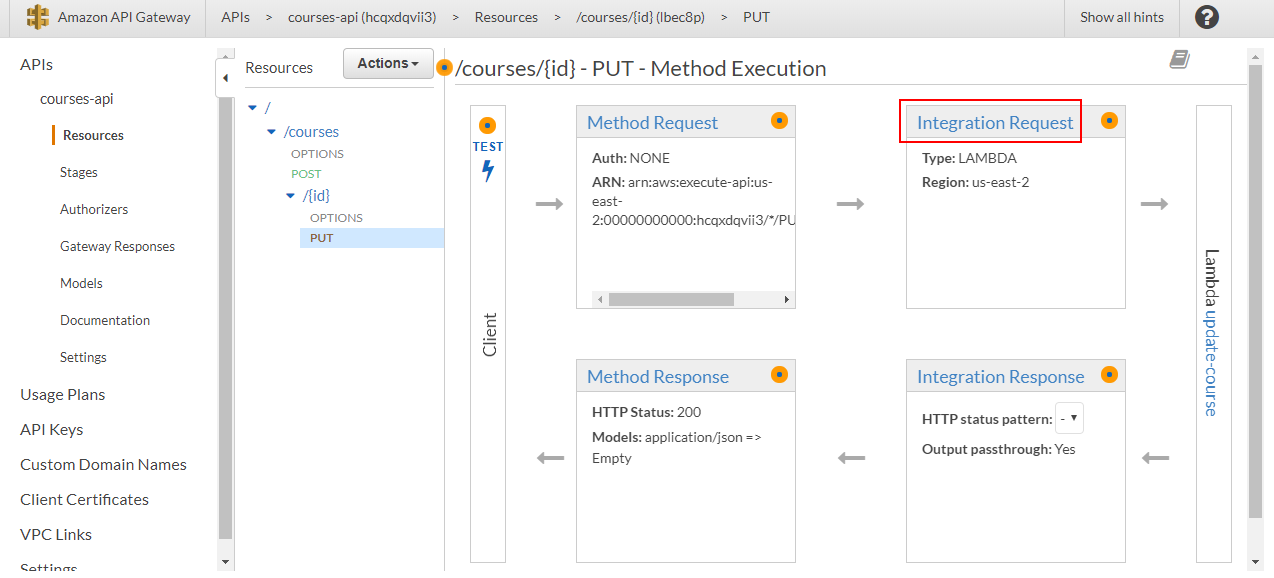
Then, in the Body Mapping Templates section, choose the option When there are no templates defined, add a mapping template for the content-type application/json, click on the check icon next to it, and enter the following template:
      {
  "id": $input.params('id'),
  "title" : $input.json('$.title'),
  "authorId" : $input.json('$.authorId'),
  "length" : $input.json('$.length'),
  "category" : $input.json('$.category'),
  "watchHref" : $input.json('$.watchHref')
}
The mapping template uses the Velocity Template Language (VTL). Here's the link to the relevant section in the AWS documentation.
The $input variable gives you access to all the request data, while $input.params() to the request parameters from the path, query string, or headers (in that order) and $input.json() returns a JSON string from the request body. You can know more about the $input variable and their functions here.
Also, notice that the ID has to be "converted" to a string by enclosing it in quotation marks, while the rest of the data since it's already sent as a string, don't have to be converted.
Click Save and test it with the path variable web-component-fundamentals (assuming the record exists in your database) and the following request body:
      {
  "title": "Web Component Fundamentals",
  "authorId": "cory-house",
  "length": "5:03",
  "category": "HTML5",
  "watchHref": "http://www.pluralsight.com/courses/web-components-shadow-dom"
}
Everything should work correctly:

If you like, add a model to validate the request, just like in the case of the POST method.
Now, applying what you have learned, create a DELETE and GET method on the /courses/{id} resource, linking them to the delete-course and get-course functions and passing only the ID with the following template:
      {
  "id": "$input.params('id')"
}
Don't forget to add a GET method on the /courses resource for the get-all-courses function.
And another resource, /authors, for the get-all-authors function.
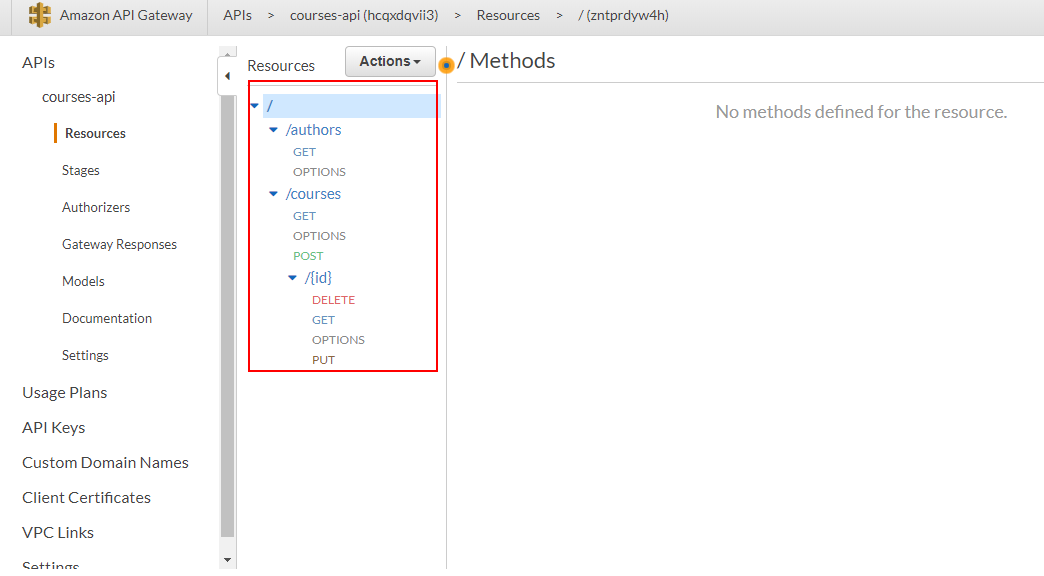
When you're done, you should have something like this:
Cross Origin Resource Sharing (CORS)
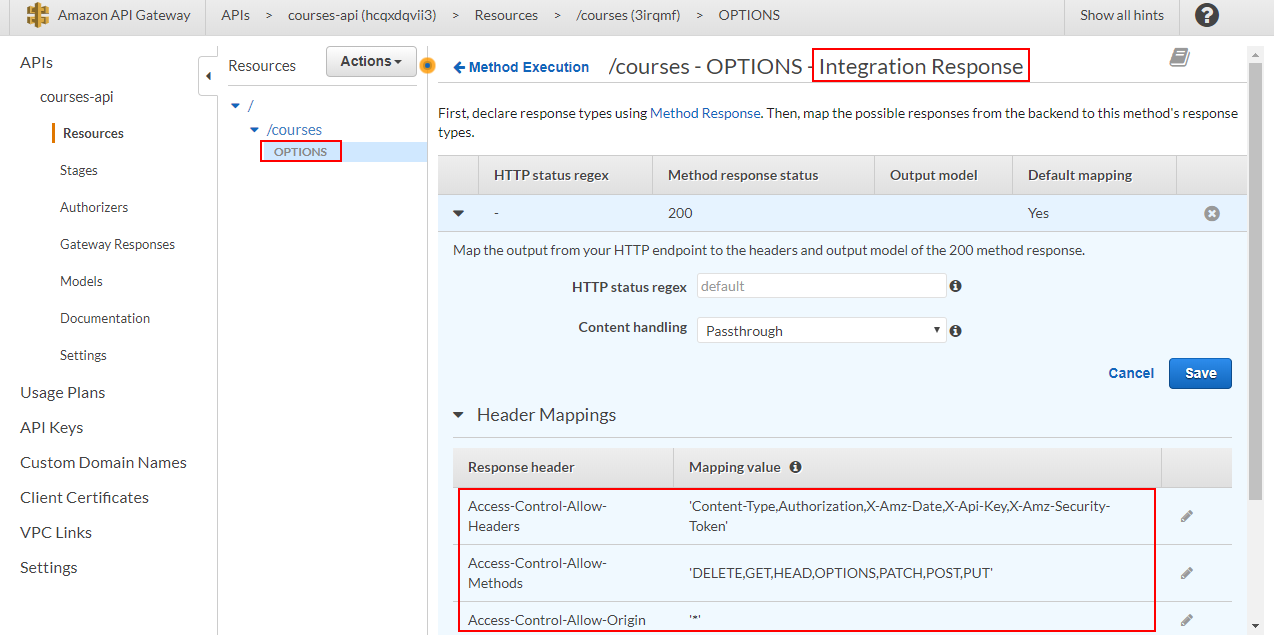
Now, we need to add the CORS header to all the methods (the CORS option you chose when creating a resource only adds the CORS headers for the preflight request).
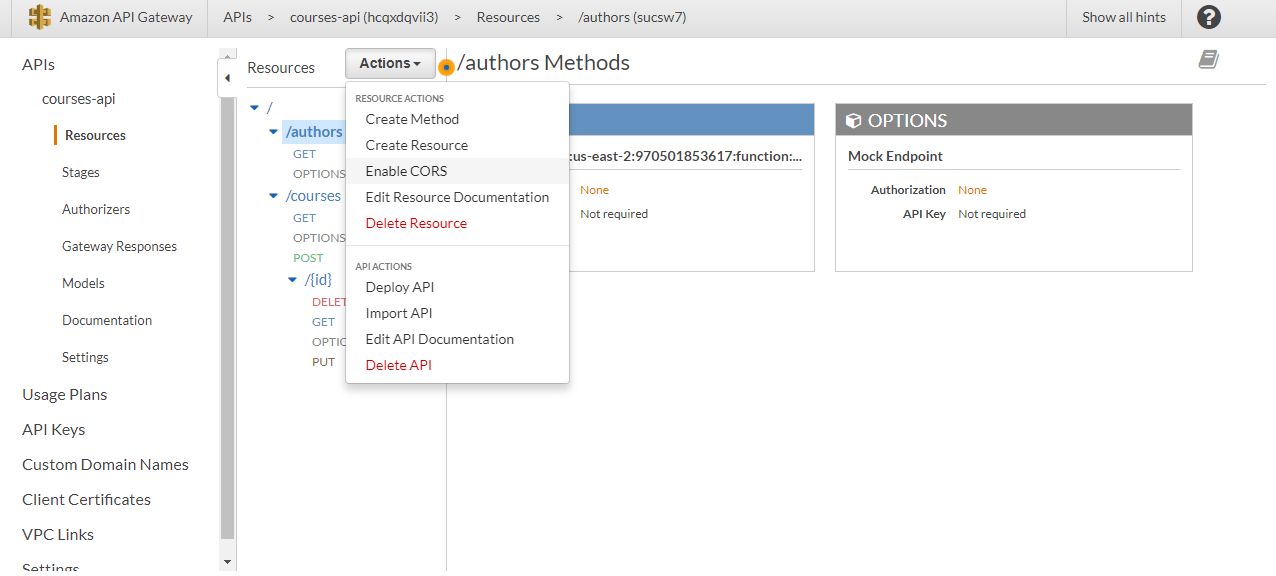
Select the /authors endpoint, click on Actions and choose Enable CORS:
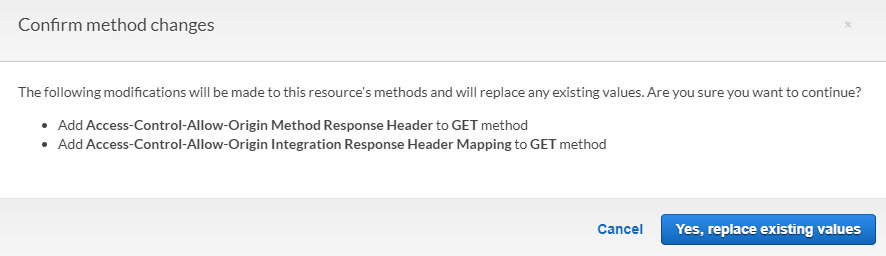
Deselect the OPTIONS method, click on Enable CORS and replace existing CORS headers:
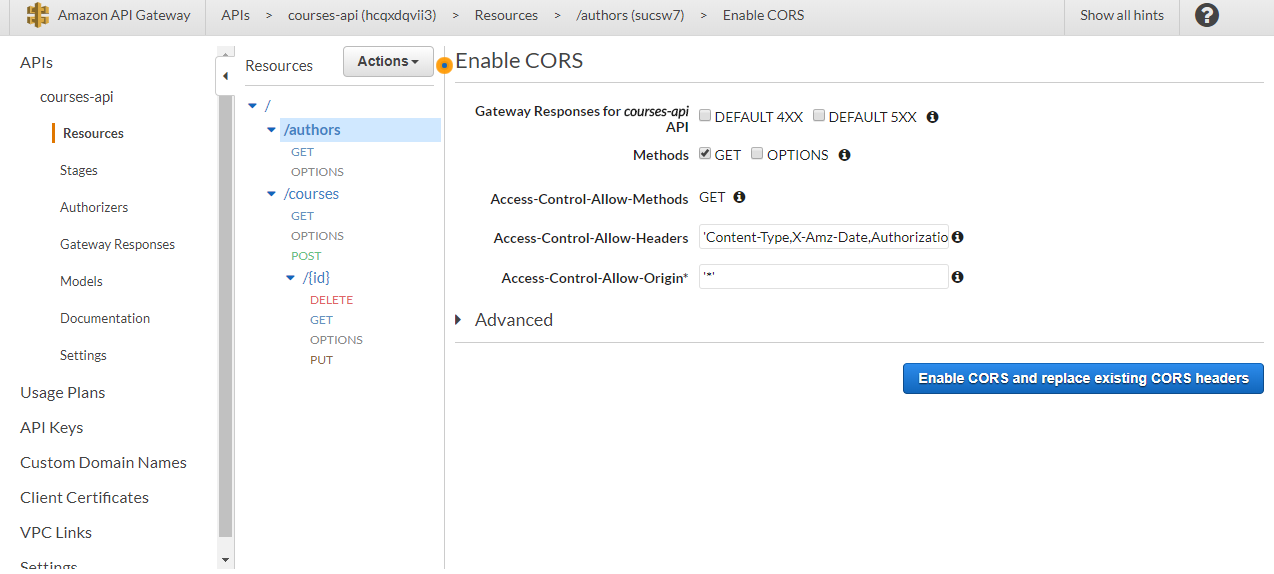
And confirm to add the CORS headers to the GET method:
Do the same for all the methods of the /courses and /courses/{id} resources (except for the OPTIONS method).
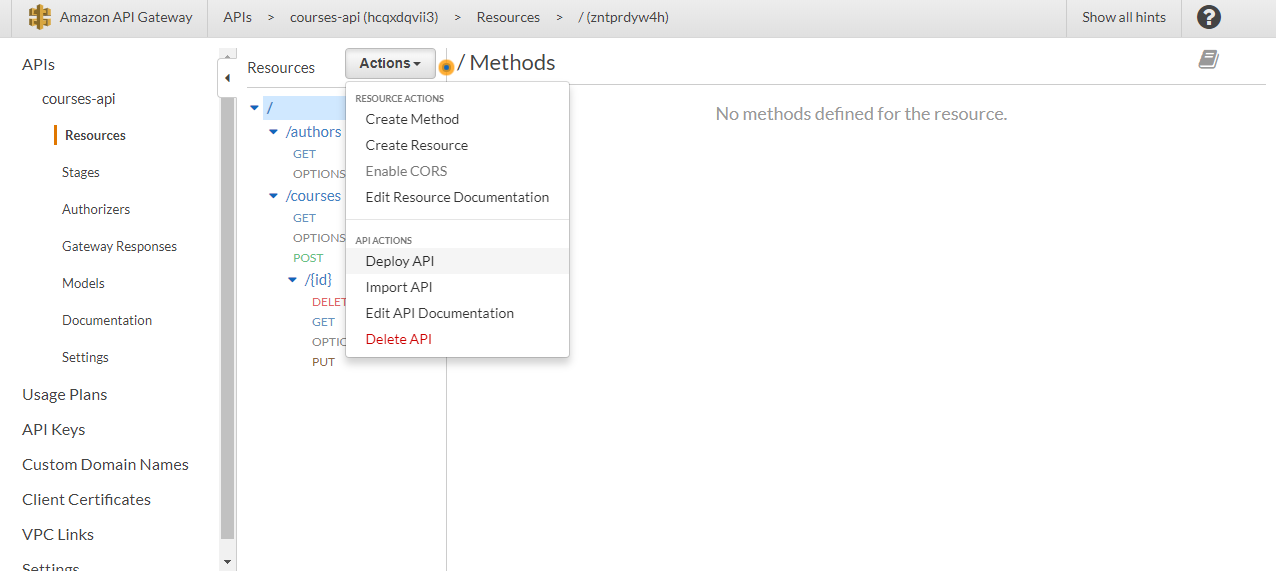
Finally, to deploy the API, go to the Actions menu and choose Deploy API:
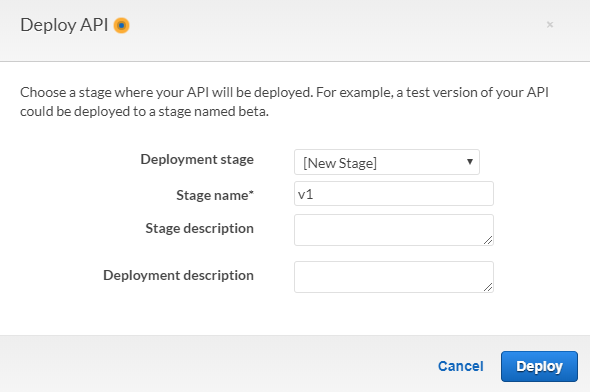
Then, create a new stage, give it a name, optionally a description and click on Deploy:
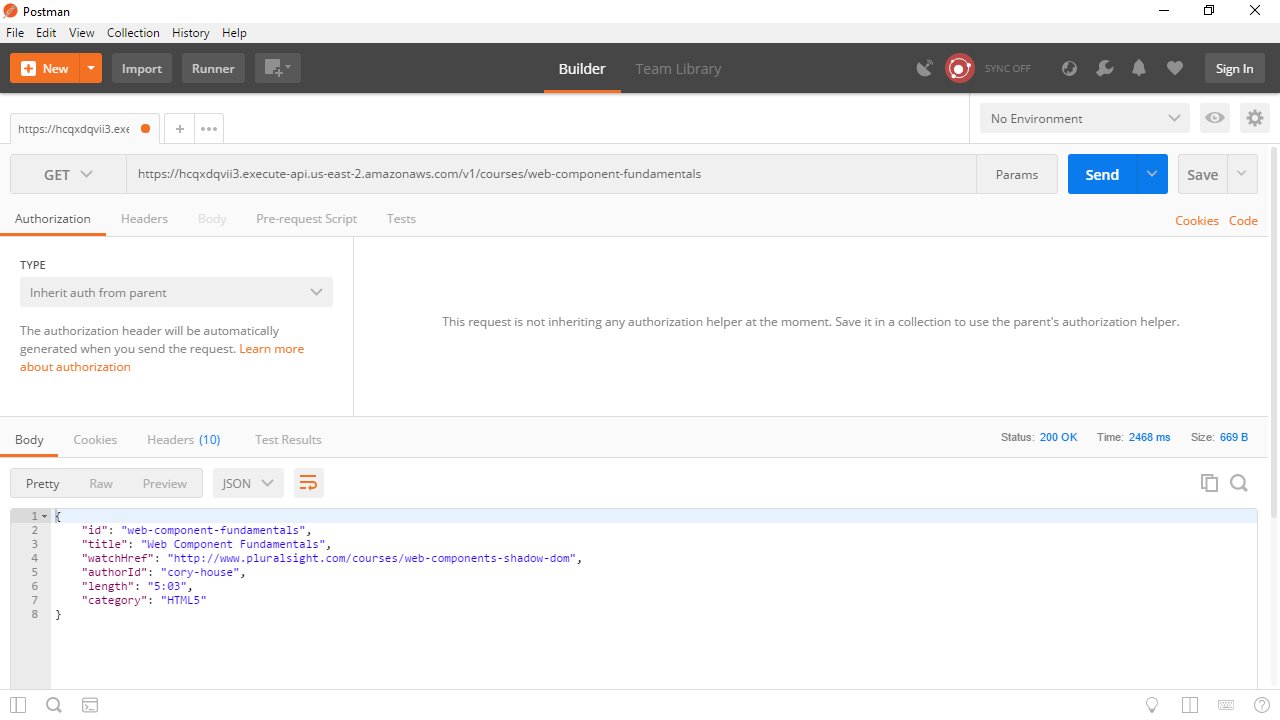
After the API is deployed, you'll get the URL to invoke it:
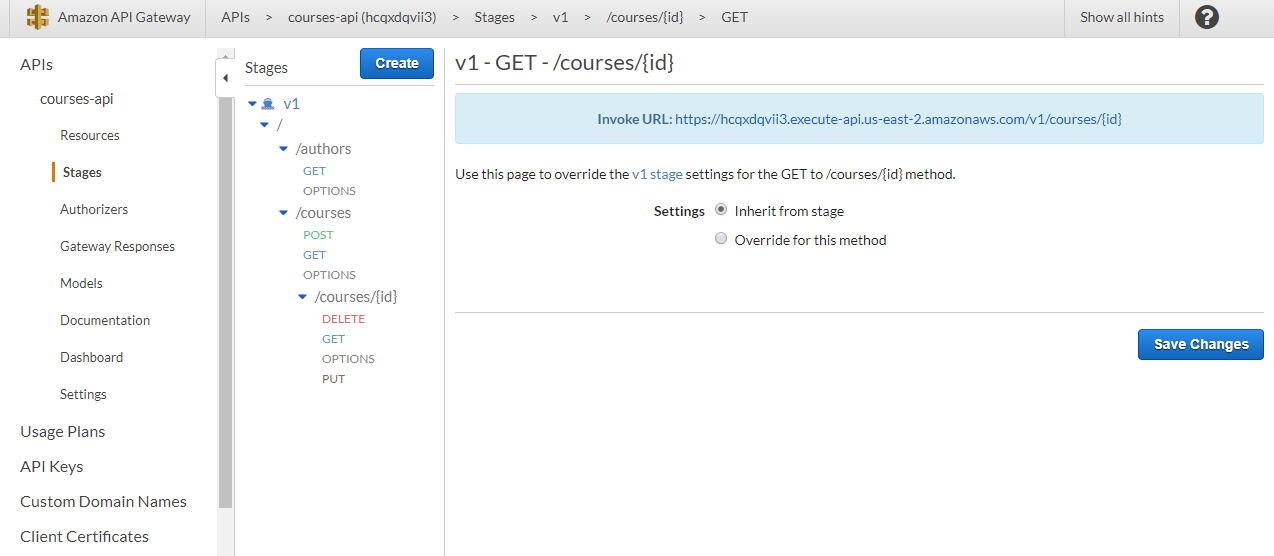
For example, in my case, the root URL of my API is https://hcqxdqvii3.execute-api.us-east-2.amazonaws.com/v1 and to get the course with ID web-component-fundamentals, I'll have to use the URL https://hcqxdqvii3.execute-api.us-east-2.amazonaws.com/v1/courses/web-component-fundamentals.
Now, the only step missing is uploading a client app for our API to S3.
Hosting the app in S3
Clone the app from this GitHub repository.
In a terminal window, go to the app directory and execute npm install to install the dependencies.
Next, go to src/api/serverUrl.js, and replace the exported value with the URL of your API.
If you want to test it locally, execute npm start on the terminal.
Then, execute npm run build to build a version of the app ready for production. You can find the output files in the build folder.
Now, let's use Amazon S3 to host the app and go completely serverless.
Amazon S3 is a storage service that can also function as a web server.
In S3, you put your files in buckets. You can know more about S3 in this developer guide, for now, let's create a bucket.
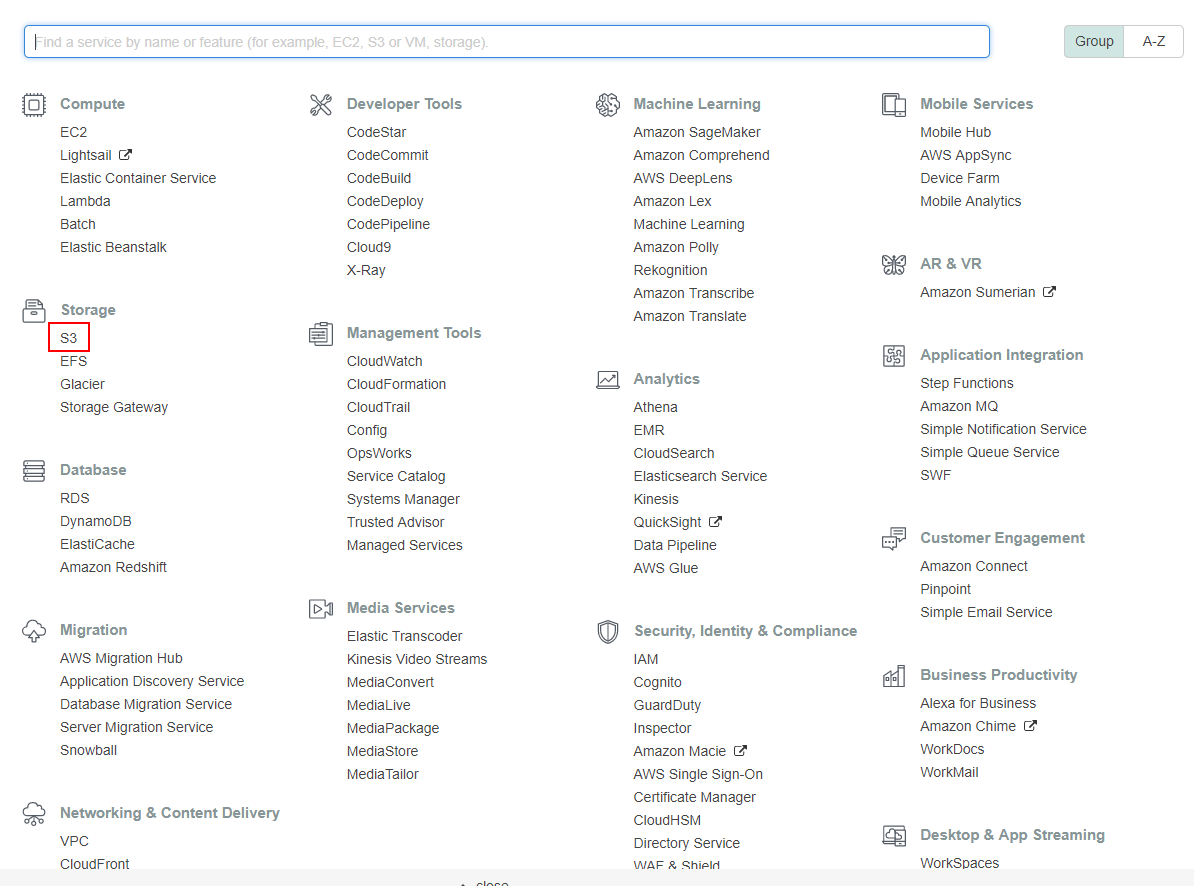
Open the Services menu and choose S3:
Click on the Create bucket button and enter a name and the region where your bucket will be created:
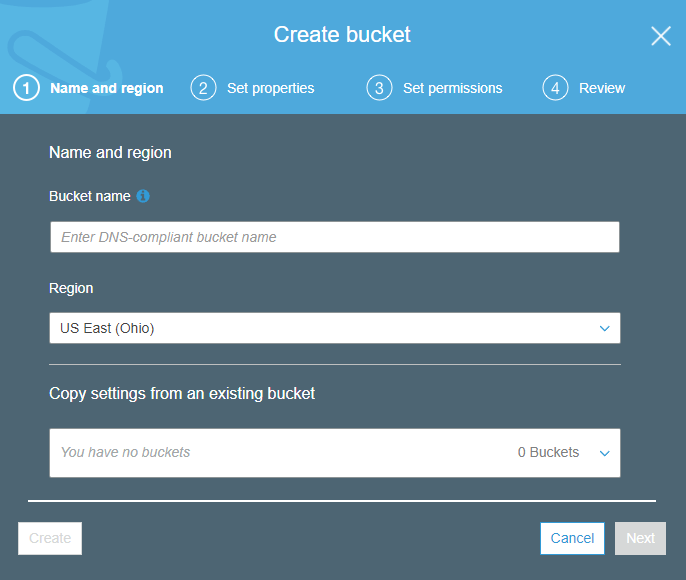
Make sure you don't put any spaces in the name. Also, the name has to be unique across all existing names in S3, so use your domain name or something unique.
Next, click on the Create button, we'll take the default values for the properties and permissions tabs.
Once the bucket is created, click on it, and go to the Properties tab:
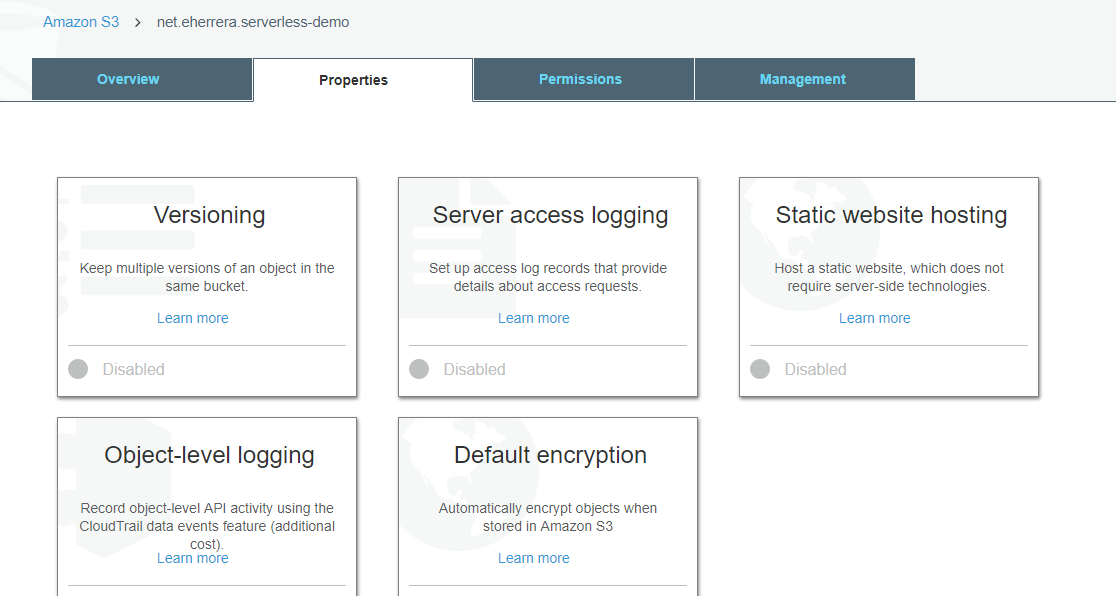
Click on the Static website hosting option and select Use this bucket to host a website:
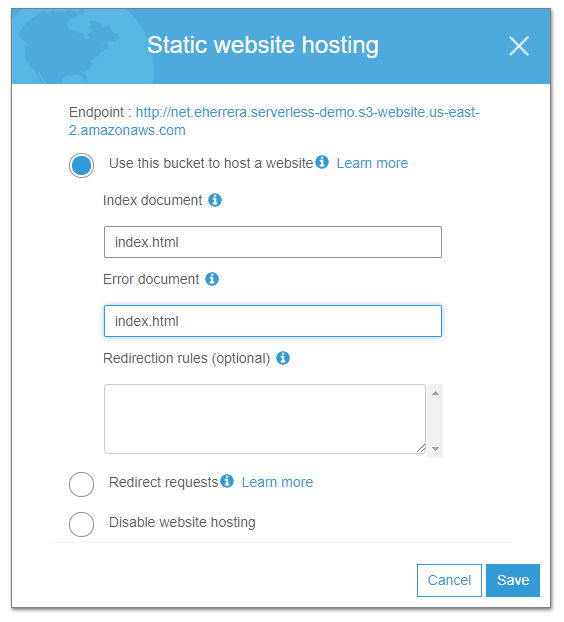
Since this is a single-page application, enter index.html as the Index and Error documents. Copy the URL that S3 gives you and click Save.
Next, in the Permissions tab, select Bucket Policy:
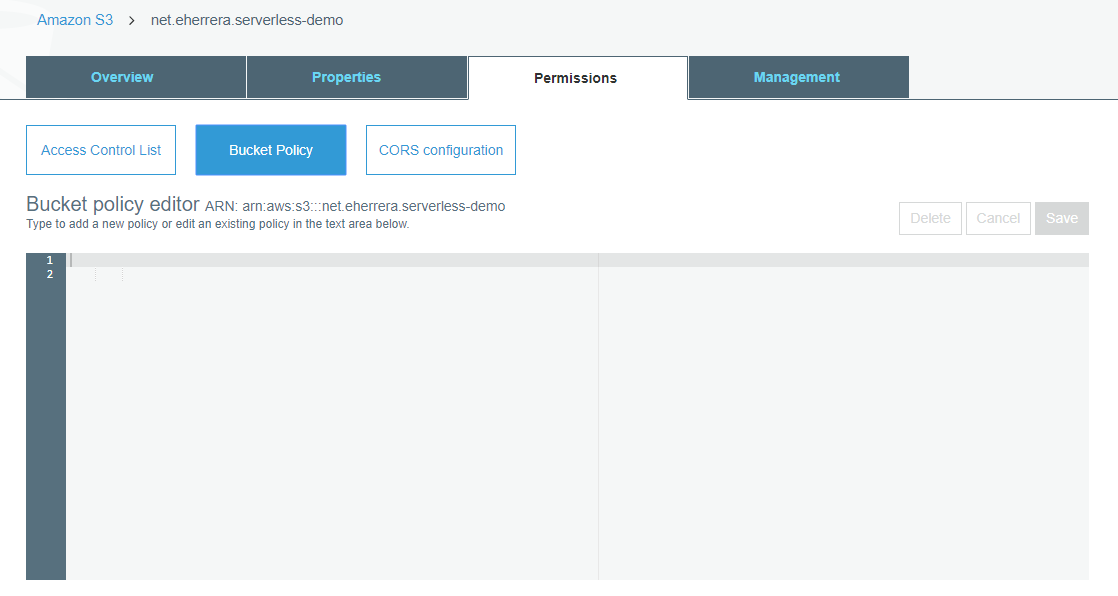
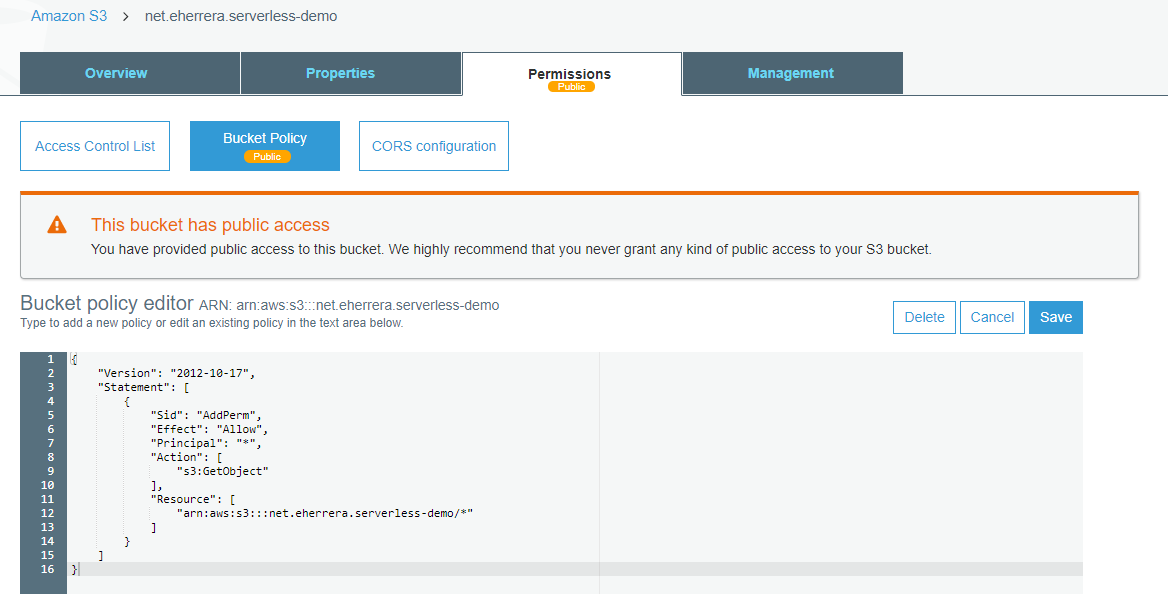
Enter the following policy to grant read-only permissions to your bucket, just change examplebucket by your bucket name (in my case net.eherrera.serverless-demo):
      {
  "Version":"2012-10-17",
  "Statement":[
    {
      "Sid":"AddPerm",
      "Effect":"Allow",
      "Principal": "*",
      "Action":["s3:GetObject"],
      "Resource":["arn:aws:s3:::examplebucket/*"]
    }
  ]
}
Click on Save to apply the policy:
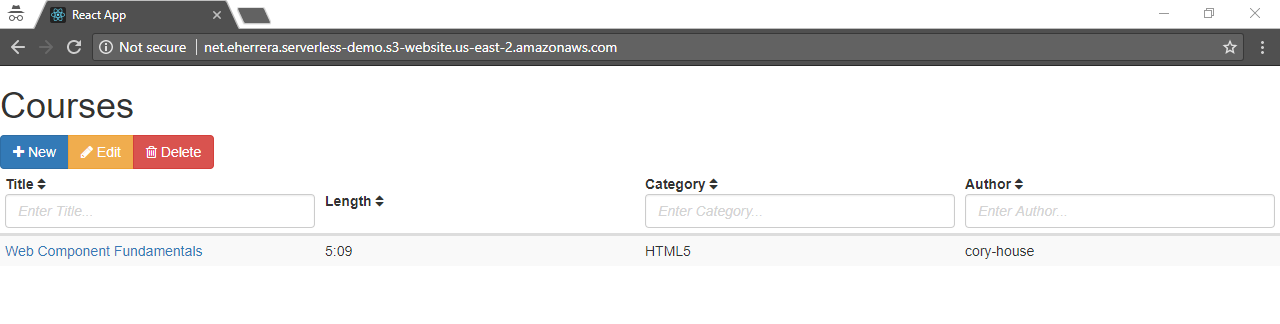
Now go to the Overview tab, click on the Upload button, drag the content of the build directory and click on Upload:

Once the upload has finished, go to your app using the URL you copied (or go back to the Static website hosting option in the Properties tab to get it):
Optionally, you can create another bucket to store the logs of the web server, you just have to enable the Server access logging option in the Properties tab.
However, I would highly recommend using CloudFront.
CloudFront is a Content Delivery Network (CDN) service that will copy your app to edge locations around the world to improve the speed in which your app is served to your users. You can learn more about it in this developer guide.
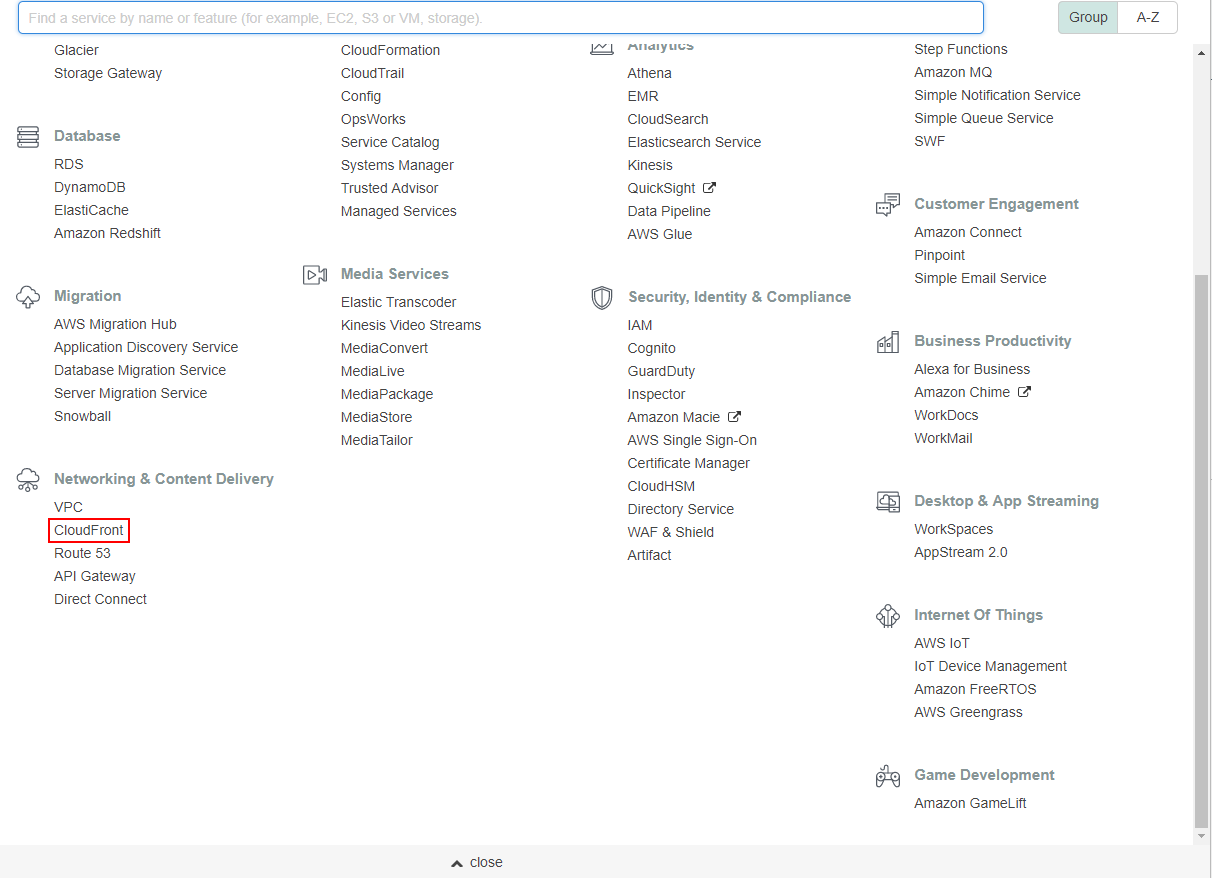
Open the Services menu and choose CloudFront:
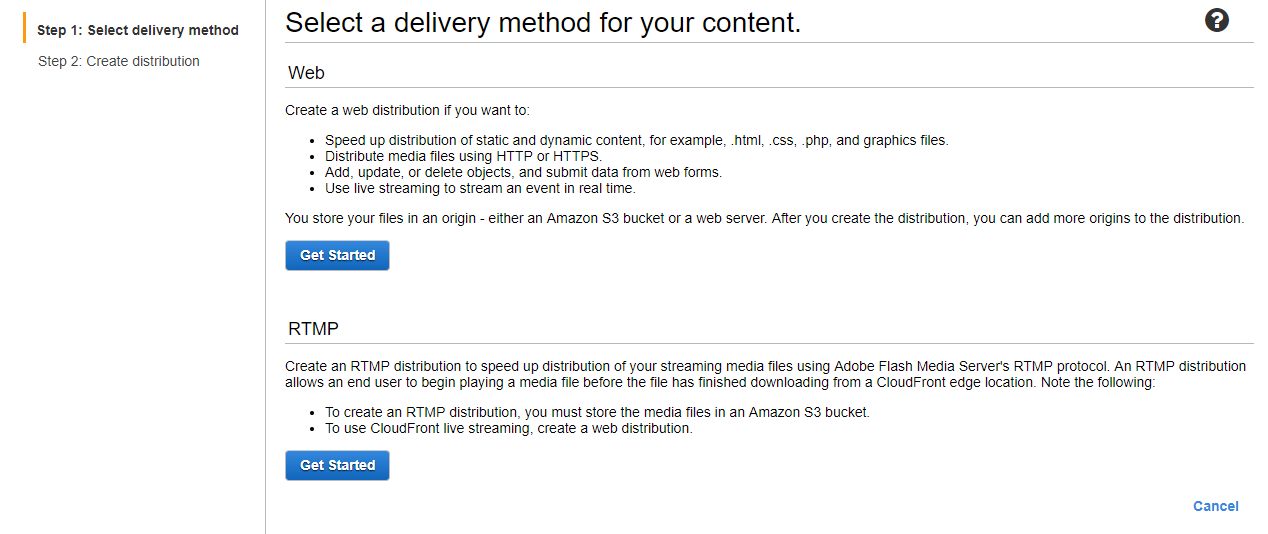
Click on Create Distribution and under the Web section click on Get Started:
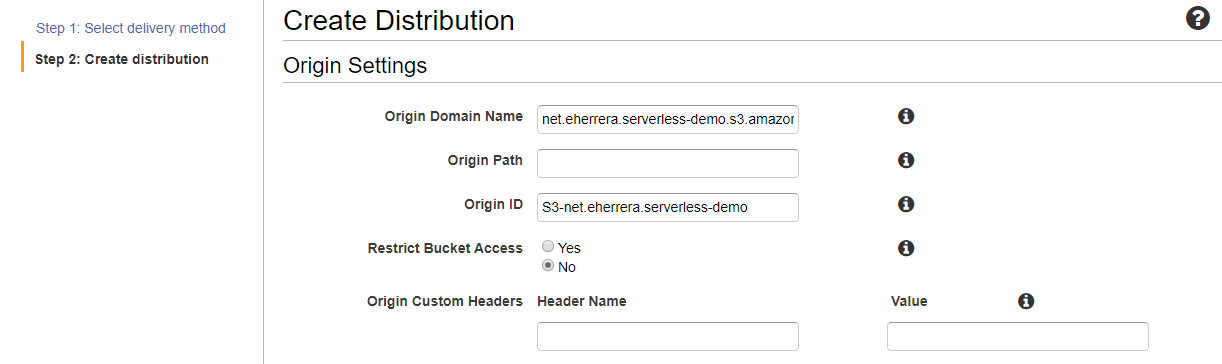
In the Origin Domain Name select the bucket that contains your app, Origin ID will be populated:
Scroll down and under Distribution Settings, set the Default Root Object value to index.html and click on Create Distribution at the bottom of the page.
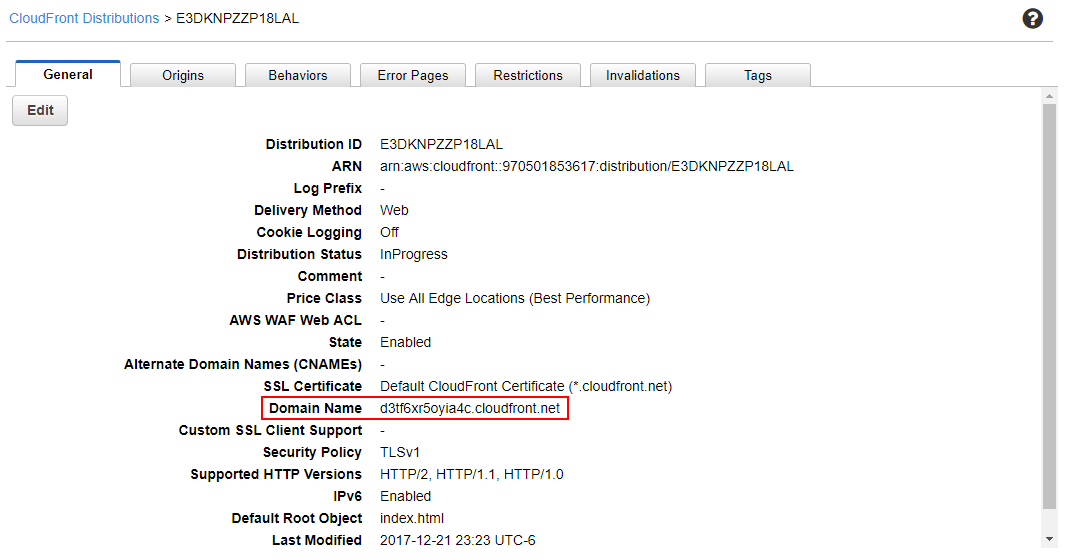
Wait a few minutes until the deployment has finished, and then click on the ID of your distribution:

In the General tab, you'll find the new URL of your app in the Domain Name row. (You can use the HTTPS protocol for your URL if you prefer):
And that's it!
Conclusion
The idea of a serverless application is interesting:
- There's no need to manage any servers.
- The application can be scaled automatically and highly available.
- You pay only for the resources used and for the time the application is used.
In this tutorial, you have learned how to use AWS's API Gateway and Lambda functions to build a REST API that performs CRUD operations on a database built on the AWS DynamoDB database framework. This guide also covered how to host this API on S3 in a single-page application that can be distributed worldwide using CloudFront.
This was just a cursory look at each of these technologies; there is a lot more to learn about each technology and about other AWS components as well!
In case AWS excites you, some interesting projects would include authenticating users with Amazon Cognito or using a framework like Serveless or a service like AWS CloudFormation to simplify the managing and deploying of serverless applications.
Thanks for reading. I hope you found this guide informative and engaging.
Advance your tech skills today
Access courses on AI, cloud, data, security, and more—all led by industry experts.
