How to Set Up a Ruby Development Environment
Aug 11, 2020 • 8 Minute Read
Introduction
First released in the mid-1990s by Yukihiro Matsumoto, the Ruby programming language saw an exponential rise in popularity with the release of Ruby on Rails, a web app framework. Platforms like Twitter, GitHub, Shopify, and others were initially built with RoR (Ruby on Rails).
In this guide, we will set up a Ruby Development Environment on Windows, Ubuntu, and macOS. We will discuss the step-by-step process of downloading, installing, and configuring the environment. We will also discuss RVM, a popular version manager for Ruby, which gives you more flexibility in adding and removing Ruby versions.
Installing on Windows
RubyInstaller is a widely used tool for installing Ruby on Windows. Alternatively, you can also use a package manager like Chocolatey to install Ruby.
Here are the steps to install Ruby with RubyInstaller:
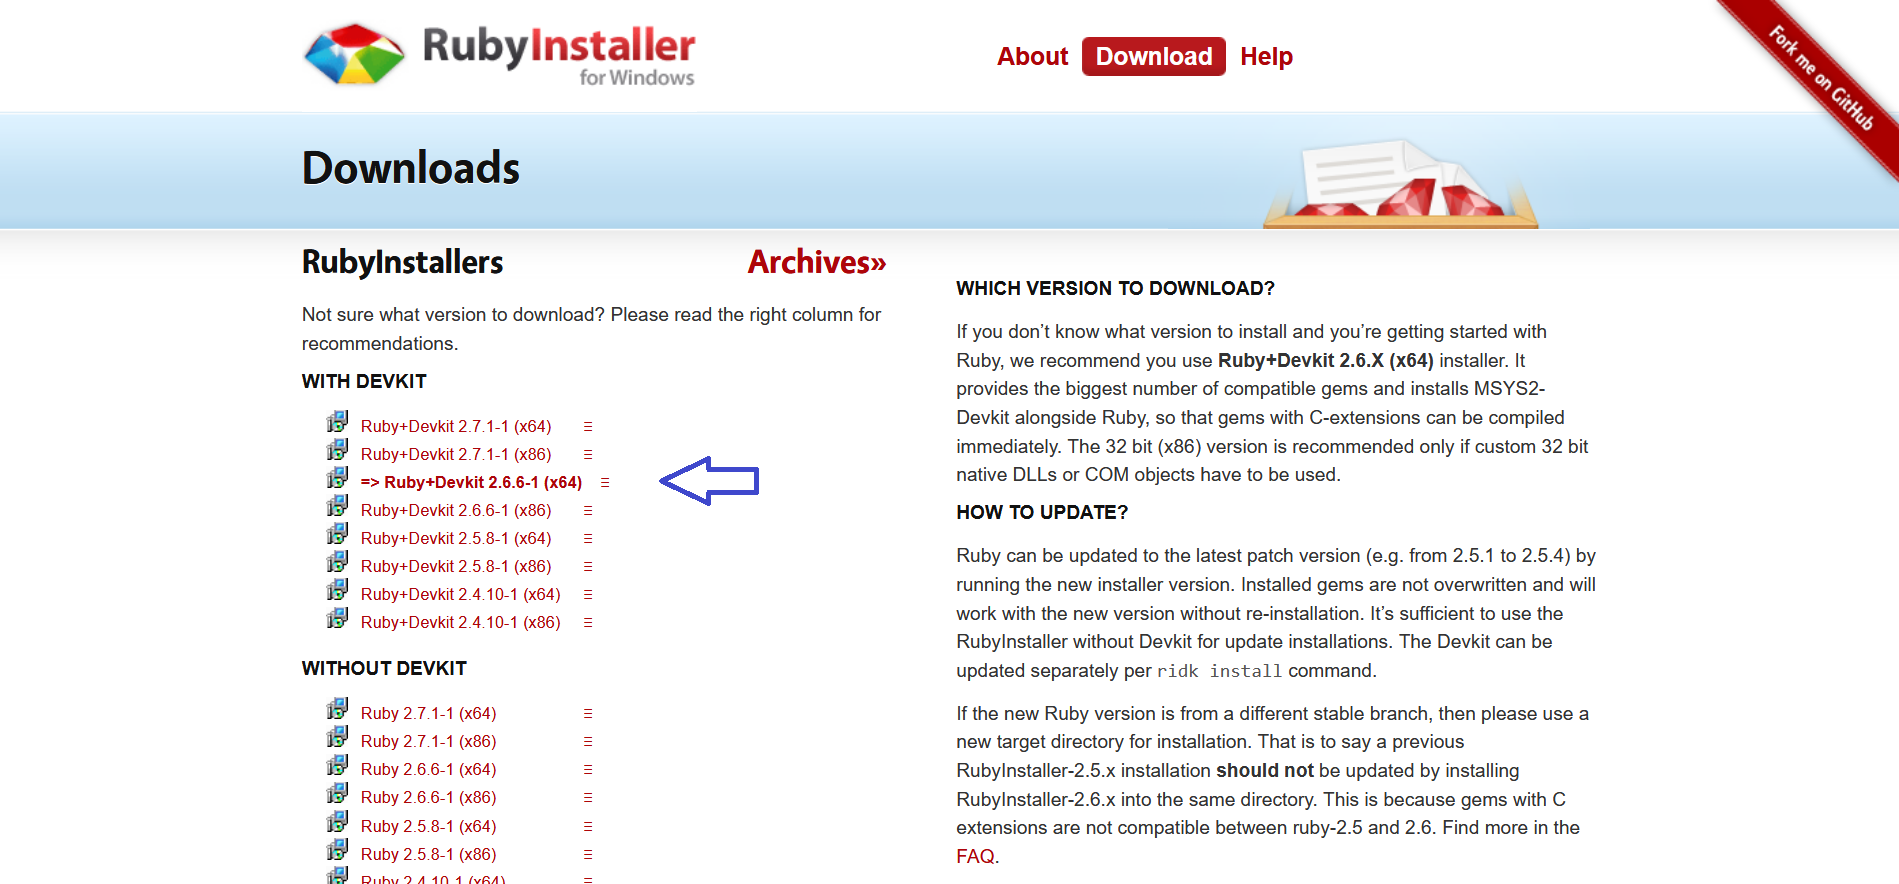
- Download the recommended stable version of Ruby+Devkit from https://rubyinstaller.org/downloads/. It will automatically suggest the version most people are using at the time of downloading. Currently, the arrow is pointing at 2.6.6-1. The Devkit versions install the MSYS2 system, which is necessary to install RubyGems that require compilation.
- Once downloaded, open the installer, check I accept the License, and click Next.

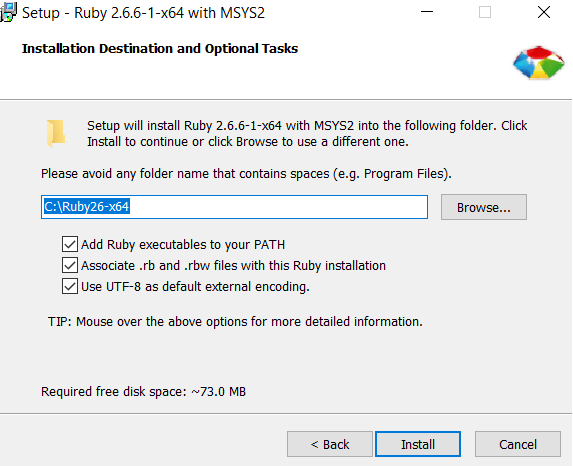
- Using RubyInstaller saves you from manually setting the PATH variable and other configurations that you may need. You can change the Ruby installation folder or leave it at default.
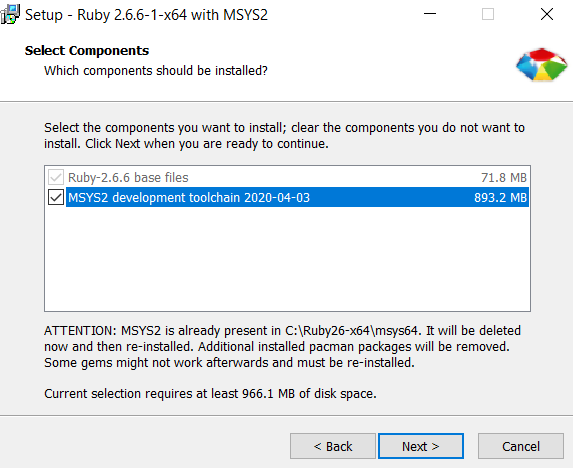
- Make sure to check the MSYS2 development toolchain option on the next screen:
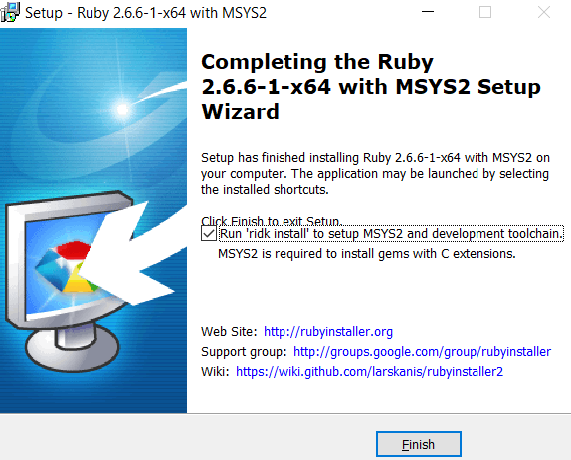
- On the installer's final screen, another checkbox appears: Run ‘ridk install’ to set up MSYS2 and development toolchain. Make sure to select it and click Finish.
Installing Development Toolchain
A terminal window will open to install the development toolchain:

The ridk install command will ask for the components you want to install. Leave it at default, and hit ENTER. After the installation completes, you should see the message, Install MSYS2 and MINGW development toolchain succeeded. You will again see the same install prompt. Just hit ENTER and the terminal will close.
      Install MSYS2 and MINGW development toolchain succeeded

 1 - MSYS2 base installation
 2 - MSYS2 system update (optional)
 3 - MSYS2 and MINGW development toolchain

Which components shall be installed? If unsure press ENTER []
Verifying the Installation
You can verify the installation by running the following command in your terminal.
ruby -v
You should see an output like this.
ruby 2.6.6p146 (2020-03-31 revision 67876) [x64-mingw32]
Installing on Ubuntu
The most common and easiest way to install Ruby on Ubuntu is through the apt package manager, and you can do so with one command. It might be a good idea to update the packages index beforehand.
      sudo apt update
sudo apt-get install ruby-full
You can verify the installation by checking the version of the Ruby installed.
ruby --version
Installing on MacOS
Ruby comes pre-installed with default macOS installation; you can check that by running the following command in the terminal.
ruby -v
It is possible that the Ruby that came pre-installed is not the most recent version, and you may run into compatibility issues when building projects.
Installing Using Homebrew
You can install Ruby using Homebrew with just one command. In your terminal, run the following command:
brew install ruby
This command will install the most recent stable version of Ruby that is available.
Updating using Homebrew
To update your version of Ruby, get the latest packages by updating Homebrew, and then upgrade Ruby:
      brew update
brew upgrade ruby
Installing Ruby with RVM
For most projects, the above installation methods work great. Still, there may come a time when you need to deploy a different implementation of Ruby or a conflict between gems in different projects arises. Installing different versions of Ruby using the above methods can be a real headache. To solve this problem, different version managers like RVM, chruby, rbenv, and others were developed.
RVM (Ruby Version Manager), created by Wayne E. Seguin, is a command-line tool to install, manage, and work with multiple Ruby environments from interpreters to sets of gems. RVM supports most UNIX-like systems, and hence is widely used with Ubuntu. For Windows, you can use WSL(Windows Subsystem for Linux).
Before installing RVM, you need GPG, curl, and bash, but RVM will most likely autodetect it and install anything required.
Installing RVM
To install RVM, run the following commands:
      gpg --keyserver hkp://pool.sks-keyservers.net --recv-keys 409B6B1796C275462A1703113804BB82D39DC0E3 7D2BAF1CF37B13E2069D6956105BD0E739499BDB
curl -sSL https://get.rvm.io | bash -s stable
You need to run the following command to start using RVM:
source ~/.rvm/scripts/rvm
Installing Ruby with RVM
To install the latest version of Ruby:
rvm install ruby
Use the latest version as default.
rvm --default use ruby
To install a specific version of Ruby:
rvm install X.X.X
Where X.X.X is the version of Ruby.
Using Different Versions of Ruby
You can jump between different versions using the rvm use X.X.X command.
This example will show how to install two different versions of Ruby and switch between them. The same steps can be followed for any number of Ruby versions.
To install and use Ruby 2.5.1, run the following commands:
      rvm install 2.5.1
rvm use 2.5.1
ruby -v
Here is the output of the above command:
ruby 2.5.1p57 (2018-03-29 revision 63029) [x86_64-linux]
Now, install a different version of Ruby:
      rvm install 2.1
rvm use 2.1
ruby -v
This Ruby version is different from the above output.
ruby 2.1.1p76 (2014-02-24 revision 45161) [x86_64-linux]
Both Ruby versions are installed and present in the system simultaneously, and the rvm use X.X.X command specifies which version to use. To see the current version of Ruby, enter the following into the terminal:
rvm list
      ruby-2.5.1 [ x86_64 ]
* ruby-2.7.1 [ x86_64 ]
=>ruby-2.1.1

# => - current
# =* - current && default
# *  - default
Uninstalling a Ruby Version
To uninstall any version of Ruby you previously installed using RVM, run the following command:
rvm uninstall 2.1.1
You can read more about this here.
Conclusion
Now that your local machine is ready for Ruby software development, you can learn more about programming with Ruby and start creating awesome stuff.
Although only RVM was discussed in this guide, many version managers are available out there. You can explore them and find the one that corresponds with your needs. You can also further install and learn Ruby on Rails and take your development to the next level.
Here are some resources you may find useful:
Happy Coding!
Advance your tech skills today
Access courses on AI, cloud, data, security, and more—all led by industry experts.
