Introduction to Augmented Reality with ARKit
Looking for an AR Kit tutorial? Start learning how to do this with ARKit today! Augmented reality (AR) is the ability to digitally place virtual elements into the real-world and interact with them. Don't wait up!
Jan 10, 2019 • 9 Minute Read
What Is Augmented Reality?
Augmented reality (AR) is simply the ability to digitally place virtual elements into the real-world and interact with these elements as if they were actually present. AR opens exciting new possibilities in many areas, including navigation, gaming, military technology, travel enhancements, and more.
We can spruce up the real-world environment in ways impossible before AR. The possibilities are endless, limited only by our creativity.
Apple announced their ARKit framework at World Wide Developers Conference (WWDC) in June 2017. The ARKit framework relies on advanced iOS features like real-time world tracking and hit testing, horizontal plane detection, and the ability to apply real lighting to virtual objects.
But we don’t have to be experts in all these areas. ARKit hides all the underlying complexity and makes creating AR applications rather simple.
Here’s a screenshot from the AR-demo we’re going to build in this tutorial:
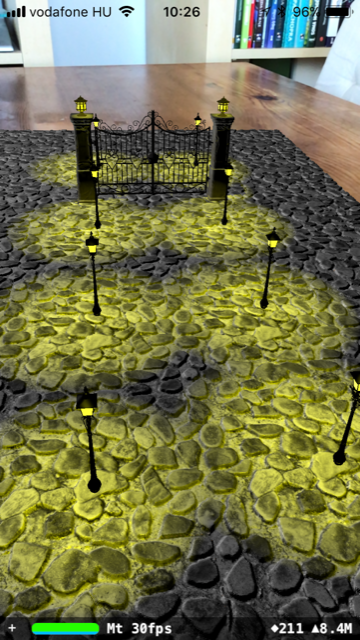
Follow along with me to see how we get there. You can download the demo projects from Github.
Your First AR App
You're going to create your first iOS augmented reality app in a matter of minutes. Fired up? Read along.
Prerequisites
To implement the ARKit demos in the tutorial, you’ll need a Mac with Xcode 9 or newer. Also, ARKit requires the A9 or newer processors to perform all the complex computations in real-time. Thus, you’ll need an iPhone SE, iPhone 6s, iPhone 6s Plus, 5th generation iPad, or a newer device running iOS 11.
Note that ARKit apps won’t run in the Simulator.
Let’s Get Started
Apple made it easy for us to create beautiful, realistic augmented reality apps and games through Xcode 9 and the hardware described above. Xcode 9 even comes with a dedicated template that allows us to build our first ARKit app within minutes.
Open up Xcode and choose File -> New -> Project. Choose the Augmented Reality App template:
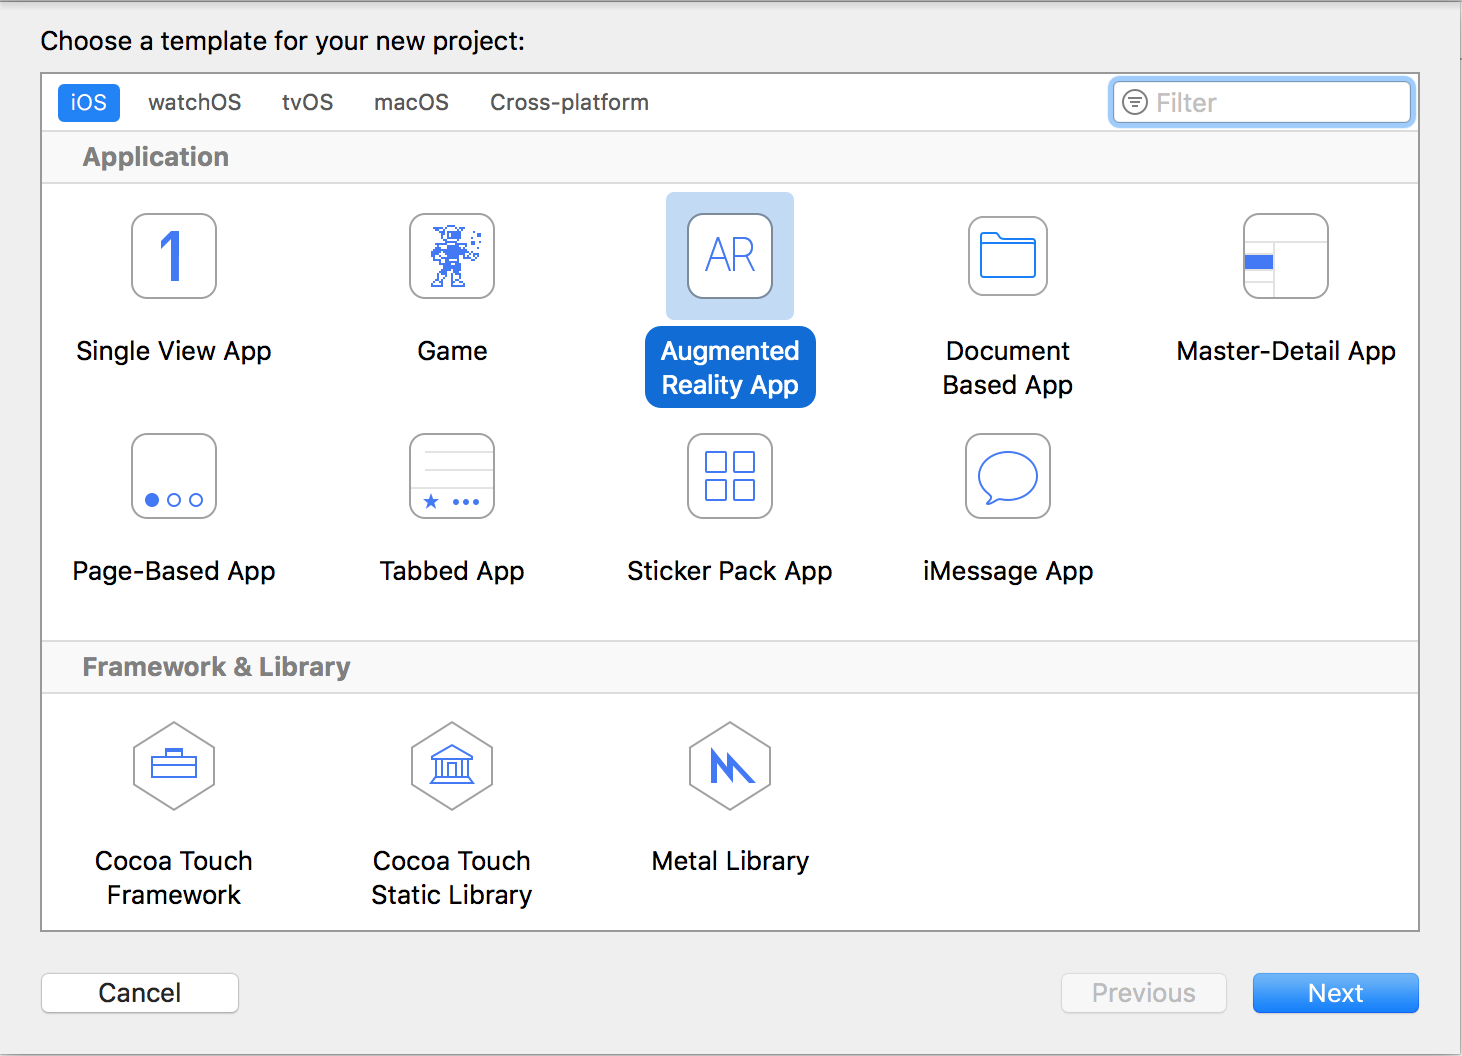
Hit Next, then pick a name for your project (e.g., “FirstARKitApp”). You can leave the defaults for the other settings (Language: Swift, Content Technology: SceneKit). Click Next then create the project in a folder of your choice.
Congrats! You just created your very first augmented reality app.
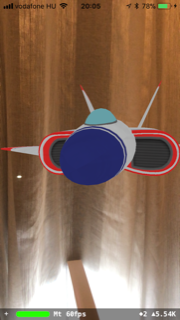
Yes, you read that right! No coding required. And here’s what you’ll see after running the app on a real device:
Now, let’s take a closer look at the generated project. The Main.storyboard contains a single view controller which has a main view of type ARSCNView. ARSCNView is a special view used for displaying scenes that blend the device’s camera view with virtual 3D content. The view is connected to the sceneView outlet in the ViewController.swift file:
@IBOutlet var sceneView: ARSCNView!
Next, let’s inspect the ViewController’s viewDidLoad() method:
      override func viewDidLoad() {
  super.viewDidLoad()

  // Set the view's delegate
  sceneView.delegate = self

  // Show statistics such as fps and timing information
  sceneView.showsStatistics = true

  // Create a new scene
  let scene = SCNScene(named: "art.scnassets/ship.scn")!

  // Set the scene to the view
  sceneView.scene = scene
}
The sceneView’s delegate is set to self, but we won’t be using the ARSCNViewDelegate in this demo.
sceneView.showsStatistics = true
By setting the showsStatistics attribute to true, we’ll see real-time statistics when running our app.

Tapping the + icon in at bottom left reveals even more details:
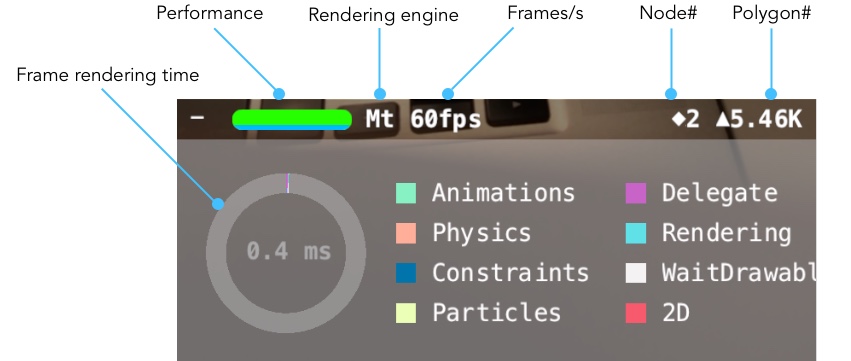
- The green bar is the performance indicator. A full bar indicates good performance.
- The rendering engine is displayed to the right of the performance indicator. Possible values are GL (OpenGL) and Mt (Metal). On modern devices capable of running ARKit, you’ll see Mt.
- The FPS counter shows the frame rate, the number of screen updates per second. 60 is the maximum and values above 30 are acceptable.
- The node count (the value next to the diamond-shaped icon) shows the number of nodes in your scene graph. More on this later.
- The next piece of information is the polygon count indicator. It shows how many polygons are rendered currently in your scene.
- The donut chart shows what the time is being spent on while rendering a frame. We can also see how much time it takes to render a frame. In this example, it only took 0.4 ms to display a frame. Thus, we could display up to 2500 frames/s if the device supported such a high frame-rate.
We load the scene next:
let scene = SCNScene(named: "art.scnassets/ship.scn")!
An SCNScene instance represents a 3D scene and its contents, including lights, 3D-objects, cameras, and other attributes. The current scene is initialized using the ship.scn that is bundled with the ARKit template:
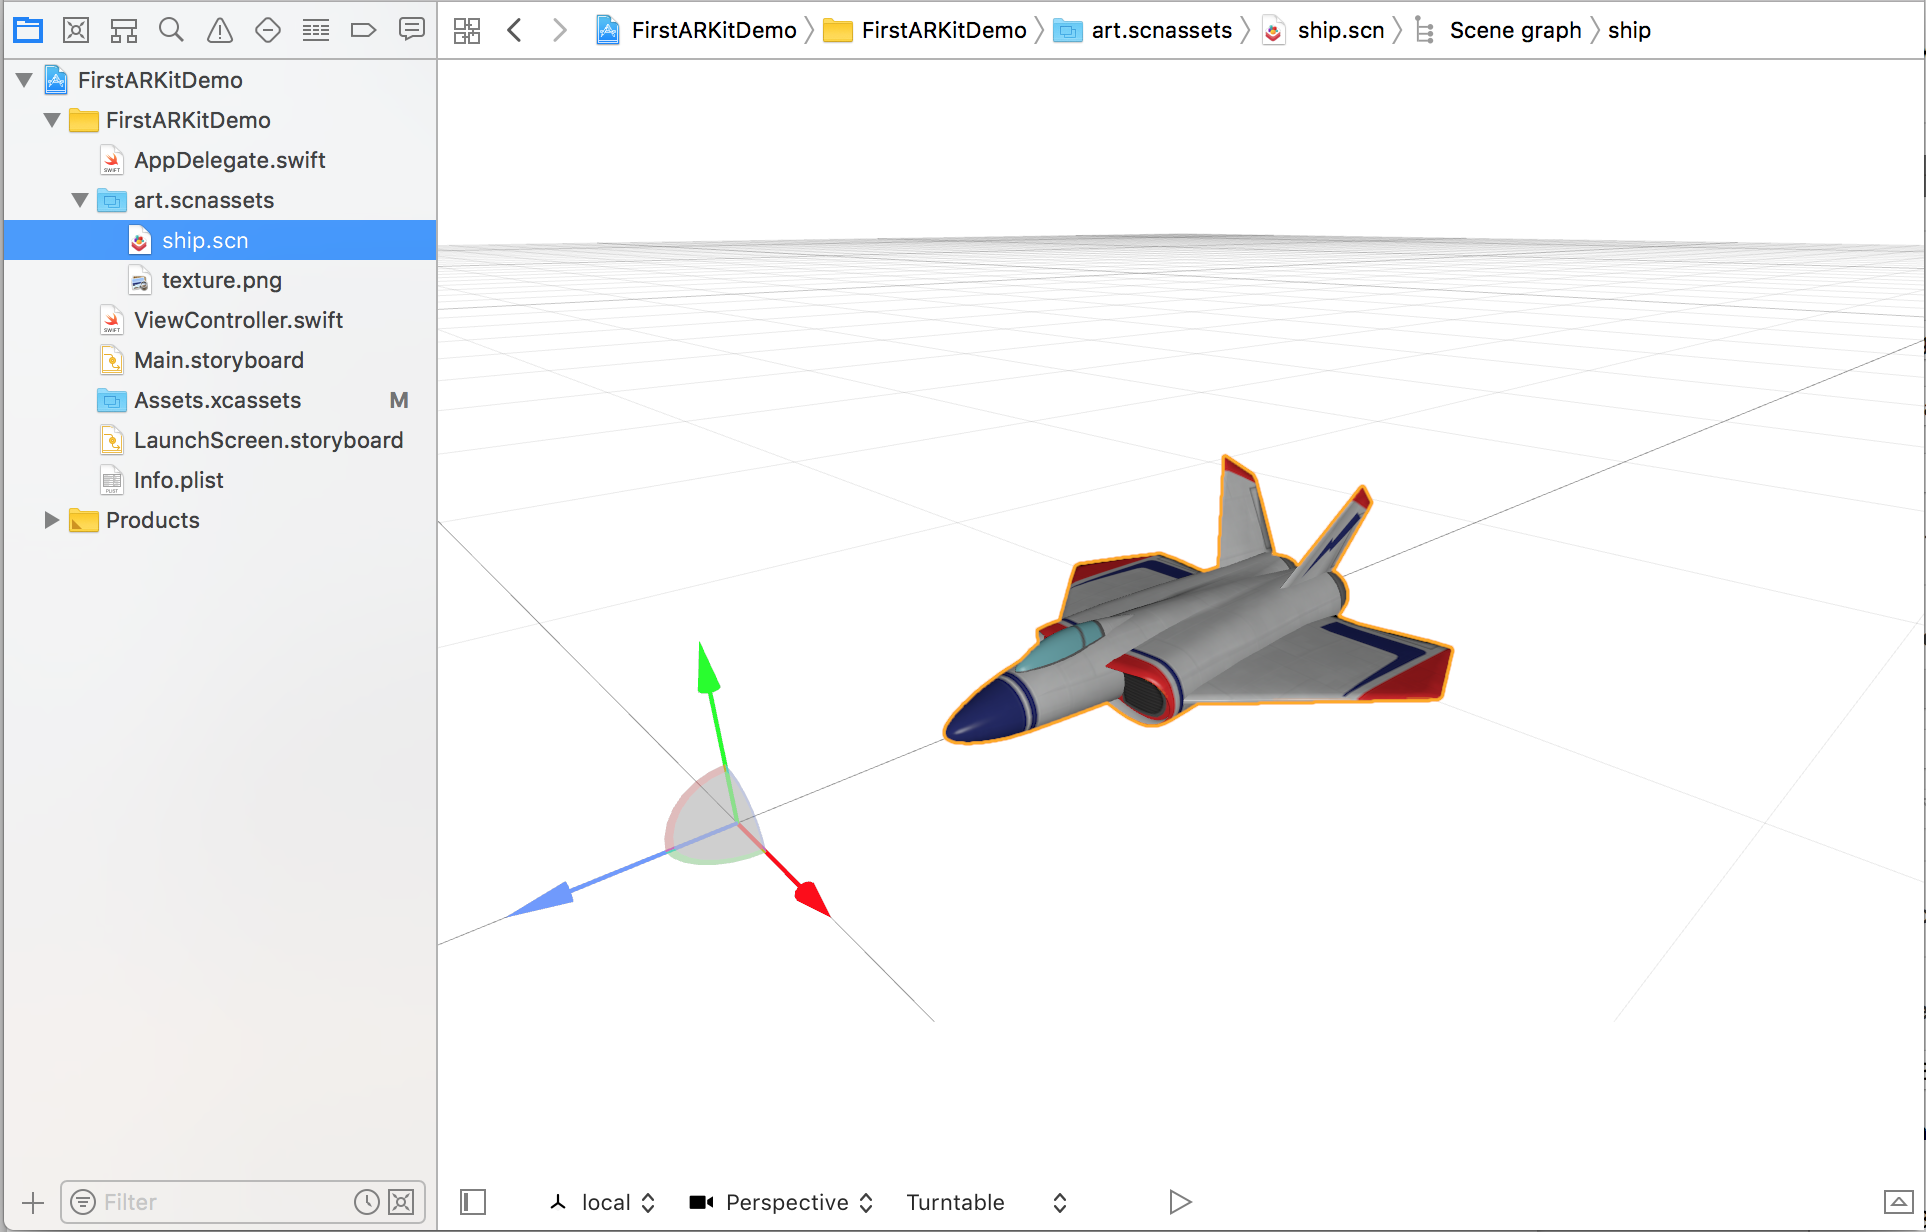
This ship will be displayed and combined with the real-world in our demo. Finally, we assign the scene to the ARSceneView object:
sceneView.scene = scene
We’re almost ready to run our first AR-app. The final configuration steps are performed in the viewWillAppear() delegate method:
      override func viewWillAppear(_ animated: Bool) {
  super.viewWillAppear(animated)
  // Create a session configuration
  let configuration = ARWorldTrackingConfiguration()
  // Run the view's session
  sceneView.session.run(configuration)
}
An ARSCNView has an AR session associated with it. The ARSession processes the camera image and tracks the device’s motion. The AR-processing starts after calling the ARsession’s run() method. The run() method needs a valid ARConfiguration instance. This configuration object defines the session’s motion and scene tracking behaviors.
ARConfiguration cannot be instantiated directly. Instead, use one of the following subclasses provided by ARKit.
Quoting from the ARKit documentation:
- ARWorldTrackingConfiguration: Provides high-quality AR experiences that use the rear-facing camera to precisely track a device's position and orientation and allow plane detection and hit testing.
- AROrientationTrackingConfiguration: Provides basic AR experiences that use the rear-facing camera and track only a device's orientation.
- ARFaceTrackingConfiguration: Provides AR experiences that use the front-facing camera and track the movement and expressions of the user's face.
The ARKit template uses the ARWorldTrackingConfiguration class. This type of configuration will track the device’s position and orientation changes as well. As a result, we’ll be able to freely move around the spaceship model which stays at a fixed position in the real-world place.
If I instead used an AROrientationTrackingConfiguration, the device’s position changes would not be tracked. Consequently, the starship would move together with the device. We could use this configuration to display the planets of the solar system orbiting around our device.
However, the lack of position change tracking is a deal-breaker for most AR apps and games, so you’ll probably end up using ARWorldTrackingConfiguration. In addition to position and orientation changes, ARFaceTrackingConfiguration can also track facial expressions, which opens further opportunities.
Note that ARFaceTrackingConfiguration requires the iPhoneX’s TrueDepth camera.
Next Steps
Continue on to the next guide in this series Virtual 3D Shapes in Your Living Room.
If you enjoyed this quick introduction to ARKit, you'd probably want to find out more. You may want to check out my Swift courses on Pluralsight. I talk about design patterns and Swift best-practices, tips and tricks.
I have also collected a couple of links for you:
Introducing ARKit (WWDC 2017): https://developer.apple.com/videos/play/wwdc2017/602/ Official ARKit site: https://developer.apple.com/arkit Free and premium 3D models for your ARKit/SceneKit apps: https://free3d.com, https://sketchfab.com, https://www.turbosquid.com Blender, free 3D creation tool: https://www.blender.org
Advance your tech skills today
Access courses on AI, cloud, data, security, and more—all led by industry experts.
