Advanced Machine Learning Modeling in Azure ML Studio
In this guide, you will learn how to build and evaluate advanced machine learning models such as support vector machines and neural networks with Azure Machine Learning Studio.
Sep 15, 2020 • 10 Minute Read
Introduction
When dealing with complex data science problems, it is important for data scientists to understand advanced machine learning algorithms. Some real-life use cases include text characterization, classification of patients on the basis of biological attributes, image recognition, and stock market prediction. These advanced algorithms can handle complex data and are used across industries such as healthcare, banking, education, telecom, and retail, to name a few.
In this guide, you will learn how to build and evaluate advanced machine learning models such as support vector machines and neural networks with Azure Machine Learning Studio.
Data
In this guide, you will work with the Pima Indian diabetes dataset available in Azure Machine Learning Studio. This data originally comes from the National Institute of Diabetes and Digestive and Kidney Diseases. The dataset consists of several variables, such as the number of pregnancies the patient has had, their BMI, insulin level, age, and so on. You can have a look at this data here.
Start by loading the data.
Load and Explore the Data
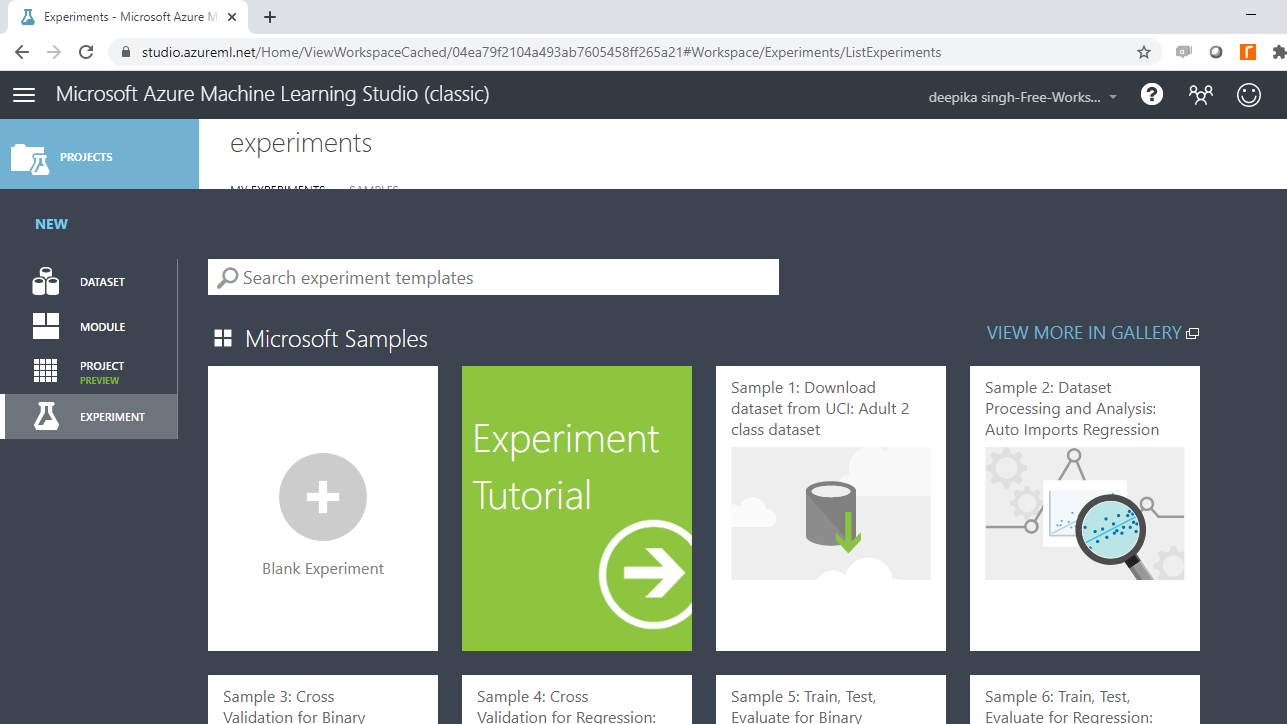
Once you have logged into your Azure Machine Learning Studio account, click on the EXPERIMENTS option, listed on the left sidebar, followed by the NEW button.
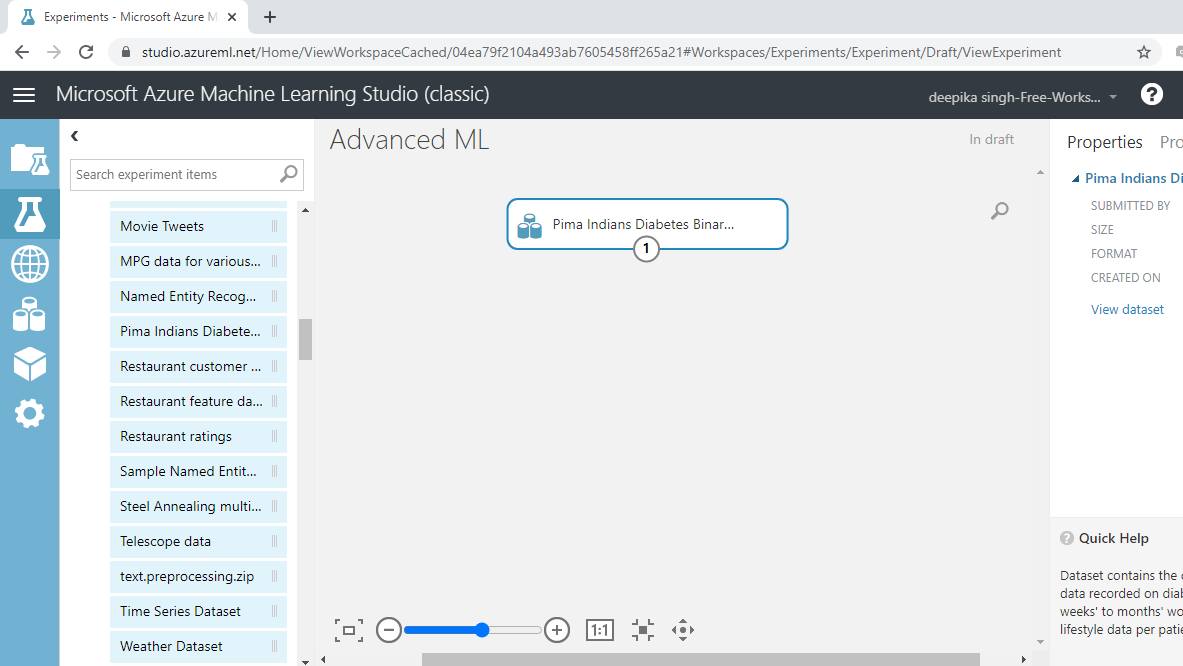
Next, click on a blank experiment and name the experiment Advanced ML. Under the Saved datasets, drag Pima Indians Diabetes dataset into the workspace.
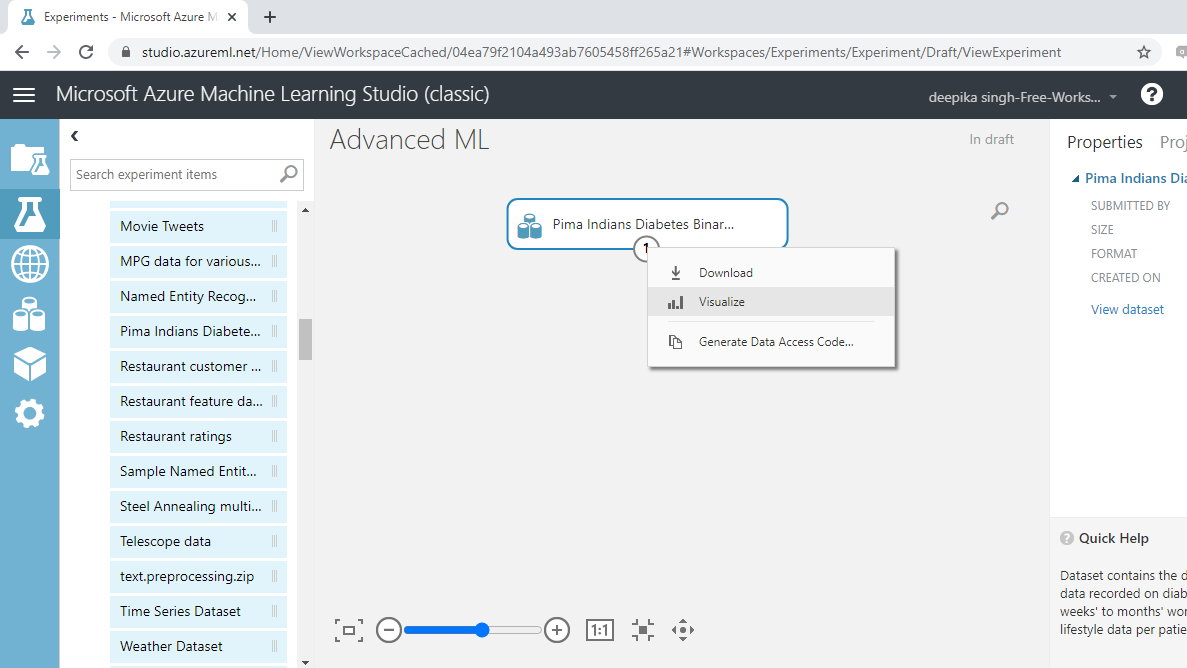
Once you have loaded the data, the next step is to explore it. To do this, right-click and select the Visualize option as shown below.
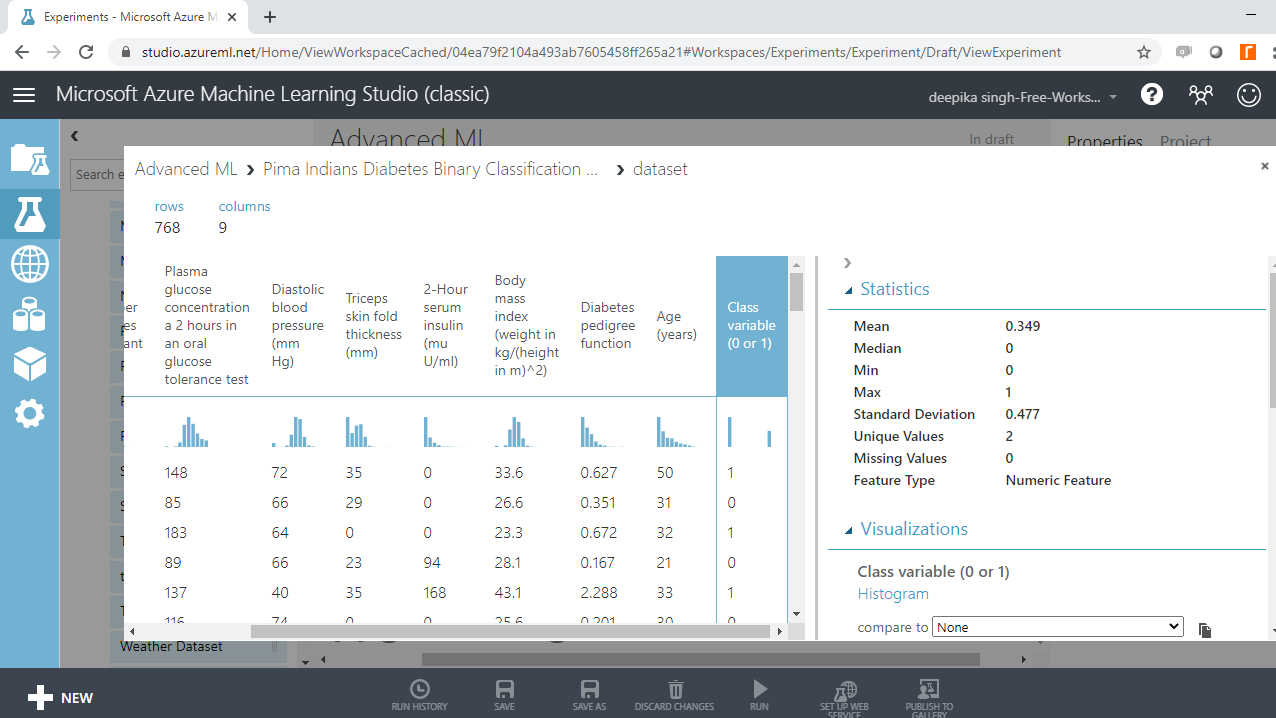
The data contains 768 rows and 9 columns. Select the different variables to examine their basic statistics. For example, the image below displays the details for the Class variable.
Support Vector Machine
Support Vector Machine (or SVM) is an advanced machine learning algorithm that can be used for both classification and regression machine learning problems. The SVM algorithm works by creating an n-dimensional feature space, called a hyperplane, which is used to analyze and recognize patterns in the input data. In this data, the model will create a hyperplane with the eight independent variables, and this hyperplane will divide the various classes of the target variable in the most distinct manner possible.
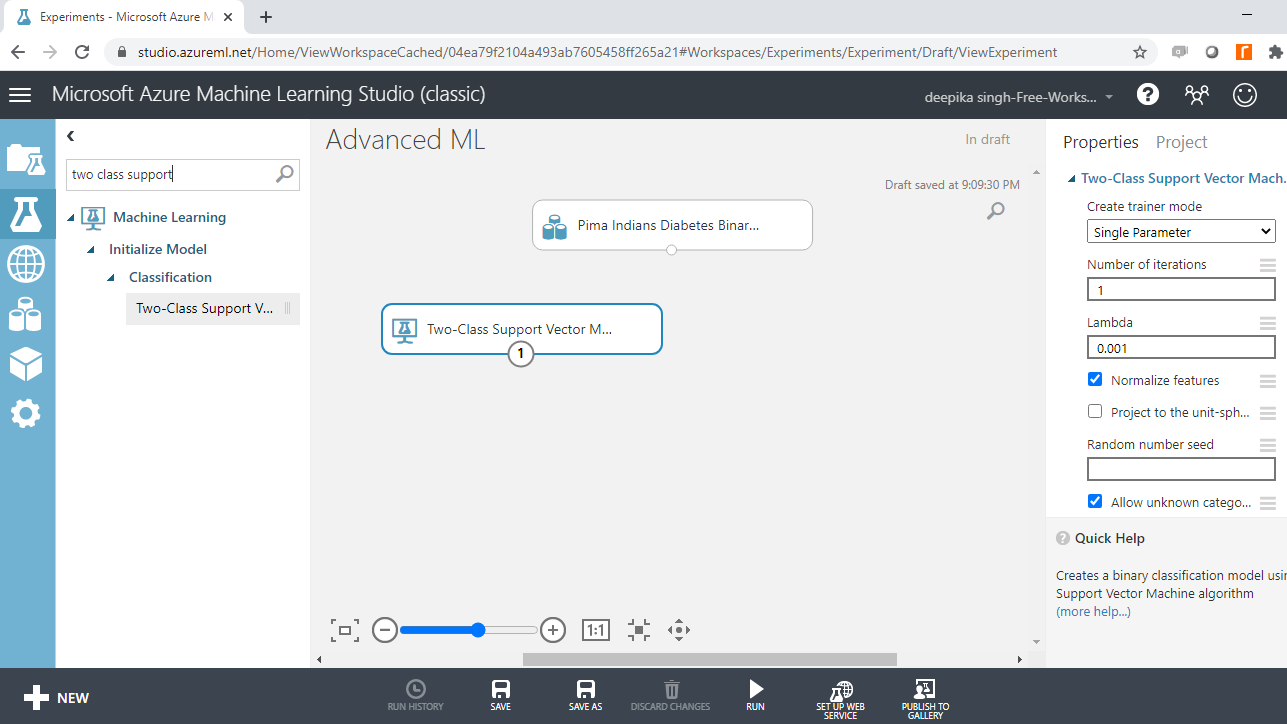
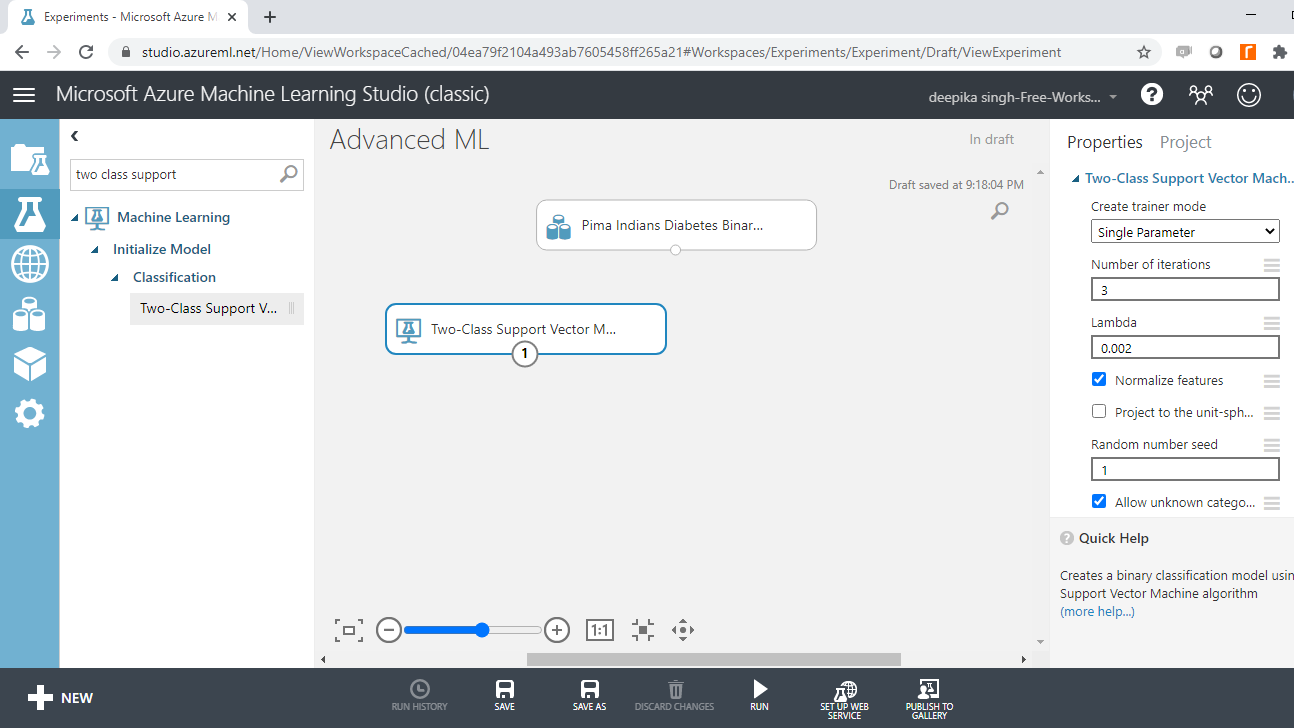
In Azure Machine Learning Studio, the Two-Class Support Vector Machine module is used to create the support vector machine algorithm. Start by searching and dragging the module into the workspace.
You have the module in the workspace, and the next step is to configure it. In Create trainer mode, select the Single Parameter option that is used when you know how you want to configure the algorithm. The second parameter is Number of iterations, which indicates the number of iterations used when building the model. Set this value to 3. The Lambda value is used to tune the model parameter. Select the Normalize features option, which will normalize the features. Type an integer value in Random number seed to ensure reproducibility.
You have set up the model, and the next step is model validation. One popular cross-validation technique is k-fold cross-validation. In k-fold cross-validation, the data is divided into k folds. The model is trained on k-1 folds with one fold held back for testing.
For example, if k is set to ten, then the data will be divided into ten equal sections. After that, the model will be built on the first nine sections, while the evaluation will be done on the tenth section or fold. This process gets repeated to ensure each fold of the dataset gets the chance to be the held-back set. Once the process is completed, you can summarize the evaluation metric using the mean or standard deviation.
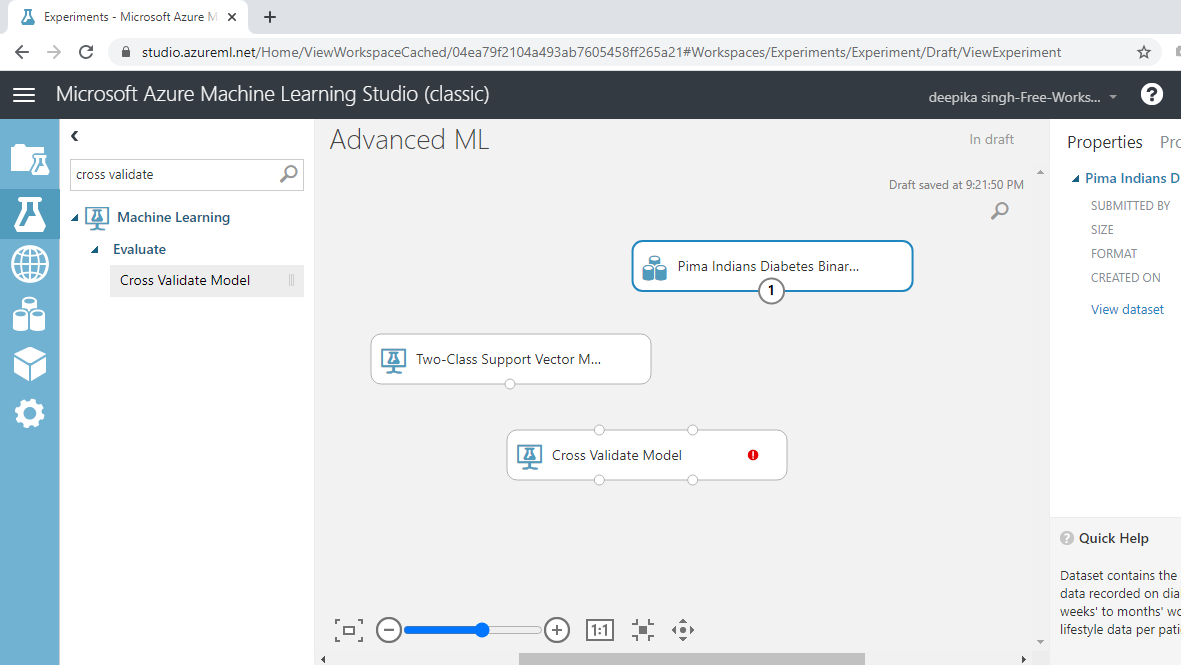
The Cross Validate Model module performs this task in Azure Machine Learning Studio. Search and drag Cross Validate Model module into the workspace as shown below.
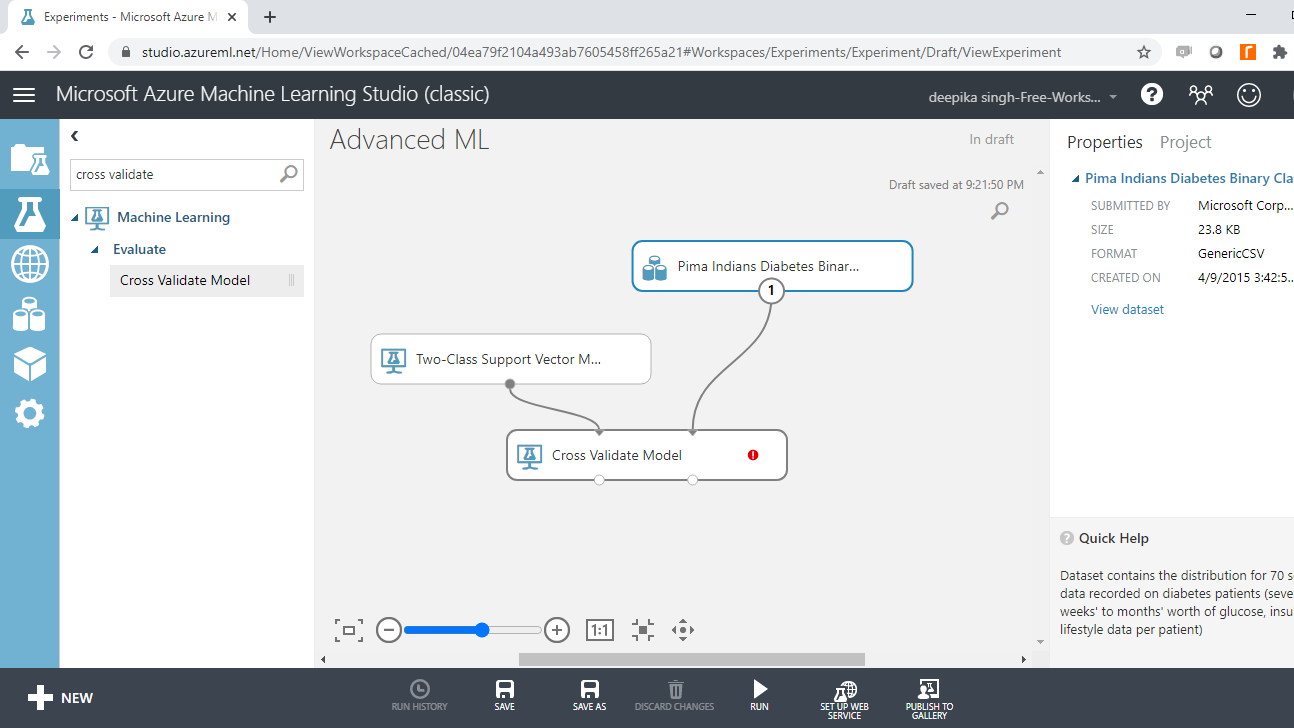
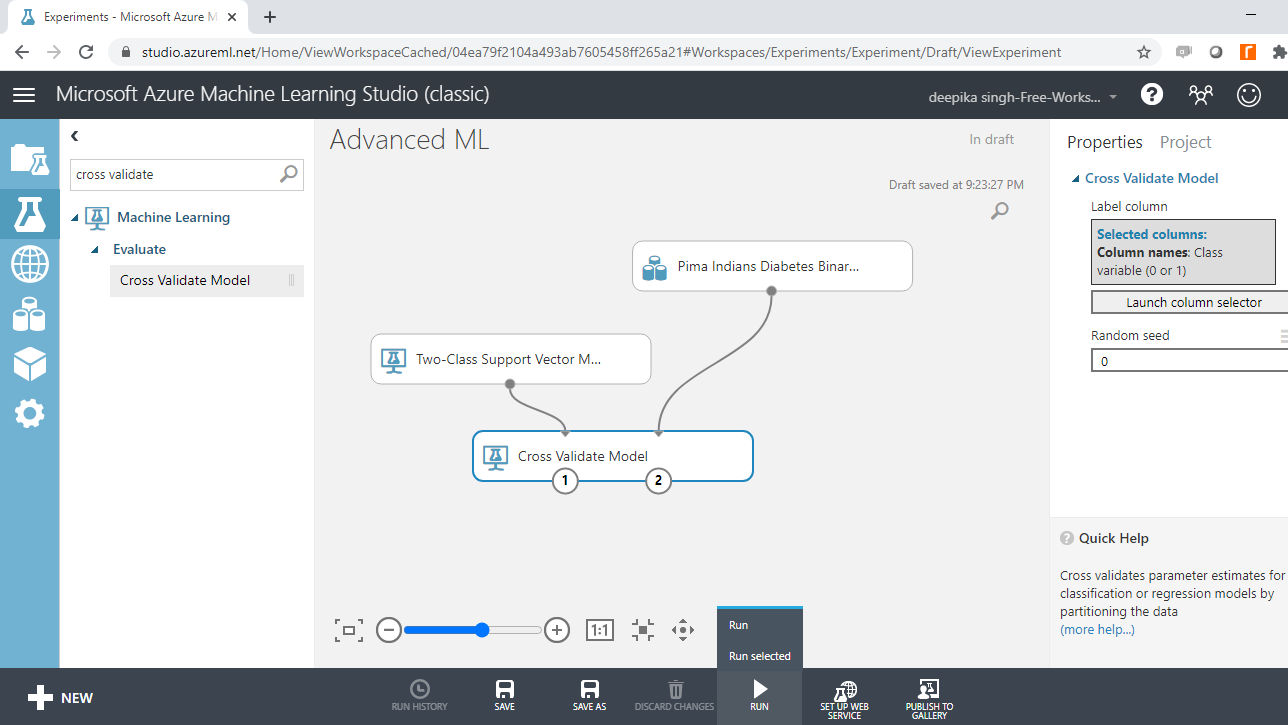
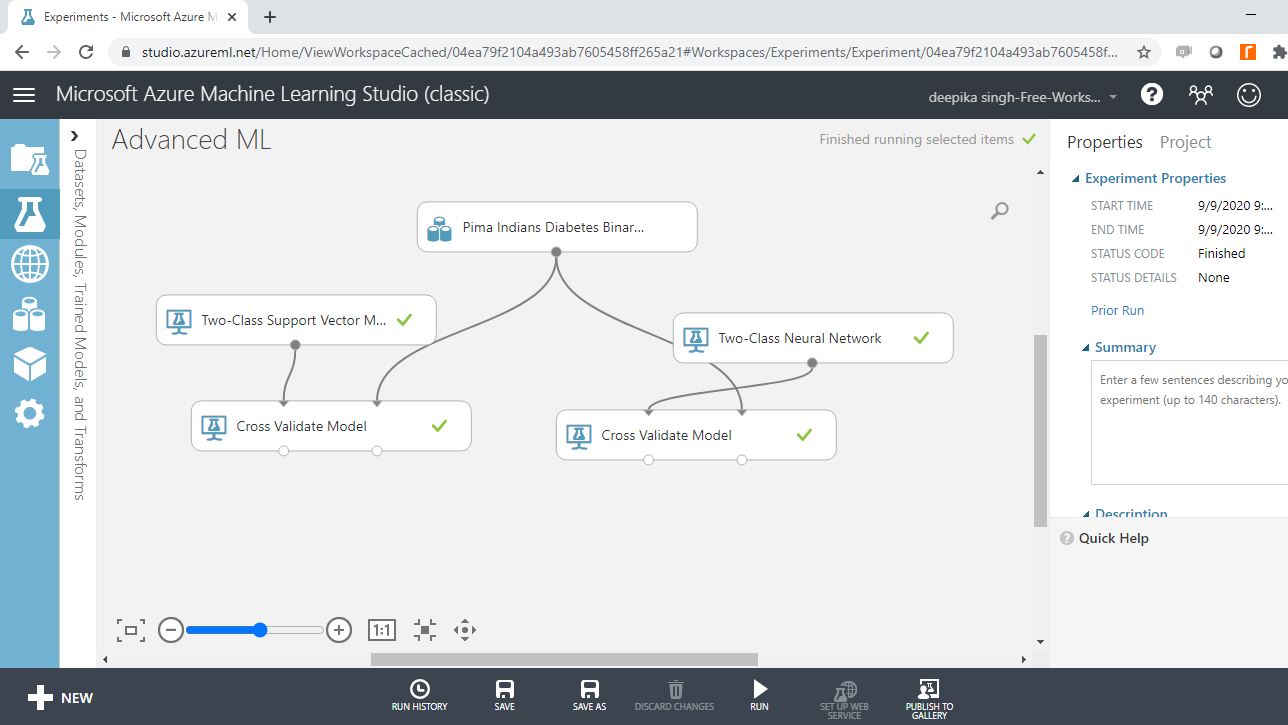
You have loaded the modules, and the next step is to connect them. This is shown below.
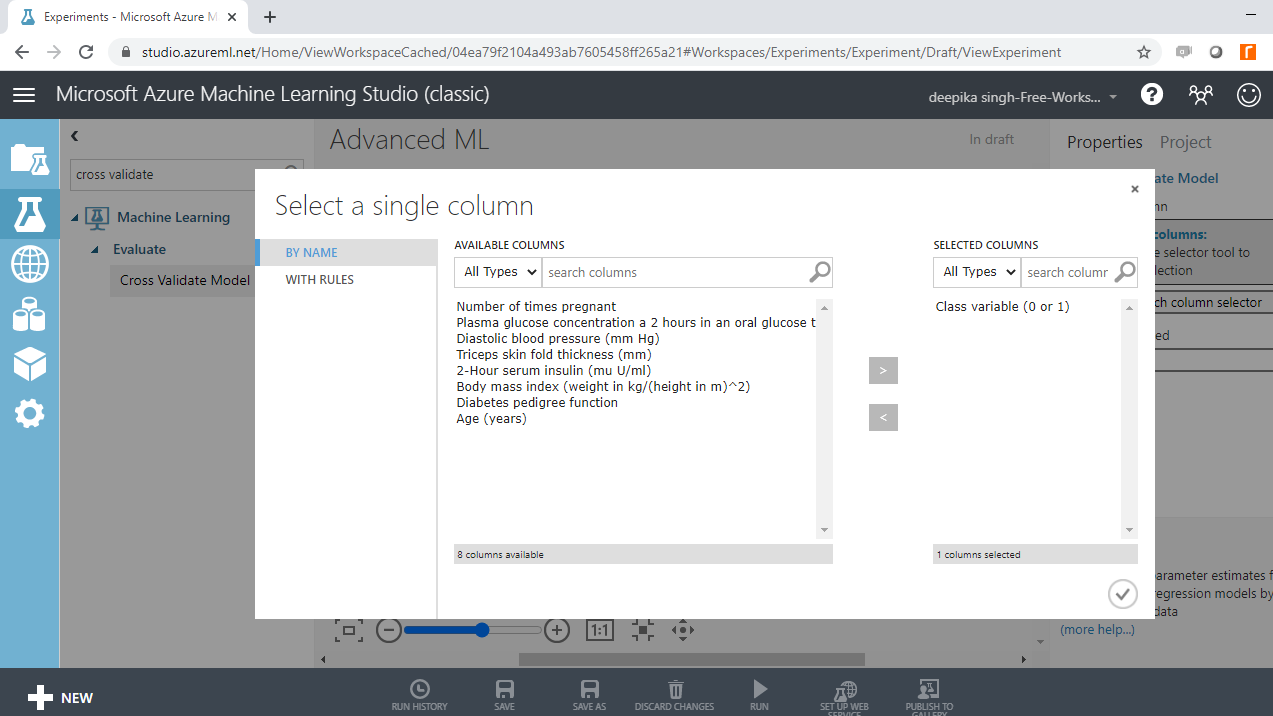
You can see the red flag next to Cross Validate Model, which needs to be corrected. Click on the Launch column selector option, and select the target variable, Class variable, as shown below.
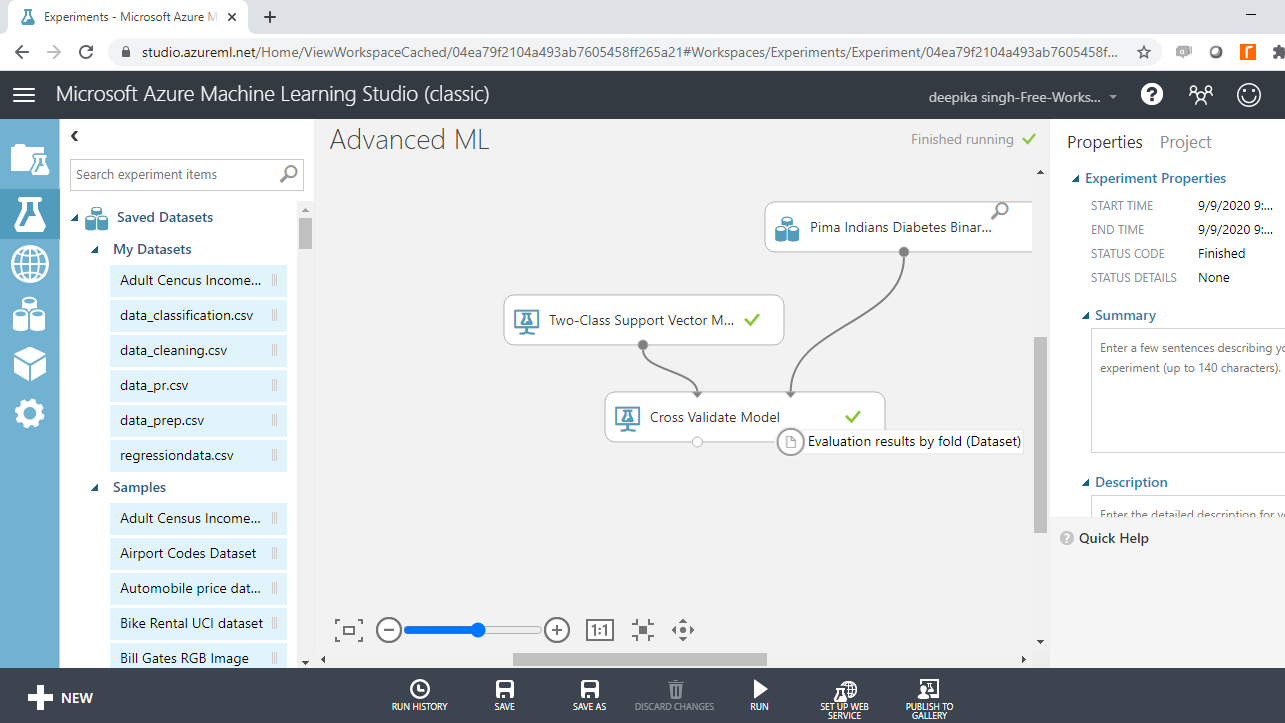
Run the experiment.
Model Evaluation
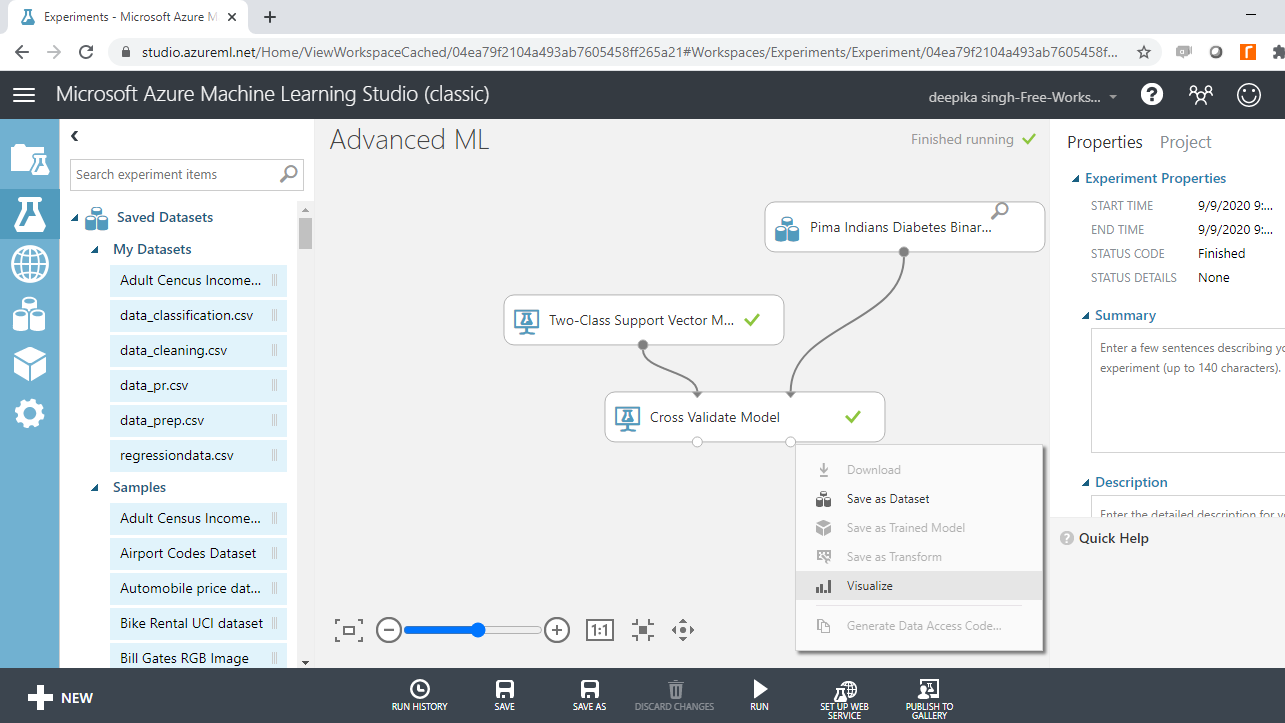
Once the model is built, the next step is to understand the model outcomes. The model evaluation results can be viewed in the right-output port, which shows the Evaluation results by fold (Dataset).
Right-click and select the Visualize option.
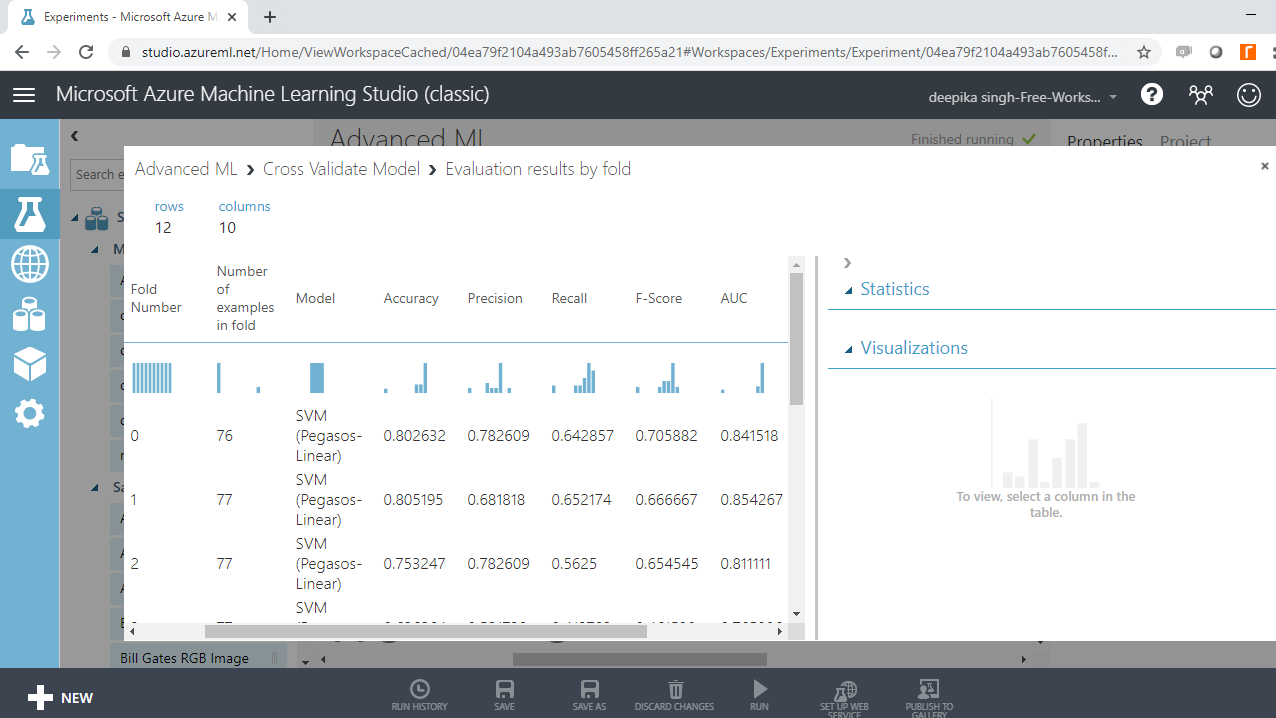
The following output will be displayed to show the evaluation results by folds. There are ten folds, zero through nine, and for every fold you have results across several metrics such as accuracy, precision, recall, and so on.
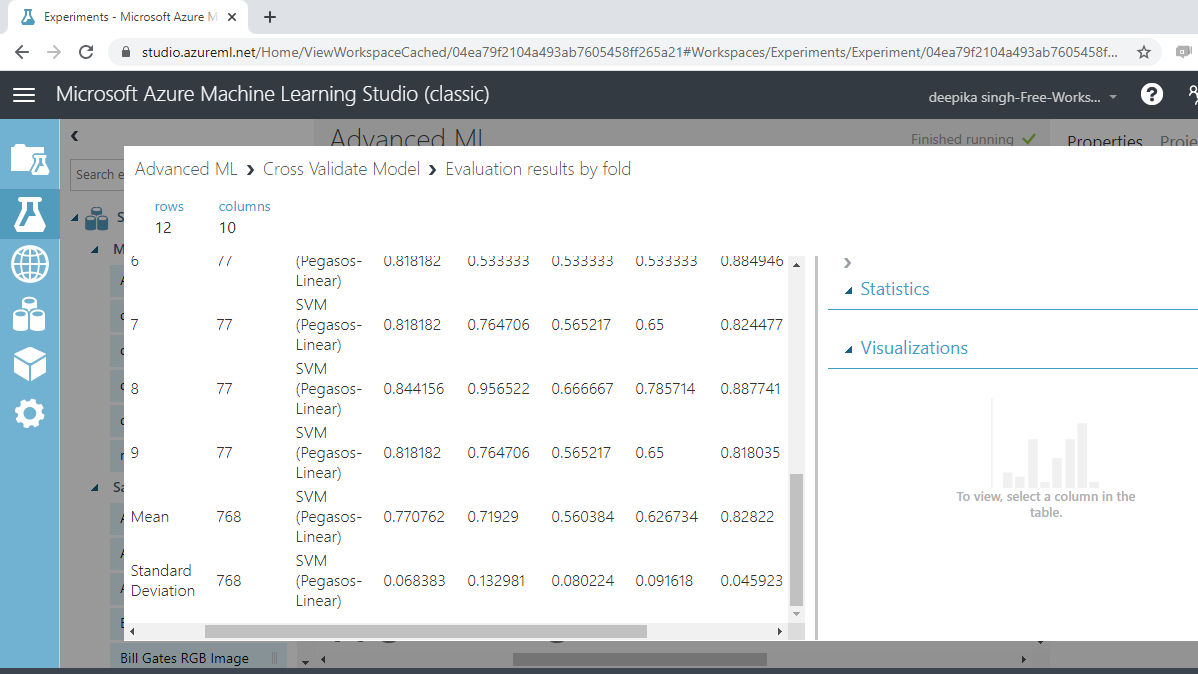
If you scroll downwards, you will see the mean results across the ten folds.
From the above output, you can infer that the mean accuracy, F-score, and AUC value for this support vector machine model are 0.77, 0.63, and 0.83, respectively.
Neural Network
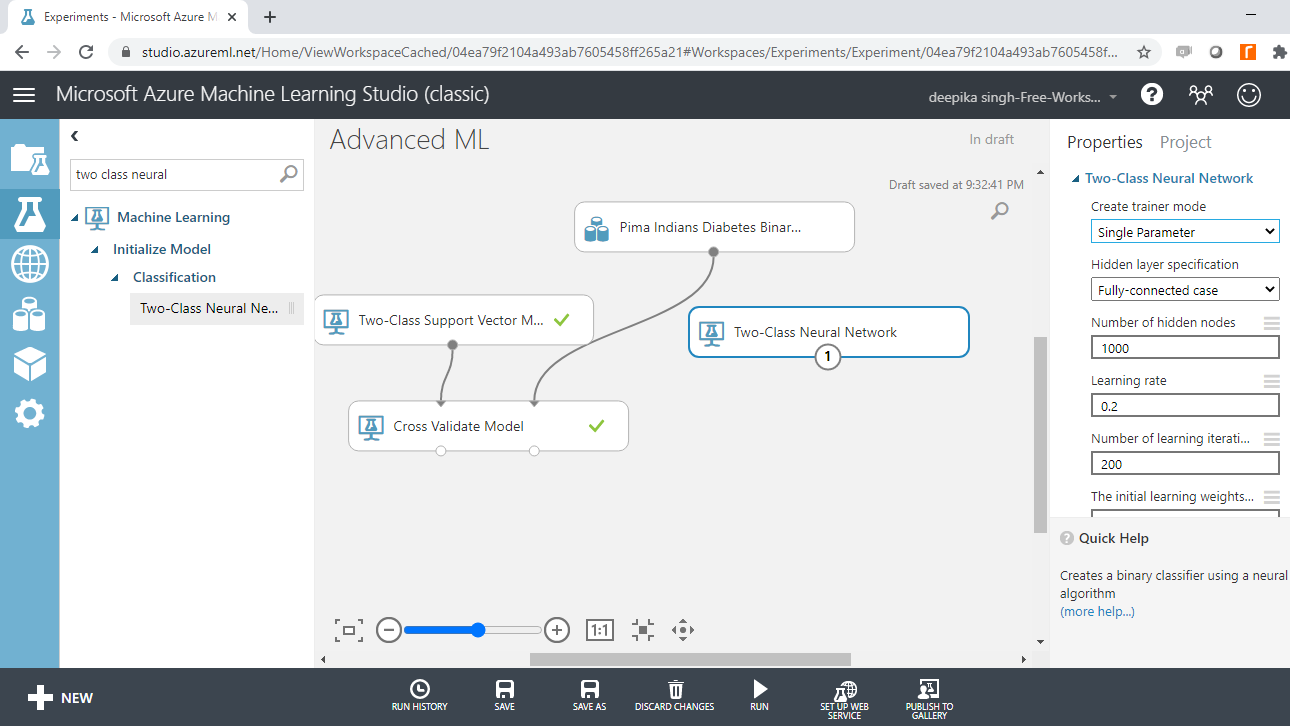
The Two-Class Neural Network module in Azure Machine Learning Studio is used to train the neural network algorithm for binary classification.
A neural network is a set of interconnected layers used to solve advanced machine learning and artificial intelligence problems. Neural networks often outperform traditional algorithms because they have the advantages of non-linearity, variable interactions, and customization. For the data used in this guide, this algorithm creates a network of input, output, and hidden layers to make predictions of the target variable, Class variable.
Search and drag the module into the workspace.
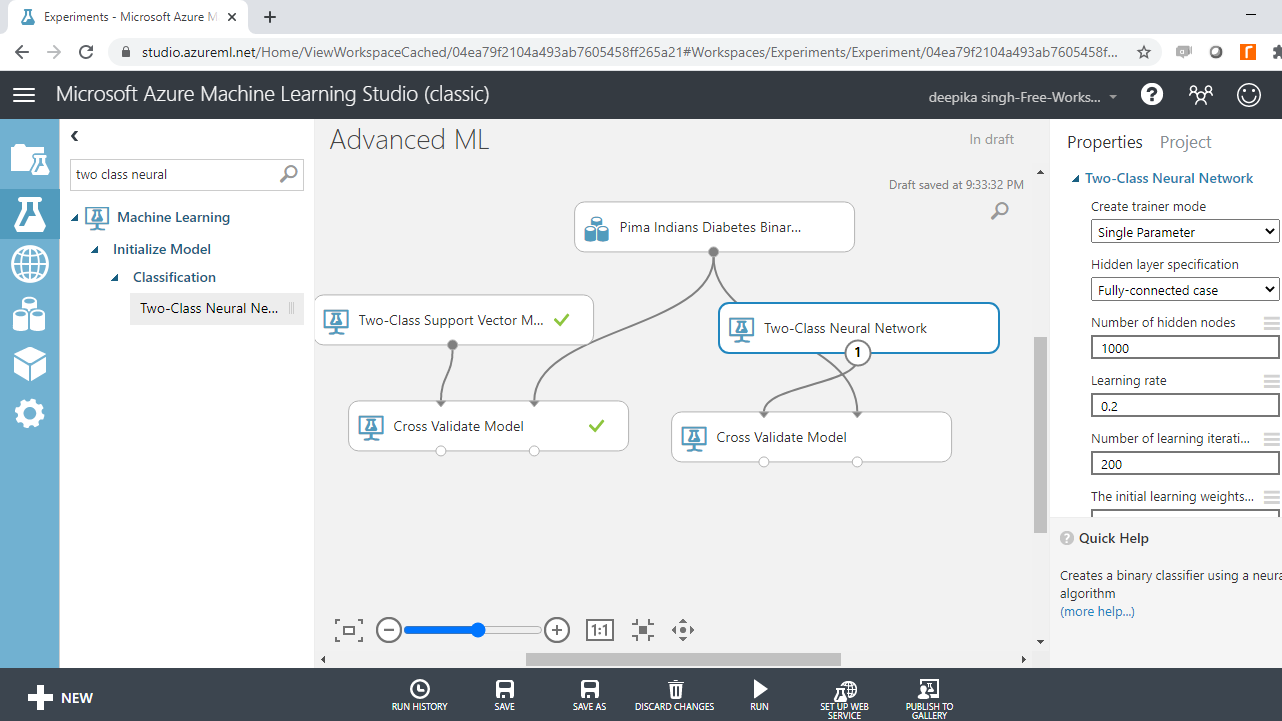
The next step is to drag the Cross Validate Model module into the workspace and connect the modules as shown below.
Run the experiment. If it is successfully run, all the modules will have a green tick.
Model Evaluation
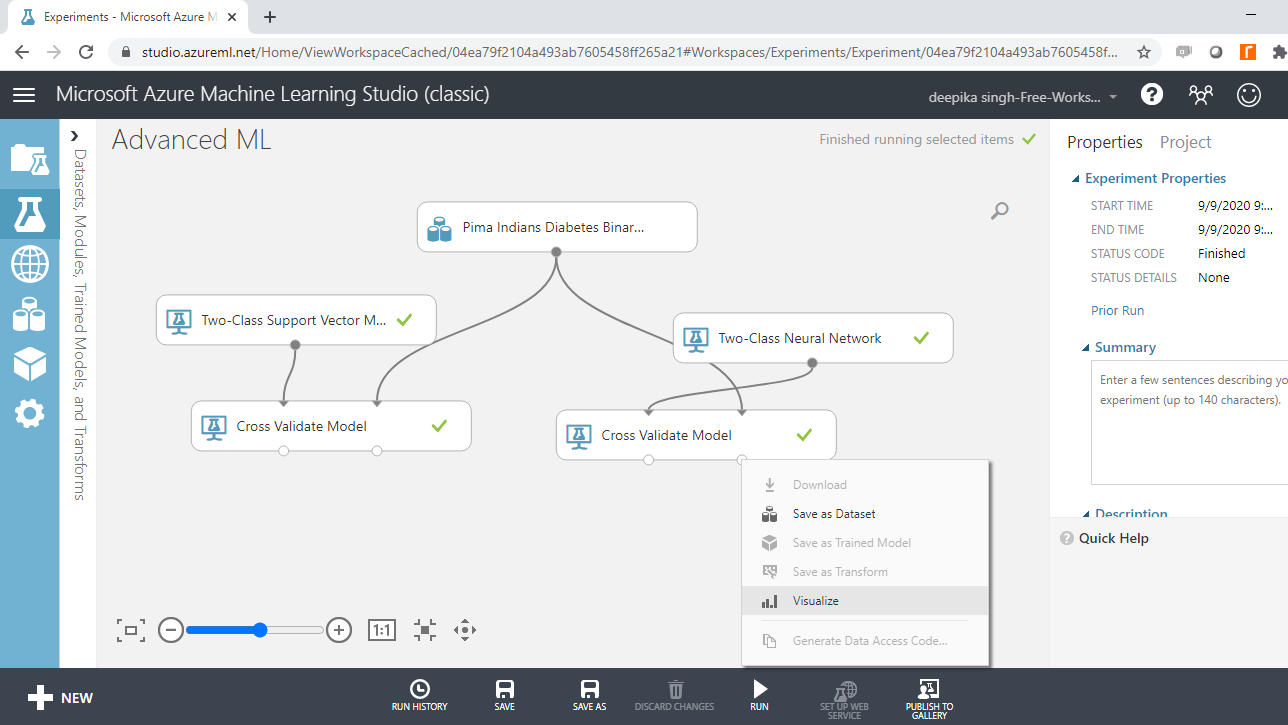
To evaluate model performance, right-click and select the Visualize option.
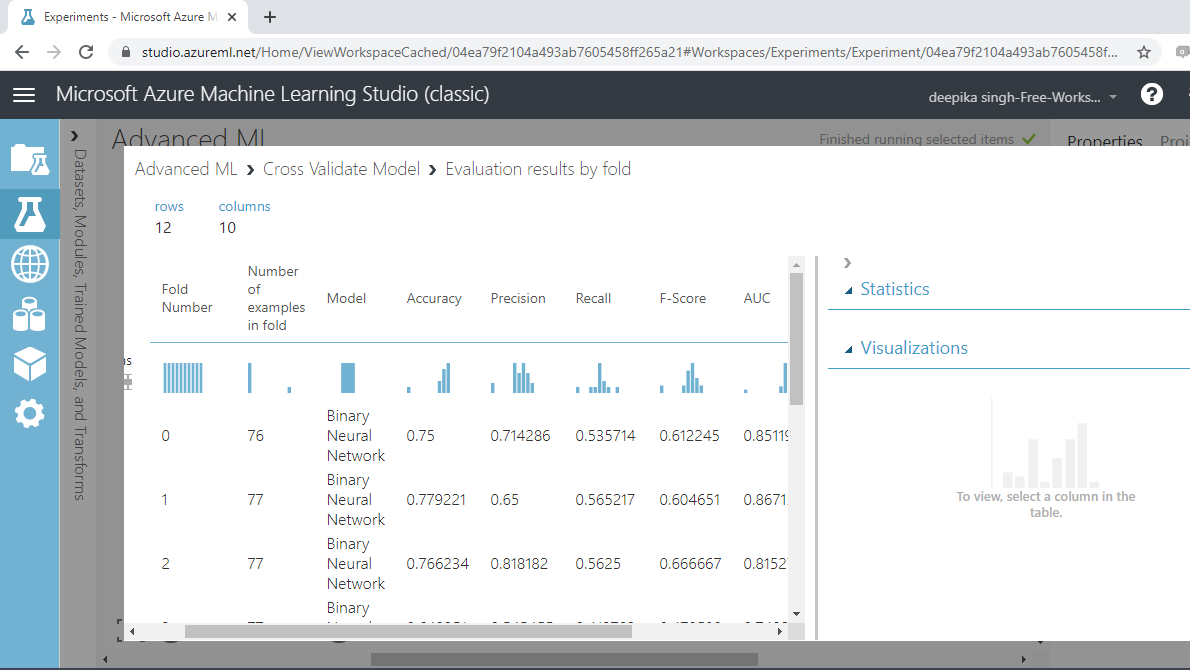
As previously discussed, there are ten folds, and evaluation results by folds are displayed.
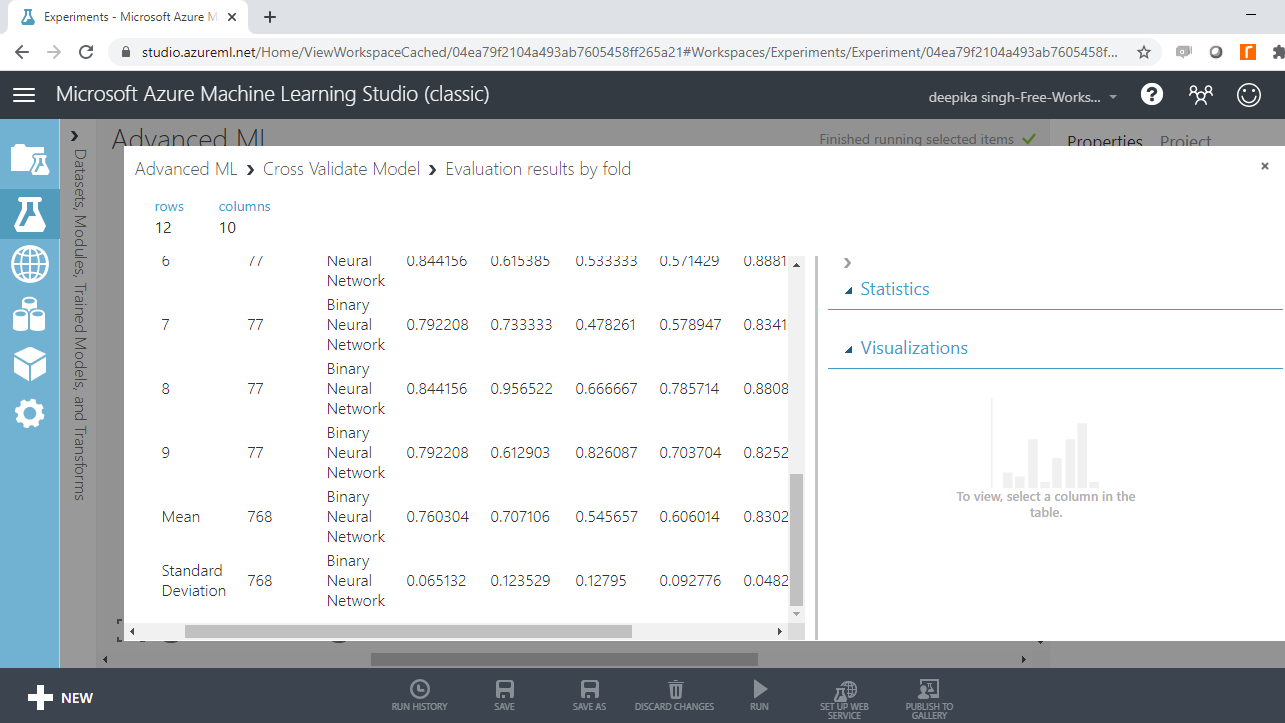
If you scroll downwards, you will see the mean results across the ten folds.
From the above output, you can infer that the mean accuracy, F-score, and AUC value for the neural network model are 0.76, 0.60, and 0.83, respectively.
Comparison of the Two Algorithms
Both the machine learning algorithms performed well, but the support vector machine algorithm performed marginally better than the neural network model across the evaluation metrics of accuracy, F-score, and AUC value.
Conclusion
In this guide, you learned the basics of two advanced machine learning algorithms—support vector machine and neural network. You also learned how to configure and evaluate the two algorithms in Azure Machine Learning Studio.
To learn more about data science and machine learning using Azure Machine Learning Studio, please refer to the following guides:
Advance your tech skills today
Access courses on AI, cloud, data, security, and more—all led by industry experts.

