Creating and Using Widgets in Android Studio
Learn how to creat and use android widgets in this Android Studio tutorial. Up your Android widget development skills with this free guide!
Dec 15, 2018 • 8 Minute Read
Intro
This guide will take you through creating and using widgets in Android Studio. You'll walk through building an application that changes the background color of our application and alters the text of a TextView object when the user clicks a Button object displayed on the screen.
Setup and Basics
Refer to Sudheer Kumar’s previous tutorial on Android Studio for instructions regarding Android Studio setup and the basic “Hello World” application.
Widgets
Widgets enable users to interact with an Android Studio application page. There are various kinds of widgets, such as Buttons and TextViews.
To see all the widgets at your disposal, create a new application project called “Widgets” and select "empty activity". Call your activity “MainActivity”.
There are two components of each Android activity: the XML (Extensible Markup Language) design (the beauty) and the Java text (the brains).
On the activity_main.xml page, you can see the full widgets palette underneath the various layout options.
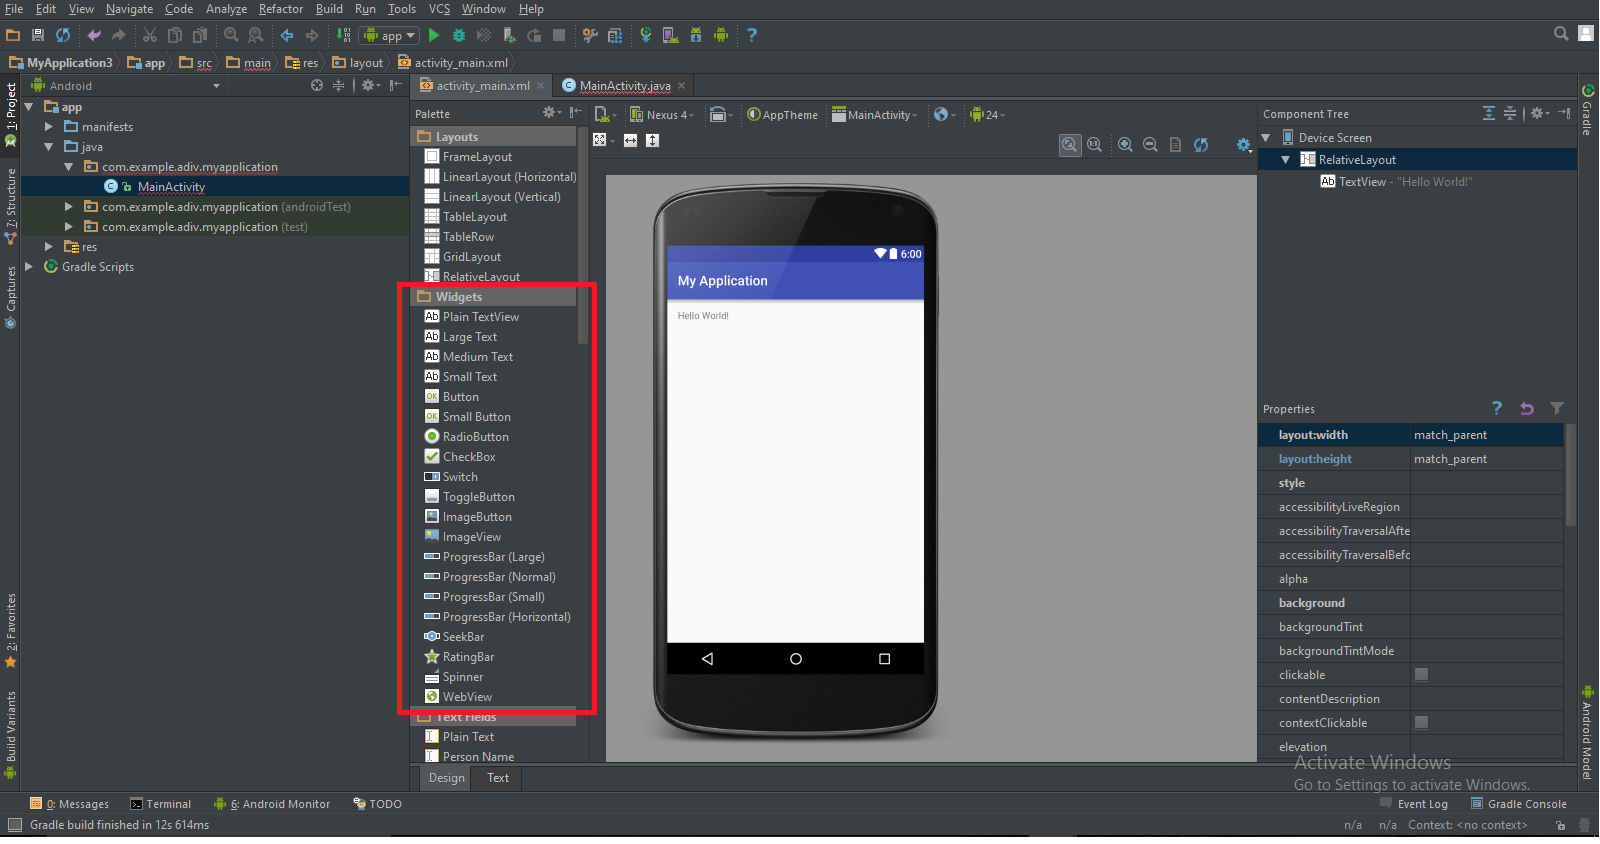
As you can see, there are 20 widgets available for you to use. In this guide, we’ll discuss TextViews and Buttons, which are probably the most common widgets in Android development.
Creating a Widget
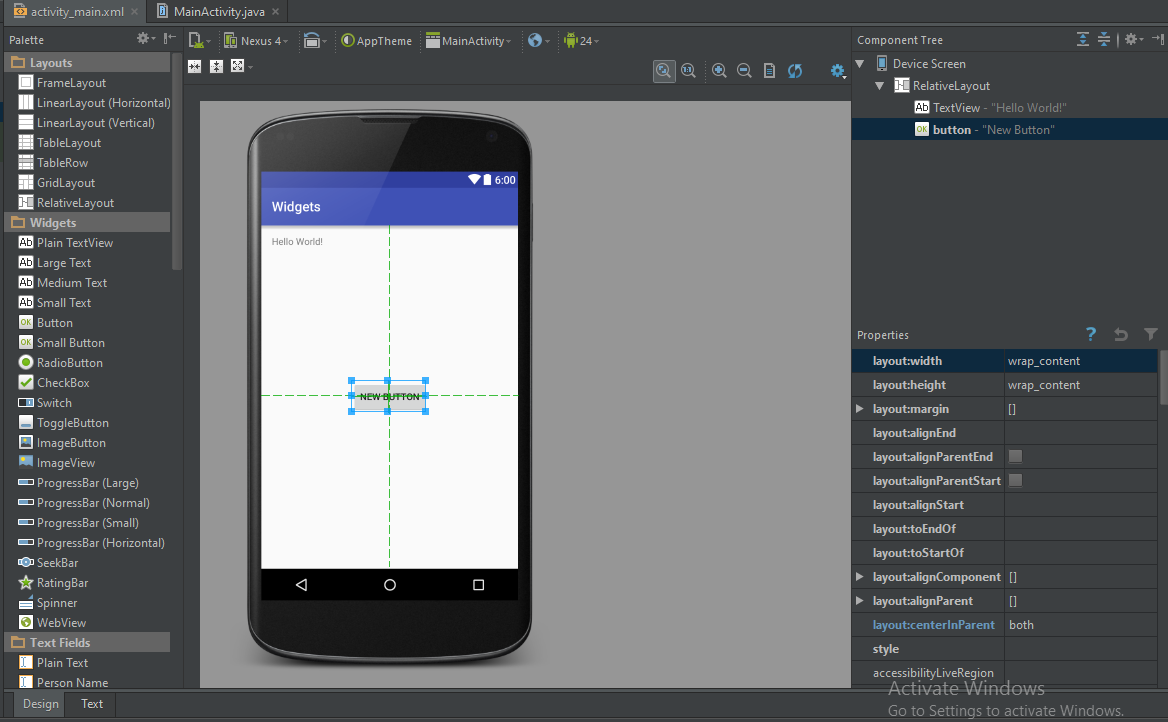
Your default activity comes with a TextView containing “Hello World”. So you’ve technically created a widget before this tutorial without even knowing it!
To create another widget, we simply drag and drop the desired widget onto the desired location on the Android application page.
For example, let’s create a Button at the center of our page. Android Studio will help us align our widget automatically. Keep in mind that we can also align the widget by changing its properties, which appear on the XML text page.
Changing Button Text
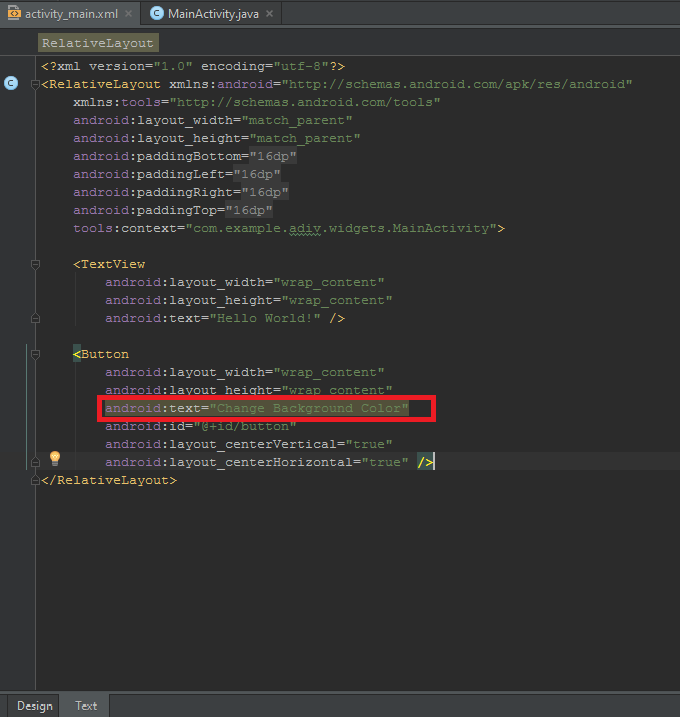
By default, the Button will have “New Button” as its text element. You can change the Button’s text by either double-clicking its text and modifying it on the design page or by scrolling through the Button properties on the right and finding the text property. Lastly, you can change its text by switching to the XML text tab and modifying its android:text property.
Let’s make our button say “Change Background Color” by changing the Button properties on the XML text page to read android:text = “Change Background Color”
String Resources
You will find that the code is highlighted in yellow after you make the change. Don’t worry, your application is not broken.
You get a warning because the string we just inputted (“Change Background Color”) is a hardcoded string that needs to be made into a string resource. String resources are stored in the strings.xml file in the res folder of your application. Any time that you hardcode a string, Android Studio will point out a string resource error.
Fix this error by clicking the yellow light bulb next to the hardcoded string and selecting “Extract String Resource”. Choose your resource name, then click the “OK” button to save the resource.

Widget: onClick
If you switch over to the Design page, select the Button widget that we created, and scroll through its properties, you’ll find the onClick property. onClick allows you to choose a Java method that the application will call once the Button is clicked.
Let’s change the onClick properties of our Button to call the method “changeColor”. Keep in mind that we have to create the changeColor() method in our Java Class for this onClick command to work.
Widget: changeColor(View view)
Component IDs
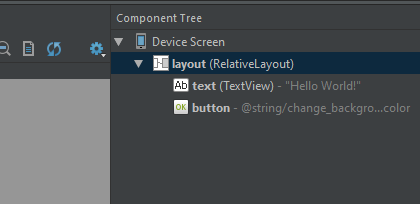
To have our changeColor method function, we’ll need to assign IDs to our Layout and our TextView. By default, our “Hello World” TextView object does not have an ID and neither does our Layout (which is a RelativeLayout, meaning that it allows widgets and other components to be aligned relative to each other).
Select the TextView in the top right box, which is titled “Component Tree”. Scroll through its properties until you see “id”. Change its ID to “text”.
Do the same thing for the RelativeLayout component, but set its ID to “layout”.
You should be able to see the corresponding ID next to each component in the Component Tree.
Creating the Actual Method
Let’s move onto the actual changeColor method. Go to your MainActivity.java tab. In this tab, you’ll see a method called onCreate. This runs whenever the app first starts up.
We’ll create our “changeColor” method right after the onCreate. Add the following to your MainActivity.java class:
      public void changeColor(View view)
{
  RelativeLayout layout = (RelativeLayout)findViewById(R.id.layout);
  TextView text = (TextView)findViewById(R.id.text);

  layout.setBackgroundColor(Color.RED);
  text.setText(R.string.PageIsRed);
}
Our method will turn the color of our layout to red once the button is clicked. It will also set the TextView object to say “Page is Red”.
For the beginner to Android Studio, there are many things in the code block above that you should notice.
First, check out our method signature: public void changeColor(View view). Android requires onClick methods to take a View as a parameter; failure to do so can cause your app to crash.
Next, notice the findViewById() method. This is the standard method for accessing Views (or the objects on the application screen) for use in our application. As you can see, we need to cast the resulting view to RelativeLayout. This casting is necessary because findViewById returns a View; Java polymorphism does not allow RelativeLayout (which is a View) to generalize to all types of Views.
Once again, you will also see the yellow warning regarding string resources when you use text.setText("Page is Red"). Handle this warning in the same way we handled the Button text string resource warning and you’ll get a string resource just like mine (R.string.PageIsRed).
Testing the Application
Run the application on an emulator or external debuggable Android device. Clicking the button changes the color of the layout and alters the TextView as well. Currently, once the user clicks the button, the widget becomes useless. Try out the bonus activities to make our button more useful!
Conclusion
Clearly widgets are integral to Android development. Just think of the numerous times that you clicked a button on an Android application or saw text on the app page. But don't forget that there are many more widgets to use; learning to use various widgets can help you create more complete, user-friendly applications.
Bonus Activities!
In case the simple exercise above wasn’t enough to satisfy your Android cravings, try out one of the following side projects involving the widgets that we used:
- Make the button change the layout background to a random color
- Create another button that resets the color of the layout
- Set the text to automatically match the layout color
If you can complete the activities above mostly on your own, then you are no longer a beginner when it comes to widgets!
I hope you enjoyed this beginner tutorial on Android Studio and widgets. Stay tuned for more Android!
Hit the “thumbs up” icon at the top right if this guide helped you.
Advance your tech skills today
Access courses on AI, cloud, data, security, and more—all led by industry experts.
