Boost Android Development Skills To Produce Quality Apps
In this tutorial, learn to implement UI, UX, code quality, security, and third party libraries, and to boost the quality of application with minimal efforts.
Dec 15, 2018 • 27 Minute Read
Introduction
Android OS has several releases over the past 2 years. These updates have introduced astonishing features thus causing several significant functionalities to become deprecated. This technological evolution has led to Android development challenge of keeping an app compatible with the different levels of Android OS, while keeping UI and UX elegant.
Throughout this tutorial, You will learn about how you can implement UI, UX, code quality, security, and third party libraries, along with tips and tricks to boost the quality of application with minimal efforts.
Quick Start Guide
The following guide will give you an instant notion about the basic android development terminologies in simplest terms, that is being used throughout this tutorial.
- View: A View represents a graphical rectangular on the screen. Every GUI component like Button, TextView, EditText are inherited from View class.
-
ViewGroup: A ViewGroup is a layout container, which is responsible for positioning multiple views on the screen. There are various decedents of ViewGroup like LinearLayout, RelativeLayout, ConstraintLayout etc, to position child views in linear or relative fashion.
-
Activity: An Activity is a single screen view that is visible to user. An application can consist multiple Activities for separate functionalities, for e.g splash, Login , signUp etc.
      // To create activity, a class must extend Activity or AppCompatActivity class
 // AppCompatActivity is used to support ActionBar and design features for older version
public class MainActivity extends AppCompatActivity {

    @Override
    protected void onCreate(Bundle savedInstanceState) {
        super.onCreate(savedInstanceState);
        // static view for MainActivity
        setContentView(R.layout.activity_main);
    }
}
Using a backward compatibility component from a support package requires additional dependencies, which will result in increasing the APK size.
-
Layout XML file: XML is a tag based file which represents a static layout design view, which can be embedded into activities. A layout file can be attached to an Activity by calling setContentView(int) method.
A single XML file can be attached with multiple activities and there are many types of XML files, to design menu, shapes, selectors or to store global constant values.**
The design can also be created at run time (while the app is running) using Java or Kotlin code. This is helpful when you have no idea about the number of views to be drawn on the screen in dynamic environment.
-
Application: An application is a single entity which represents the whole app. It is the first instance to be initialized by Android OS, so often being used to declare global constants or configure services like crash-reposting, analysis, dependency injections which are required to run the app.
You can provide your own implementation by creating a subclass and specifying the fully-qualified name of this subclass as the "android:name" attribute in your AndroidManifest.xml's tag.
-
LifeCycle: LifeCycle corresponds to a series of methods which will be invoked by the Android OS according to the current state of the process. LifeCycle methods are described below:
      public class MainActivity extends AppCompatActivity {

	 // called only once when activity is created
	 // so optimal place to initialize GUI component and services
	 @Override
     protected void onCreate(Bundle savedInstanceState){...};

 	// called everytime when user comes to this activity
	 @Override
     protected void onStart(){...};

 	// called when activity is completely visible
	 @Override
     protected void onResume(){...};

 	// called when activity is partially visible
 	// covered by some dialog
	 @Override
     protected void onPause(){...};

     // called when current activity is covered by another activity
     // when user go to next activity
     protected void onStop(){...};

 	// called when activity's object is destroyed and no longer accessible
 	// when user press back-press button
	 @Override
     protected void onDestroy(){...};
 }
These methods are invoked in a serial order in normal scenarios. There are many other methods, which can be overridden when required, as shown in below image.

-
Context : A context is a special object which is used to access the resources and files (assets, XML constants) contained in application. Activities has their own context and can be used as YourActivityName.this which is internally initialized by Application object.
getContext() will give current host activity's context and getApplicationContext() will give the context of the application. These methods are not accessible in normal classes but they can be passed as values.
-
Manifest : manifest.xml contains information about app which is required by android OS to grant permission to access resources like storage, Internet, SMS and registered activities etc. Every activity or customize application class (if there is any) should be registered in manifest.xml.
A boilerplate manifest file
      <?xml version="1.0" encoding="utf-8"?>
<manifest xmlns:android="http://schemas.android.com/apk/res/android"
	package="com.pavneet.android.boost">

 	<!--needs to be added to get access to Internet -->
	<uses-permission android:name="android.permission.INTERNET"/>

    <application
 	  <!--app icon-->
        android:icon="@mipmap/ic_launcher"
 	  <!--app name-->
        android:label="@string/app_name"
 	  <!--aa-->
        android:roundIcon="@mipmap/ic_launcher_round"
 	  <!--support for right to left languages-->
        android:supportsRtl="true"
 	  <!--XML based theme file-->
        android:theme="@style/AppTheme">

    <!--Register Activity, declare this activity as launcher using intent-filter
    mean first activity to be opened, on click of app icon-->
        <activity android:name=".MainActivity">
            <intent-filter>
                <action android:name="android.intent.action.MAIN" />

                <category android:name="android.intent.category.LAUNCHER" />
            </intent-filter>
        </activity>

        <activity android:name=".AnotherDefaultActivityYetToBeCreated"/>

    </application>

 </manifest>
-
Gradle: The build system used to download dependencies, tools and to manage application configuration settings to build project.
- There are two gradle files:
- Project : which is used to configure project and sub-projects
- Module : which is used to configure app, dependencies,SDK versions etc.
- There are two gradle files:
-
R.java: A final Java class file that consists of static final int constants and array constants. Every file or unique id (+@id/name attribute of views), is given an int value by the gradle and these constants are used to access those components and files in project.
- This file is created under app\generated\source\r\debug\your_package_name\R.java directory and should never be modified by hand.
- The R file is especially useful when trying to get access views in code. For example, the View method findViewById() takes in an R.id value based on the component to be selected, such as R.id.my_button.
Design
An Android application should provide a simplified, engaging interface with meaningful motion like elevation, ripple, and material design.
Android 5.0 Lollipop introduced the concept of Material design, which can also be implemented on older versions by using the Android Design library which provides material design components to make an elegant app.
Steps to include design library as dependency
-
Open build.gradle (module)
-
Add the following dependency inside the dependencies block
compile 'com.android.support:design:27.0.2'
or use implementation for Android studio 3.0. Note that the version number 27.0.2 may differ in to future releases:
implementation 'com.android.support:design:27.0.2'
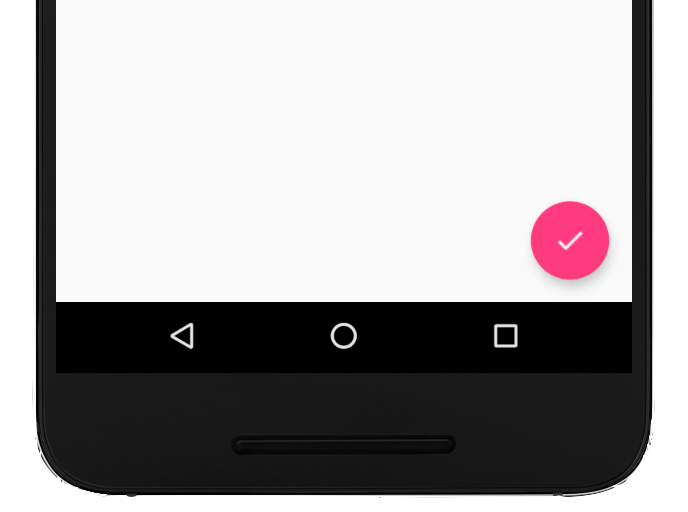
A FloatingActionButton (fab) is a round button with an icon, which denotes a quick primary action on the interface such as:
- Adding a Note or alarm
- Sending an email or text
Snackbar
Snackbar appears from the bottom for a short time then disappears. It shows a brief message along with an action button to perform corresponding task. Using the SnackBar is best when trying to:
- Undo the item deletion
- Display an exit action when back button pressed

Move up the Fab when SnackBar appears
If fab button is at the bottom of the screen, you can coordinate with the SnackBar to move the fab up when the SnackBar appears. This is done by using coordinator layout as the root ViewGroup.
FoatingAndSnakBarActivity.Java
      package com.pavneet.android.boost;

import android.os.Bundle;
import android.support.design.widget.FloatingActionButton;
import android.support.design.widget.Snackbar;
import android.support.v7.app.AppCompatActivity;
import android.support.v7.widget.Toolbar;
import android.view.View;

public class FoatingAndSnakBarActivity extends AppCompatActivity {

    @Override
    protected void onCreate(Bundle savedInstanceState) {
        super.onCreate(savedInstanceState);
        setContentView(R.layout.activity_foating_and_snak_bar);

        FloatingActionButton fab = findViewById(R.id.fab);
        fab.setOnClickListener(new View.OnClickListener() {
            @Override
            public void onClick(View view) {
                Snackbar.make(view, "Replace with your own action", Snackbar.LENGTH_LONG)
                        .setAction("Action", new View.OnClickListener() {
                            @Override
                            public void onClick(View view) {
                                // sncakbar button clicked
                            }
                        }).show();
            }
        });
    }
}
By default the width of SnakBar is same as screen, so view here should be a child of your ViewGroup to retrieve the width internally.
activity_foating_and_snak_bar.xml
      <?xml version="1.0" encoding="utf-8"?>
<android.support.design.widget.CoordinatorLayout xmlns:android="http://schemas.android.com/apk/res/android"
    xmlns:app="http://schemas.android.com/apk/res-auto"
    xmlns:tools="http://schemas.android.com/tools"
    android:layout_width="match_parent"
    android:layout_height="match_parent"
    tools:context="com.pavneet.android.boost.FoatingAndSnakBarActivity">


    <android.support.design.widget.FloatingActionButton
        android:id="@+id/fab"
        android:layout_width="wrap_content"
        android:layout_height="wrap_content"
        android:layout_gravity="bottom|end"
        android:layout_margin="@dimen/fab_margin"
        app:srcCompat="@android:drawable/ic_dialog_email" />

</android.support.design.widget.CoordinatorLayout>
Tip: Design library provides many other elegant views like NavigationDrawer, CollapsingToolbarLayout.
TextInputLayout
TextInputLayout is like an EditText which supports floating label as hint and it moves up when user stats typing.
      <android.support.design.widget.TextInputLayout
        android:layout_width="match_parent"
        android:layout_height="wrap_content">

    <android.support.design.widget.TextInputEditText
            android:layout_width="match_parent"
            android:layout_height="wrap_content"
            android:hint="@string/form_username"/>

</android.support.design.widget.TextInputLayout>
Animation
Android supports variety of animations which can be created via Java and XML as well.
- Value Animator used to animate the objects
- Object Animator are used to animate the attribute properties like objects
- View Animation are collections of multiple animations like scaling, rotating into a single animation file
- Drawable Animations are often used to create waiting/processing dialogs to display collection of images one after another according to given transition time
- overridePendingTransition : This function can be overridden in Activities to add your own customize enter and exit animations(via XML) during activities transitions.
      startActivity(new Intent(YourCurrentActivity.this,DestinationActivity.class));
// animate by applying fade in and fade out animations
overridePendingTransition(android.R.anim.fade_in, android.R.anim.fade_out);
Material Design
Material design standards are the design guidelines for an application's user interface, appearance, and motion. Features of material themes are as follows:
- CardView: CardView is a rounded corner rectangular view which supports elevation (shadow) and ripple animation.
- RecyclerView: RecyclerView is an enhance version of ListView in terms of efficiency and it also supports - Linear View - Grid View - Staggered View
- Circular Image: Android provides inbuilt support to crop and display in circular shape which efficient than creating a customize one.
      // fetch the image as bitmap
Bitmap b= BitmapFactory.decodeResource(getResources(),R.drawable.norml);
// create a rounded drawable
RoundedBitmapDrawable drawable= RoundedBitmapDrawableFactory.create(getResources(),b);
// create a circular image
drawable.setCircular(true);
Code Optimization
Serializable and Parcelable
Serialization is the process of converting your object into bytes to persist them. This can be achieved by implementing both the Serializable and Parcelable interfaces.
The important difference is that Parcelable is implemented via the Android native (C++) framework which requires less resources per single instruction resulting in overall better performance. Serializable is best when sending singular objects from one activity to another. Parcelable is far better for larger transfers, however, such as sending lists of customized objects to the next Activity. Learn more about the difference here.
OutOfMemoryError
Like every system, the Android OS has limited resources, so it's always better to avoid using large size bitmaps or images. There are other options that be applied, such as
- BitmapFactory.Options to reduce image size
- 3rd party libraries like Glide, Picasso or Fresco
LinearLayout
To achieve better performance for simple layout(without multiple nested ViewGroups), it is preferred to use LinearLayout due to support of linear flow-based UI drawing whereas the Relative layout always use two measure passes.
LinearLayout is also quite handy for allocating the available width or height as per the weight property.
- Set the attribute value as 0dp of either height or width
- As per the weight property, 0dp of space (either height or width) will be allocated.
      <?xml version="1.0" encoding="utf-8"?>
<LinearLayout android:layout_height="match_parent"
    android:layout_width="match_parent"
    xmlns:android="http://schemas.android.com/apk/res/android" >

    <View
        android:background="#c44cd4"
        android:layout_width="0dp"
        android:layout_weight="1"
        android:layout_height="match_parent"/>
    <View
        android:layout_weight="1"
        android:background="#7bf2dc"
        android:layout_width="0dp"
        android:layout_height="match_parent"/>
</LinearLayout>
Clean-Code Architecture
Clean-Code Architecture separates the background logic from the UI so that both user interface and background logic can be tested independently.
MVP: Model View Presenter is the talk of the town amongst Android developers when it comes to implementing clean-code architecture.
- Model: Object structure to store data.
- View: A dumb view who receives the actions from user and pass it on to presenter.
- Presenter: A relay that acts upon the model and the view. It retrieves data from model, and formats it to display in the view.
IDE Support
Live template
Live template offers quick code insertion shortcut, so you don't have to write the whole statement. Instead just press ctrl+j and select the Toast or any other option to insert respective code.
Refactoring code
Use shift+f6 to rename components, variables or module across project.
There are lots of other useful options under Refactor menu like extract, change signature, and more that save us a lot of time and prevent mistakes.
Patterns & Principals
-
Builder patterns: Builder patterns are widely used to create APIs and libraries and reducing the complexity of and effort needed for object creation.
-
SOLID: SOLID is an acronym for principals widely used to make a stable, scalable and effective software design. The five parts of SOLID are discussed in depth in the linked article.
There are several patterns that have been invented to solve specific problems. These patterns and problems are discussed here. Read more to create better quality applications.
UI Testing
Android studio provides built-in support to test user interface actions via recoding an Espresso test. Espresso tests state expectations, interactions, and assertions.
A simple example would be to perform a button click and check whether the text of TextView has changed or not.
      onView(withId(R.id._button)).perform(click()); // perform click
onView(withText("Hello")).check(matches(isDisplayed())); // check a view is visible with text "Hello"
To Record a test: _ Click "run" in menu _ Select "Record Esprsso Test" This will open the app on a device and record user actions, generating a UI test.
Best Practices
Security
An APK is like an archive. It contains a classes.dex archive which is a collection of .class files.
Anyone having access to dex2-jar tool can obtain the original source code (java files) and can build a personal version of your market app to harm your product value by uploading a free version of your app.
The process is called Reverse engineering, and it is a major security threat to app revenue.
By default, Android Studio built a debug version of project as an APK, from which the original source code can be easily obtained.
Never share your debug APK with any outside user.
Obfuscation
Unfortunately, there is currently no way to protect our app from reverse engineering so the optimal solution is to use obfuscation.
To generate obfuscated code, the apk should be generated as a release version. A release version is signed with a SHA1 key and outputs a working obfuscated source code apk.
- Result of reverse-engineering on debug apk
      public class MainActivity extends AppCompatActivity
{
    private ArrayAdapter<String> adapter;
    private ListView listView;

    protected void onCreate(Bundle paramBundle)
    {
        super.onCreate(paramBundle);
        setContentView(2130968605);
        this.listView = ((ListView)findViewById(2131558552));
        this.adapter = new ArrayAdapter(this, 17367046, Util.DEMO_LIST_ITEMS);
        this.listView.setAdapter(this.adapter);
    }
}
- Result of reverse-engineering on release apk
      import android.support.v7.a.a;
import android.support.v7.a.s;
import android.support.v7.a.u;

public class MainActivity extends s
{
    private ListView i;
    private ArrayAdapter<String> l;

    protected void onCreate(Bundle paramBundle)
    {
        super.onCreate(paramBundle);
        setContentView(2130968602);
        this.i = ((ListView)findViewById(2131558552));
        this.l = new ArrayAdapter(this, 17367046, Util.DEMO_LIST_ITEMS);
        this.i.setAdapter(this.l);
    }
}
Reference
Proguard-rules.pro
This file contains the instructions to obfuscate source code for release apk. ProGuard is a command line tool that shrinks the size of apk by optimizing, obfuscating and eliminating the files (java/bytecode/resources) which results in smaller size apk.
Enable progurad:
- Open build.gradle (module)
- set "minifyEnabled" flag to true
      android {
    compileSdkVersion 26
    buildToolsVersion "26.0.1"
    defaultConfig {
        applicationId "com.pavneet.android.boost"
        minSdkVersion 15
        targetSdkVersion 26
        versionCode 1
        versionName "1.0"
        testInstrumentationRunner "android.support.test.runner.AndroidJUnitRunner"
    }
    buildTypes {
        debug {
            minifyEnabled true
            proguardFiles getDefaultProguardFile('proguard-android.txt'), 'proguard-rules.pro'
        }
        release {
            minifyEnabled true
            proguardFiles getDefaultProguardFile('proguard-android.txt'), 'proguard-rules.pro'
        }
    }
}
The above configuration is for testing purposes. It will obfuscate the APK for every build. Please do not use the minifyEnabled true for debug because it will result in longer project buld duration.
Often you might be required to disable obfuscation for POJO classes and libraries to meet proper naming convention during JSON parsing or placing network calls. To accommodate for this, you can define customize rules for which code to keep.
Resources
Hide Sensitive Information
There is basically no way that you can protect your API key from a hacker but the safest way is to use an NDK, or a Native Developers Toolkit. Through the NDK, corresponding C and C++ functions can be implemented in Android project.
The NDK ports C and C++ code into separate libraries that are hard to decompile — although the NDK compiled code can still be opened with hexadecimal code, it is still hard to detect an API key out of hex code.
Learn more about NDKs and security.
API Levels
Every Android release introduces new features that might not be backward compatible with older versions, making it important to make your app compatible with older versions. You can put a check to verify the current android OS version and process according as
      if (android.os.Build.VERSION.SDK_INT >= android.os.Build.VERSION_CODES.M) {
	// current os is marshmallow or above
}else{/* perform alternative actions for older version */}
Common Issues:
Do not reinvent the wheel
Android has a huge open source development community and there are thousands of developers who has published their great work in open source community which saves lot of time and efforts while offering tons of features.
For example, do not use background threads to download and display images just because you can write lengthy code — use Picasso, an image downloading library which offers lot other functionalities like cache, resizing, error handling and easily customizable.
      Picasso.with(context)
  .load(url)
  .resize(50, 50)
  .centerCrop()
  .into(imageView)
References:
Summary
- Follow the Google Java Style Guide for readable code.
- Don't reinvent the wheel, and always use libraries design, CardView, RecyclerView, retrofit etc.
- Enhance UI with swipeToRefresh , BottomBarNavigation, and the design library.
- Add meaningful animations, ripple, elevation, transition.
- Use pro-guard rules to obfuscate your code.
- Perform UI and logical testing for quick deployment for beta testing.
- Use the job scheduler for longer running background tasks.
- Add support for the latest APIs using runtime permissions, Doze, or StandBy mode.
I am glad that you have made this far! Thanks for reading and I hope this guide helped you with your Android endeavors!
Advance your tech skills today
Access courses on AI, cloud, data, security, and more—all led by industry experts.
