Building a Redux application with Angular 2 - Part 2
Apply concepts from functional programming to Redux in this new approach to managing application state and see if this approach is the right fit for you.
Sep 6, 2019 • 36 Minute Read
What we did last time
In part 1 of this guide, I covered Redux's main principles and terminology by creating a small application for recording financial operations.
This tutorial builds on the concepts learned in the previous one. If you need a refresher, I highly recommend looking over the first Redux application tutorial again.
Restructuring
In this part, the example application will be extended to include additional functionality.
To make this possible, the application must be able to have multiple states in its store. Implementing this feature requires serious alteration to many facets of the app.
In its current state, the application does not have a Meta-Reducer, which is essential for having more than one state. Meta-Reducers are a map of all the reducer functions in the state tree. It contains a reference for each of the state slices and their reducers. When an action gets dispatched, the Meta-Reducer goes through the map of all reducers, looking for the one that matches the action type and calls the function.
Another issue that causes concern is the actions and the reducer for operations are staying together, but as the applicaiton grows and the actions and the reducer are becoming more complex, there's going to be a lot of code in a single file. Thus, the actions and the reducers have to be divided in different files.
Having all these concerns in mind, here is how the directory structure will look in the new application:
      +-- app
  |
  +-- reducers
  |   |
  |   +--index.ts
  +-- actions
  |
  +-- models
Models
Let's get started.
First, move operation.model.ts to the models folder. This is where the models for all entities of the application will be stored from now on.
"Classifying" actions
Next, the actions need to be overhauled, so we know to which reducer each action belongs. In operations.ts, delete the action constants and create a new file in actions/operations.ts'
      $ mkdir actions
$ cd actions
$ touch operations.ts
Instead of making a new constant for each action, the actions will be grouped into enums.
      export const ActionTypes = {
 ADD_OPERATION: 'Add an operation',
 REMOVE_OPERATION:'Remove an operation',
 INCREMENT_OPERATION:'Increment an operation',
 DECREMENT_OPERATION: 'Decrement an operation',
};
Action Class
Because the Meta Reducer dispatches actions to their respective reducers, we define custom actions and create actions as new class instances when dispatching using the @ngrx/store's Action class. Expressing actions as classes also enables type checking in reducer functions.
Here's how an ADD_OPERATION action would look like:
      export class AddOperationAction implements Action {
  type = ActionTypes.ADD_OPERATION;

  constructor(public payload:Operation) { }
}
The action type is given by the ActionTypes enum that was previously defined and the payload of the action in the constructor fo the class.
Lastly, a type alias for all actions in order to be later used in the reducers.
      export type Actions
  = AddOperationAction |
  RemoveOperationAction |
  IncrementOperationAction |
  DecrementOperationAction
Here is the full code for operations actions:
      // app/actions/operations.ts

import { Action } from '@ngrx/store';
import {Operation} from "../models/operation.model";

export const ActionTypes = {
 ADD_OPERATION: 'Add an operation',
 REMOVE_OPERATION:'Remove an operation',
 INCREMENT_OPERATION:'Increment an operation',
 DECREMENT_OPERATION: 'Decrement an operation',
};

export class AddOperationAction implements Action {
 type = ActionTypes.ADD_OPERATION;

 constructor(public payload:Operation) { }
}

export class RemoveOperationAction implements Action {
 type = ActionTypes.REMOVE_OPERATION;

 constructor(public payload:Operation) { }
}

export class IncrementOperationAction implements Action {
 type = ActionTypes.INCREMENT_OPERATION;

 constructor(public payload:Operation) { }
}

export class DecrementOperationAction implements Action {
 type = ActionTypes.DECREMENT_OPERATION;

 constructor(public payload:Operation) { }
}


export type Actions
 = AddOperationAction |
 RemoveOperationAction |
 IncrementOperationAction |
 DecrementOperationAction
New form of dispatching
With new implementations of actions comes a new way of dispatching them.
Before
      //app.component.ts

this._store.dispatch({type: ADD_OPERATION , payload: {
  id: ++ this.id,//simulating ID increments
  reason: operation.reason,
  amount: operation.amount
}});
The task of directly sending an action with its type and payload will now be handled by the operation's class. Since the action is a class instance, dispatching is done by creating a new class member and putting the payload in the class constructor:
After
      //Import the action classes for operations
import * as operations from "./common/actions/operations"


this._store.dispatch(new operations.AddOperationAction({
    id: ++ this.id,//simulating ID increments
  reason: operation.reason,
  amount: operation.amount
})
Adapting the reducer function
There are three problems with the current reducer:
First, the array state is too simple for our purposes. It needs to be replaced with an object which contains the array and adds it as an interface. This allows for the state to be more extendable in the future, when new features are implemented and when there is more data that has to be tracked.
      export interface State {
  entities:Array<Operation>
};
Second, the operationsReducer is not a function, but a constant of type ActionReducer to which has a reducer function as a value. This was done because the constant was then directly passed to provideStore, without being referenced in a Meta Reducer.
Now that we've settled on implementing a Meta Reducer, we can rename operationsReducer to reducer and converted it to a function with a return type of State.
Before
export const operationsReducer: ActionReducer = (state = initialState, action: operations.Actions) => { ... }
After
export function reducer(state = initialState, action: operations.Actions): State {...}
Third, the new action types are not implemented. To implement them, we'll import actions/operations and use ActionTypes from the imported library in the case statements.
Before
      switch (action.type) {
  case ADD_OPERATION:
    const operation:Operation = action.payload;
    return [ ...state, operation ];
}
After
      switch (action.type) {
  case operations.ActionTypes.ADD_OPERATION: {
    const operation: Operation = action.payload;
    return {
      entities: [...state.entities, operation]
    };
  }
  //... rest of the cases
Create an app/reducers directory and create a file for operations:
      $ mkdir reducers
$ cd reducers
$ touch operations.ts
The operations reducer after our above revisions:
      // app/reducers/operations.ts
import '@ngrx/core/add/operator/select';
import 'rxjs/add/operator/map';
import 'rxjs/add/operator/let';
import { Observable } from 'rxjs/Observable';
import * as operations from '../actions/operations';
import {Operation} from "../models/operation.model";


/*
 From a simple array ( [] ),
 the state becomes a object where the array is contained
 withing the entities property
*/
export interface State {
 entities:Array<Operation>
};

const initialState: State = {  entities: []};

/*
Instead of using a constant of type ActionReducer, the
function is directly exported
*/
export function reducer(state = initialState, action: operations.Actions): State {
 switch (action.type) {
   case operations.ActionTypes.ADD_OPERATION: {
     const operation: Operation = action.payload;
     /*
     Because the state is now an object instead of an array,
     the return statements of the reducer have to be adapted.
     */
     return {
       entities: [...state.entities, operation]
     };
   }

   case operations.ActionTypes.INCREMENT_OPERATION: {
     const operation = ++action.payload.amount;
     return Object.assign({}, state, {
       entities: state.entities.map(item => item.id === action.payload.id ? Object.assign({}, item, operation) : item)
     });
   }

   case operations.ActionTypes.DECREMENT_OPERATION: {
     const operation = --action.payload.amount;
     return Object.assign({}, state, {
        entities: state.entities.map(item => item.id === action.payload.id ? Object.assign({}, item, operation) : item)
     });
   }

   case operations.ActionTypes.REMOVE_OPERATION: {

     return Object.assign({}, state, {
       entities: state.entities.filter(operation => operation.id !== action.payload.id)
     })
   }
   default:
     return state;
 }
};
From the code we have we can conclude that a module of the state has to export:
- A reducer function
- An interface that describes how the state looks like.
Creating a Meta Reducer
With the actions and the reducer adapted to the new standards, it is time to implement the Meta Reducer. If each of the reducer modules represent a table in a database, the Meta Reducer State interface represents the database schema, and the meta reducer function represents the database itself.
To have a clearer idea what happens behind the scenes in a Meta Reducer, we need to first look into the implementation of combineReducers.
combineReducers
      const combineReducers = reducers => (state = {}, action) => {
  return Object.keys(reducers).reduce((nextState, key) => {
    nextState[key] = reducers[key](state[key], action);
    return nextState;
  }, {});
};
combineReducers is a function that takes an object with all the reducer functions as property values and extracts its keys. Then it uses Array.reduce() to accumulate the return value of each of the reducer functions into a state tree and reassign it to the key to which the reducer corresponds. The return value is an object which contains the key-value pairs of the reducers and the states they returned.
Implementation
In your app/reducers folder, create a new file named index.ts.
      $ cd reducers
$ touch index.ts
In index.ts, paste the following snippet:
      import {combineReducers, ActionReducer} from '@ngrx/store';
import {Observable} from "rxjs";
import {compose} from "@ngrx/core";

/*
 Import each module of your state. This way, you can access
 its reducer function and state interface as a property.
*/
import * as fromOperations from '../reducers/operations';

/*
 The top-level interface of the state is simply a map of all the inner states.
 */
export interface State {
  operations: fromOperations.State;
}

/* The reducers variable represents the map of all the reducer function that is used in the Meta Reducer */
const reducers = {
  operations: fromOperations.reducer,
};

/* Using combineReducers to create the Meta Reducer and export it from the module. The exported Meta Reducer will be used as an argument in provideStore() in the application's root module.
*/
const combinedReducer: ActionReducer<State> = combineReducers(reducers);

export function reducer(state: any, action: any) {
    return combinedReducer(state, action);
}
The final step of the implementation is to put the reducer as an argument in provideStore()
      // app/app.module.ts
import {reducer} from "./common/reducers/index";

@NgModule({
  bootstrap: [ AppComponent ],
  declarations: [
   //...
  ],
  imports: [
    /*
     Put the reducer as an argument in provideStore
    */
    StoreModule.provideStore(reducer),
  ],
})
export class AppModule {
  constructor() {}
}
Getting state slices
The new architecture of the application requires a different way of accessing the state slices.
Previously, we could access operations using the following snippet:
      //app.component.ts
 import {State, Store} from "@ngrx/store";

 export class AppComponent {

 //....

 constructor(private _store: Store<State>) {
   this.operations = _store.select('operations')
 }
However, now there's a state tree, and the operations state is an object that could have multiple properties. Additionally, our current way doesn't allow combining states in a specified manner. There needs to be a set of designated functions that return certain parts of the state tree.
Accessing parts of the state tree.
Accessing the state slices is not going to be done directly from the application's components. Instead, select-ing of the state will be done in the app/reducers modules.
To illustrate how this works, let's first select operations from the state tree:
      //app/reducers/index.ts

 export function getOperations(state$: Observable<State>) {
   return state$.select(state => state.operations);
}
Accessing the state properties
Using the last function, only the operations state of the application is accessed, and it contains this:
      {
    entities: [ //...an array of operations
 }
That's a problem, because we need a particular property of the operations state - the entities array. Here is how we can grab that:
First, in operations.ts, export a function which accesses the entities property of the operations state:
      // app/reducers/operations.ts

/*
 Get the entities of the operations state object. This function will be
 imported into the file for the Meta Reducer, where it will
 be composed together with a function that gets the state of
 the  operations state object out of the application state.
*/

export function getEntities(state$: Observable<State>) {
return state$.select(s => s.entities);
}
Second, compose getOperations and getEntities. Function composition is one of the building blocks of functional programming. It executes a set of functions, putting the returned value of the first function as the argument for the second function. In math, composition of two functions f(x) and g(x) would result in f(g(x)).
compose() applies functions from right to left.
      // app/reducers/index.ts

export const getEntities = compose(fromOperations.getEntities, getOperations);
In this case, getOperations first accesses the operations state from the state tree and then getEntities gets the entities property of getOperations's returned operation state.
Let's apply this functionality in app.component.ts:
      //app.component.ts

/*
 In order to access the application state, reference the reducers folder again,
 accessing all the exported members from it though index.ts
 */
import * as fromRoot from './common/reducers';

export class AppComponent {

  //...

  constructor(private _store: Store<fromRoot.State>) {
    this.operations = _store.let(fromRoot.getEntities)
  }
_store.let executes getEntities and returns its value.
Here is how the new AppComponent looks like with the new state selection and action dispatching implemented:
      import { Component } from '@angular/core';
import {State, Store} from "@ngrx/store";
import {Operation} from "./common/models/operation.model";
import * as operations from "./common/actions/operations"
import * as fromRoot from './common/reducers';

@Component({
  selector: 'app-root',
  template: `
      <div class="container">
            <new-operation (addOperation)="addOperation($event)"></new-operation>
            <operations-list [operations]="operations| async"
            (deleteOperation)="deleteOperation($event)"
            (incrementOperation)="incrementOperation($event)"
            (decrementOperation)="decrementOperation($event)"></operations-list>
      </div>
`
})
export class AppComponent {

  public id:number = 0 ; //simulating IDs
  public operations:Observable<Operation[]>;

  constructor(private _store: Store<fromRoot.State>) {
    this.operations = this._store.let(fromRoot.getEntities)
  }

  addOperation(operation) {
    this._store.dispatch(new operations.AddOperationAction({
        id: ++ this.id,//simulating ID increments
      reason: operation.reason,
      amount: operation.amount
    })
    );
  }

  incrementOperation(operation){
    this._store.dispatch(new operations.IncrementOperationAction(operation))
  }

  decrementOperation(operation) {
    this._store.dispatch(new operations.DecrementOperationAction(operation))
  }

  deleteOperation(operation) {
    this._store.dispatch(new operations.RemoveOperationAction(operation))
  }
}
Adding a new state
It's time to take the example application to the next level by adding multi-currency support. Being able to see the operations in different currencies comes with certain requirements:
- Reducer - stores the available currencies and the currently selected currency.
- JSON API - provides up-to-date currency rates.
- Technique - reactively changes amounts in the operations.
Let's tackle task #1 and add the currency actions and reducer. With the architecture already laid, adding new functionality is simple.
Actions
Let's start with actions first. Create a new file in actions named currencies.ts.
      $ cd actions
 $ touch currencies.ts
The first action will be when the user attempts to change the currency. Here's how the code for the action looks:
      // app/actions/currencies.ts

import { Action } from '@ngrx/store';

export const ActionTypes = {
  CHANGE_CURRENCY: 'Change currency',
};

export class ChangeCurrencyAction implements Action {
  type = ActionTypes.CHANGE_CURRENCY;
  constructor(public payload:string) { }
}

export type Actions =
  ChangeCurrencyAction
Reducer
Next, create a file currencies.ts in app/reducers. The currencies .
      $ cd reducers
 $ mkdir currencies.ts
Here is what the currencies reducer looks like:
      // app/reducers/currencies.ts

import '@ngrx/core/add/operator/select';
import { Observable } from 'rxjs/Observable';
import * as currencies from '../actions/currencies';

/*
The sate object needs to have three properties:
1. A property for keeping a list of the available currencies
2. A property for keeping the selected currency
3. A property for keeping the list of exchange rates
*/
export interface State {
  entities:Array<string>
  selectedCurrency: string | null;
  rates: Array<Object>,
};

const initialState: State = {
    entities: ['GBP', 'EUR'],
    selectedCurrency: null,
    rates: [] ,
};

export function reducer(state = initialState, action: currencies.Actions): State {
  switch (action.type) {

    case currencies.ActionTypes.CHANGE_CURRENCY: {
        return {
          entities: state.entities,
          selectedCurrency: action.payload,
          rates: state.rates
        };
    }

    default:
      return state;
  }
}

/*
 These selector functions provide access to certain slices of the currency state object.
*/

export function getCurrenciesEntities(state$: Observable<State>) {
  return state$.select(s => s.entities);
}

export function getSelectedCurrency(state$: Observable<State>) {
  return state$.select(s => s.selectedCurrency);
}

export function getRates(state$: Observable<State>) {
  return state$.select(s => s.rates);
}
The final step is to include the currencies state in the store:
      // app/reducers/index.ts

// Import app/reducers/currencies.ts

import * as fromCurrencies from '../reducers/currencies';
//...

export interface State {
  operations: fromOperations.State;
  //Add the currencies state interface
  currencies: fromCurrencies.State;
}

const reducers = {
  operations: fromOperations.reducer,

  // Add the currency reducer
  currencies: fromCurrencies.reducer
};

//...

//Access the 'currencies' state in the application store
export function getCurrencies(state$: Observable<State>) {
  return state$.select(state => state.currencies);
}

// Access 'entities' from the 'currencies' state in the application state.
export const getCurrencyEntities = compose(fromCurrencies.getCurrenciesEntities , getCurrencies);

// Access 'selectedCurrency' from the 'currencies' state in the application state.
export const getSelectedCurrency = compose(fromCurrencies.getSelectedCurrency , getCurrencies);

// Access 'rates' from the 'currencies' state in the application state.
export const getCurrencyRates = compose(fromCurrencies.getRates , getCurrencies);
Accessing the new state
Before creating a 'dumb' component to display the currency options and the selected currency, the currencies have to be retrieved in the smart component (in this case AppComponent).
      // app/app.component.ts

export class AppComponent {
  //...
  public currencies:Observable<string[]>;
  public selectedCurrency: Observable<string>;

  constructor(private _store: Store<fromRoot.State>) {
    //...
    this.currencies = this._store.let(fromRoot.getCurrencyEntities);
    this.selectedCurrency =this._store.let(fromRoot.getSelectedCurrency);
  }
  //...
    onCurrencySelected(currency:string) {
    this._store.dispatch(new currencies.ChangeCurrencyAction(currency))
  }
 }
Apart from making component class variables for accessing the currencies in the store, there is also a function for dispatching the ChangeCurencyAction() when the user selects another currency.
Next, install ng-bootstrap in order to add good-looking, interactive radio buttons.
$ npm install --save @ng-bootstrap/ng-bootstrap
And import the NgbModule in the AppModule:
      // app.module.ts
import {NgbModule} from '@ng-bootstrap/ng-bootstrap';

//...
@NgModule({
  declarations: [AppComponent, ...],
  imports: [NgbModule.forRoot(), ...],
  bootstrap: [AppComponent]
})
export class AppModule {
}
Currencies component
Next, create a Currenciescomponent.
touch currencies.component.ts
      // currencies.component.ts

import {Component, Input, ChangeDetectionStrategy, Output, EventEmitter} from '@angular/core';

@Component({
    selector: 'currencies',
    template: `
    '<div [ngModel]="selectedCurrency" (ngModelChange)="currencySelected.emit($event)" ngbRadioGroup name="radioBasic">
    <label *ngFor="let currency of currencies" class="btn btn-primary">
    <input type="radio" [value]="currency"> {{currency}}
    </label>
    </div>`,
     changeDetection: ChangeDetectionStrategy.OnPush
})
export class Currencies  {
    @Input() currencies:Array<string>;
    @Input() selectedCurrency:string;
    @Output() currencySelected = new EventEmitter();

    constructor() { }
}
The Currencies component is a 'dumb' component (no logic) that uses ngbRadioGroup to display the available currencies. (ngModelChange) is used to emit an event to AppComponent every time the user clicks on the radio buttons.
Lastly, add Currencies to AppModule:
      // app.module.ts
import {Currencies} from './currencies.component';

//...
@NgModule({
  declarations: [Currencies, ...],
  //...
})
export class AppModule {
}
Effects
If you go to https://localhost:4200/ now and play around with the currency buttons, you'll see that nothing special happens. Looking at the current state of the application, there needs to be a way to load the currency rates from a dedicated currency data API, such as fixer.io.
Redux has its own convention for handling server-side requests. It does it through a middleware - a piece of logic that stays between the server and the reducer functions. In Redux, server-side requests are regarded as side effects from actions that cannot be entirely handled through a reducer. Such actions call impure functions, making the reducers unable to handle the recreation of the action because the function does not depend entirely on its input. Read more about this important concept here
Actions for handling side effects
The standard for handling server-side requests requires the implementation of three actions:
- Action that indicates the start of the server-side request: This action is dispatched just before the request is made. In the example application, the name of this action will be named LOAD_CURRENCIES. A reducer handling such an action would change a dedicated state property for indicating a server-side location such as loadingCurrencies, which can be used to implement a loading spinner, for example.
- Action that indicates a successful request: This action is dispatched when te request is done. Its payload contains the request response. The reducer simply adds the response to its corresponding state property. In the example, this action name will be called LOAD_CURRENCIES_SUCCESS and its payload will fill the rates state property with the most recent information about currency rates.
- Action that indicates a failed request This action is dispatched if the request fails. The action payload may contain the error reason or simply return nothing. In the example application, this action would be normally called LOAD_CURRENCIES_FAIL
For the sake of simplity, we'll omit the process of making a separate action that handles failure. Here is what the implementation of the new action looks like:
      import { Action } from '@ngrx/store';

export const ActionTypes = {
  CHANGE_CURRENCY: 'Change currency',
  LOAD_CURRENCY_RATES: 'Loading currency rates'
};

export class LoadCurrencyRatesAction implements Action {
  type = ActionTypes.LOAD_CURRENCY_RATES;
  constructor(public payload:string) { }
}

export class LoadRatesCompleteAction implements Action {
  type = ActionTypes.LOAD_RATES_COMPLETE;
  constructor(public payload:string) { }
}

export type Actions =
  // Add the functions as tpyes
  LoadCurrencyRatesAction |
  LoadRatesCompleteAction
What happens between the Load action and the Load Success/Failure action?
This is where the middleware comes into play. To be more exact, the middleware for handling side effects.
As for the server-side calls themselves, they will be handled by an Angular 2 service, which will be called within the effect.
Fetching data with a service
Before adding the effects, let's add the service that is going to fetch the data from the fixer.io API.
Create an app/services directory that will contain the services which handle server-side requests and create a service for currencies:
      $ mkdir services
$ cd services
$ touch currencies.ts
The service looks like this:
      import {Http} from '@angular/http';
import {Injectable} from '@angular/core';

@Injectable()
export class CurrencyService {

  constructor(private http: Http ) {}

  loadCurrencies() {
    //Inferring that the base is USD
    return  this.http.get('http://api.fixer.io/latest?base=USD' )
      .map((response) => {
         let body = response.json();
          return body.rates

      })
  }
}
CurrencyService contains one function, loadCurrencies(), which makes a simple HTTP request to the fixer.io API and returns the rates property of the response as an observable.
Implementing an effect
Next, we are going to implement the side-effect for handling the returned rates from CurrencyService.
In Angular 2, there is a special package for handling side effects - ngrx/effects
Open your terminal and type:
npm install @ngrx/effects --save
Create an an app/effects directory and a file for the effects concerning currencies:
      $ mkdir effects
 $ cd effects
 $ touch currencies.ts
      // app/effects/operations.ts

import { Injectable } from '@angular/core';
import { Effect, Actions } from '@ngrx/effects';
import { Observable } from 'rxjs/Observable';
import * as currencyActions from '../actions/currencies';

import {CurrencyService} from "../services/currency.service";
import {LoadRatesCompleteAction} from "../actions/currencies";

@Injectable()
export class CurrencyEffects {
  constructor(
    private _actions: Actions,
    private _currencyService:CurrencyService
  ) { }

/*
 The effects for different states are singletons that 'intercept' dispatched actions that are being sent to the reducer.
*/

  @Effect() loadCategories$ = this._actions.ofType(currencyActions.ActionTypes.LOAD_CURRENCY_RATES)
    .switchMap(() => this._currencyService.loadCurrencies()
      .map((rates) => new LoadRatesCompleteAction(rates) )
      .catch(() => Observable.of( new LoadRatesCompleteAction({})))
    );
}
_actions.ofType() returns an observable which watches for newly dispatched events that match the type of the action. switchMap() is an rxJS operator. It is part of several operators that are used for reactive programming. What makes switchMap() different is that it returns only the most recent observable's value in a stream of observables.
Once the service returns, there are a few options.
- If the results are successfully fetched, a new LoadRatesCompleteAction will be created, having the rates as its payload.
- If an error has occured, the same action will be created, but with empty payload.
- Alternatively, a LoadRatesFailAction can be added to currencies/action for handling cases in which the server fails to return a result.
The final step for handling effects to register the effects to the app.module and the currency as a provider:
      // app.module.ts
import {CurrencyEffects} from "./common/effects/currencies";
import {EffectsModule} from "@ngrx/effects";
import { CurrencyService} from "./common/services/currency.service";
//...

@NgModule({
  //...bootstrap and declarations

  imports: [
    // Add each the effects for each of your states in the module.
    EffectsModule.run(CurrencyEffects),
  ],
  //Add the CurrencyService as a provider
  providers: [CurrencyService]
})
export class AppModule {
  constructor() {}
}
Remember that we did not handle the case in which effects failed.
Taking advantage of the reactive state
One of the best features of Redux is that it gives the opportunity for the most recent part of the application state to be accessed anywhere in the application.
To illustrate this, let's finish the current implementation of the currencies in the applications. So far, the currency rates are registered the part of the state and thanks to effects, they can be asynchronously added to the currencies state.
In order to makeuse of the rates, a custom pipe will be implemented to handle the currency conversion depending on the selected currency. There's no need to perform any special mathematical operations - money.js is going to be used to handle the conversion of the currencies.
First, install 'money.js':
npm install money --save
With the package installed, we can start implementing the pipe. Create a file app/currency.pipe.ts
$ touch currency.pipe.ts
The pipe needs to get the latest state of the rates property in the currencies state add convert it for each of the values the pipe is applied to.
      import { Pipe, PipeTransform } from '@angular/core';
import * as fromRoot from './common/reducers';
import {State, Store} from "@ngrx/store";

/*
 Requiring money.js and setting the
 base currenc to USD. In this case, we infer that
 the base currency is USD. However, if you add a
 baseCurrency attribute to the currencies state, you
 can make the base currency dynamic as well.
*/
const fx = require('money');
fx.base = "USD";

@Pipe({
  name: 'currencyPipe',
})
export class CustomCurrencyPipe implements PipeTransform {
  /*
   One of the main advantages of Redux is that the state of
   the application can be observed from any file by simply
   implementing a selector and calling it where needed.
  */
  constructor(private _store: Store<fromRoot.State>) {
    this._store.let(fromRoot.getCurrencyRates).subscribe((rates) => {
      fx.rates = rates;
    });
  }
  /*
   The currency parameter obtains its value from the selectedCurrency
   property. An alternative implementation would be to call
   getSelectedCurrency within the pipe and get the selectedCurrency
   within the pipe.
  */
  transform(value: number , currency): string {
      if(currency != null) {
        value = fx.convert(value,  {from: "USD" , to: currency});
        return currency + ' ' + value;
      } else {
        return 'USD' + ' ' + value ;
      }
  }
}
Declare the pipe in app.module.ts:
      import {CustomCurrencyPipe} from "./currencyPipe";
//...

@NgModule({
  declarations: [s
    CustomCurrencyPipe
  ],
  //...
})
export class AppModule {
  constructor() {}
}
Putting CustomCurrencyPipe to use
First, add selectedCurrency in two places in the AppComponent template - as an input for the Currencies, which will need it to display the active currency, and the OperationsList components, which will use it in CustomCurrencyPipe.
      // app.component.ts
@Component({
  selector: 'app-root',
  template: `
      <div class="container">
            <new-operation (addOperation)="addOperation($event)"></new-operation>
            <!-- Add selectedCurrency as an input for the currencies component -->
            <currencies (currencySelected)="onCurrencySelected($event)" [currencies]="currencies | async" [selectedCurrency]="selectedCurrency | async"></currencies>
            <!-- Add selectedCurrency as an input for the operations-list component -->
            <operations-list [operations]="operations| async"
            [selectedCurrency]="selectedCurrency | async"
            (deleteOperation)="deleteOperation($event)"
            (incrementOperation)="incrementOperation($event)"
            (decrementOperation)="decrementOperation($event)"></operations-list>
      </div>
`
})
export class AppComponent {
//..
}
Finally, in OperationsList apply the CustomCurrencyPipe with the selectedCurrency as a parameter:
      <!-- operations-list.template.html -->
 <!-- ...wrapper tags -->
    <ul class="list-group" >
      <li *ngFor="let operation of operations"class="list-group-item" [ngClass]="{'list-group-item-success': operation.amount > 0 ,'list-group-item-danger': operation.amount < 0 }">
      <!-- Apply the currencyPipe to each of the operation amounts in the operations list -->
        <h3 class="h3">{{operation.amount | currencyPipe: selectedCurrency}}</h3>
       <!-- ...buttons -->
      </li>
    </ul>
 <!-- ...closing wrapper tags -->
The final result
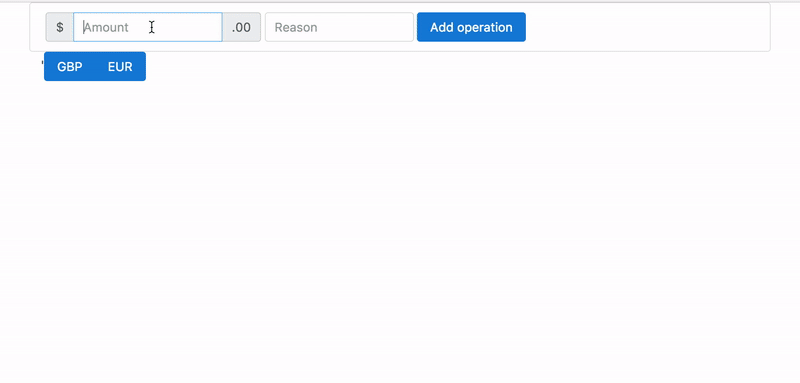
Go to https://localhost:4200 and have a look at the complete, multi-state Redux application we just created:
Conclusion
Redux is a new approach for managing application state. The concepts from functional programming applied in Redux may be suitable for certain use cases, and it's up to you your to decide whether Redux is the right way to go for your next project.
Got lost in the code?
In case you didn't understand what goes where, I have uploaded the final version of the example application for you to use as a reference.
Thanks for reading!
Advance your tech skills today
Access courses on AI, cloud, data, security, and more—all led by industry experts.
