Deploy a React App on a Server
There are numerous hosting and deployment services available online that can run your React app from a remote server with a few simple steps.
Nov 6, 2020 • 7 Minute Read
Introduction
Once you've successfully built and tested your React app, the final step is hosting and deploying it on a server. This makes your React app public, allowing other users to see your app using a URL. There are numerous hosting and deployment services available online that can run your React app from a remote server with a few simple steps. This guide walks you through the entire process of deploying your React app on the web and running it from a remote server.
Creating a React App
Create a simple hello-world-app using Create-React-App.
npx create-react-app hello-world-app
Modify the App.js file as shown below.
      import './App.css';

function App() {
  return (
    <div className="App">
      <header className="App-header">
        <h1>Hello world app</h1>
      </header>
    </div>
  );
}

export default App;
See how your app runs on your local server by running the following command:
npm start
On the local server (https://localhost:3000) you can see a simple React app displaying a "hello world" message. The next step is to make this app production-ready for deployment. Inside the root directory run the following command:
npm run build
This creates a build directory inside the root directory, which bundles your React app and minifies it into simple HTML, CSS, and JavaScript files. This build folder serves your app via a simple entry point, index.html, where your entire React app resides. Running your app via a remote server means running this index.html file on the server.
Deploying React App on Netlify
Netlify is a cloud service that allows you to host and deploy your React app in minutes. It has a variety of features, the most common being deploying using continuous integration via Git or static deployment.
Continuous Integration via Git
You can push your React project on any Git platform, such as GitLab, GitHub, Bitbucket, etc., and connect the repository to Netlify's remote server for continuous integration. This auto-deploys your app whenever any changes are made to your default branch. You also have an option of auto merging pull requests from Github, Gitlab, etc.
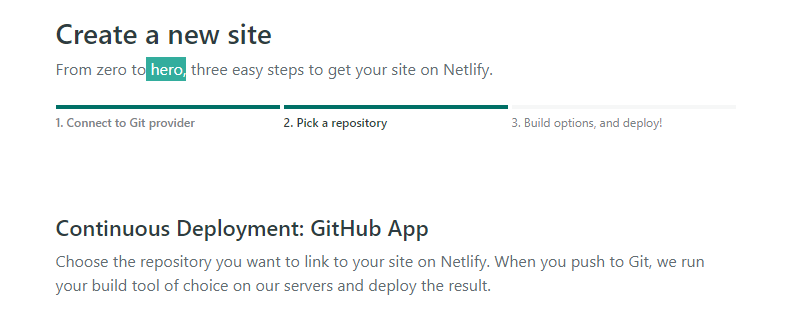
Create a simple repository on any Git provider of your choice (say, GitHub) and push the hello-world-app on the repository. Ensure that you already have an account on Netlify. Go to the site’s section and click on the New site from Git button.

Select the Git provider (in this case, Github) and choose the repository.
Configure the deploy settings. Select a default branch to deploy (you can choose the master branch or any other branch) and ensure that the build command is npm run build and the publish directory is /build.
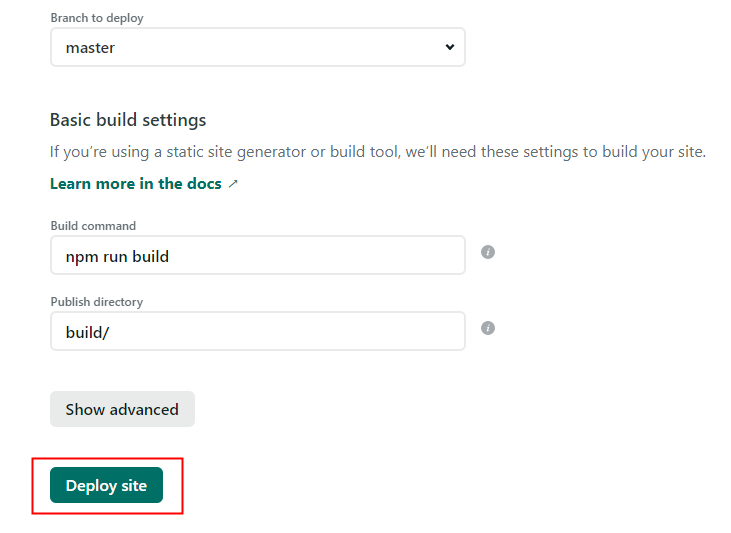
Click Deploy site, and your React app will be deployed on Netlify's remote server. After the deployment is successful, you'll get a public URL through which you can run your React app. Whenever you push any changes or merge any changes in the master branch, Netlify will automatically create a new build folder with updated files and deploy the changes on the remote server.
Using Static Deployment
The second method is to directly deploy the build folder. Visit the Sites section, and below you will see a file uploader panel. Select your React app's build folder and drag and drop it on this area.

Click Deploy and wait while Netlify deploys your app to their remote server.
Deploying React App on Firebase
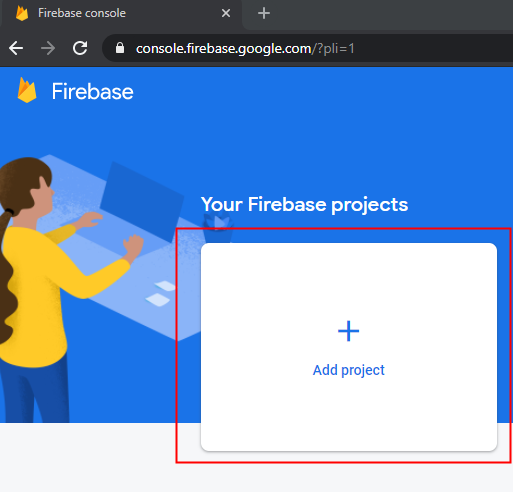
Firebase is Google's cloud service, which offers various backend features as a service to create server-less apps. Firebase also allows you to host and deploy your web app on their remote servers. To deploy your app on Firebase remote server, visit https://firebase.google.com/ and create an account. Click Go to console.

Create a new Firebase app for the web on the console.
Follow the simple steps to create a new Firebase project. Now head back over to your React app and run the following command:
npm i -g firebase
This installs firebase CLI to access various Firebase services via its command-line interface. Inside the root directory, run:
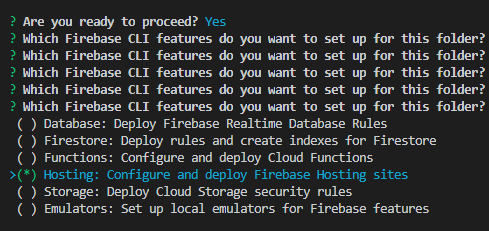
firebase init
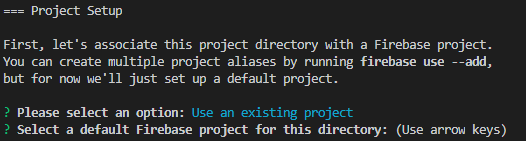
This creates a new Firebase project inside your React project. You may be prompted to log in first. Next, select the hosting feature.
Next, you'll be asked whether you want to create a new Firebase project or use an existing one. Since you already created a new Firebase project on the Firebase console, select use existing project .
Next, you'll be asked a few configurational questions.
? what do you want to use as your public directory? build
Since the production folder is the build directory, in this step you tell Firebase that the build directory should be served as the public directory for this project.
? Configure as a single-page app (rewrite all urls to /index.html)? Yes
Select Yes to tell firebase that your entry point is index.html
? File public/index.html already exists. Overwrite? No
Finally, you do not want to override your original index.html with any other files, so select No here. All configurational steps are complete—now you only need to run the following command inside the root directory:
firebase deploy
Firebase will now deploy your React app on its remote server and generate a URL for you, which you can use to run your React app from a remote server.
Conclusion
Besides Firebase and Netlify, you can also explore other platforms like Heroku or AWS for deploying your React app. These cloud service providers also offer features such as setting up SSL for your app, using a custom domain, etc. Another interesting domain you can explore is ngRok, which gives you secure tunnels to your localhost that can run your ReactJS from a remote server without actually deploying the app.
Learn More
Explore these React and Redux courses from Pluralsight to continue learning:
Advance your tech skills today
Access courses on AI, cloud, data, security, and more—all led by industry experts.
