Static Golang Code Analysis with Go and SonarQube
Code must follow and be tested on best practices to avoid syntax and security issues in production. This guide shows how to use SonarQube to test Golang code.
Sep 24, 2020 • 7 Minute Read
Introduction
When you write code, whether it's app code or automation code one fact still holds true: the code must follow best practices and be tested on best practices. Otherwise, you run the risk of having syntax and security issues in production-level code.
This guide will cover how to test Golang code using SonarQube, a popular and free static code analysis tool.
Prerequisites
To follow along with this guide, you should have:
- Docker desktop installed on Windows 10 or MacOS
- Golang version 1.15 or above. Although this version may not be mandatory, that's the version used in this guide.
- A text editor or IDE. For the purposes of this guide, Visual Studio Code (VS Code) will be used, which you can find here.
Creating the SonarQube Docker Container
Before starting with static code analysis, you need to have a SonarQube environment up and running. From a development environment perspective, the best way to do this is via Docker on localhost.
To create and run the Docker container, open up a terminal and use the following command.
docker run -d --name sonarqube -p 9000:9000 sonarqube
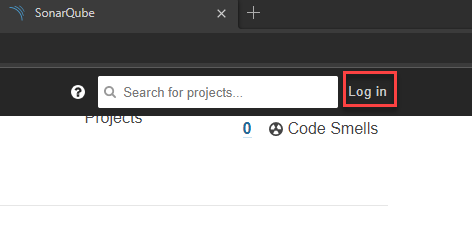
Next, log into the Docker container. Open up a web browser and go to the following link.
http://localhost:90000
You should see the SonarQube web portal up and running, as shown in the screenshot below.
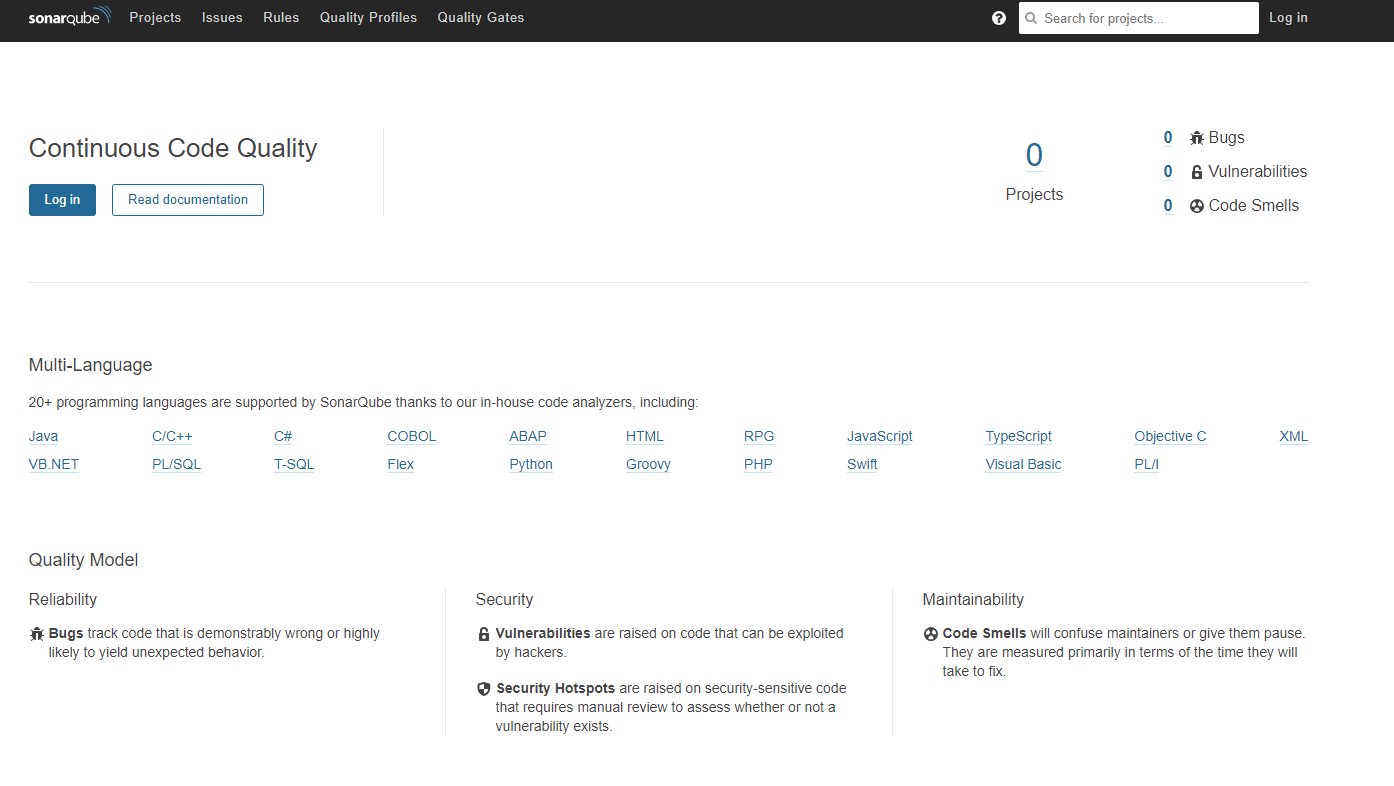
Logging Into SonarQube
To log into SonarQube, the default username and password is admin.
Installing SonarScanner
SonarScanner is the command-line tool that you'll use to run SonarQube tests. The tests send the results to the SonarQube server so you can view them.
To install SonarScanner, open up a web browser and go to the following URL.
https://docs.sonarqube.org/latest/analysis/scan/sonarscanner/
Choose which operating system you are running and download SonarScanner.
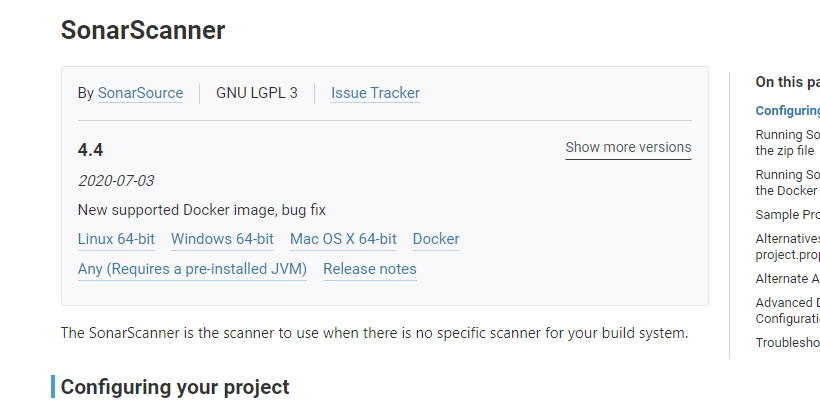
Save the download to a location that you can use in the next section to add SonarScanner to the operating systems environment $PATH. For example, you can save it to the Desktop or Documents folder. The location needs to be a place that won't be deleted because SonarScanner will be used to run the tests.
Adding SonarScanner to $PATH
Regardless of whether you're using Windows or MacOS, you need to add SonarScanner to an environment $PATH if you don't want to have to constantly cd to the SonarScanner path to use it.
Add the following directory to the $PATH.
location_of_download\sonar-scanner-version-operatingsystem\bin
You'll find the program in the bin directory, and that's where the $PATH needs to point to so you can run sonar-scanner from the terminal.
The Code to Test
When you test any code in Golang, including with Static Code Analysis, you have to ensure you have a proper Golang test. The key attributes to a proper Golang test are:
- The test is named with _test.go at the end. For example, azure_auth_test.go
- The function you set up in Golang to run the test starts with the word Test. For example, func TestAzureAuth(t *testing.T) {}
The code in this example that you will use to test is a very lite example. It's meant not to be a hardcore Golang test, but to show the workflow of testing in SonarQube.
      package Test

import (
	"testing"

	"github.com/stretchr/testify/assert"
)

func TestDemo(t *testing.T) {
	one := "one"
	two := "one"

	assert.Equal(t, one, two, "the two variables should be the same value")
}
Create a directory on the desktop called Test and save the code as my_test.go inside of the directory. Although the desktop location isn't mandatory, that's what this guide will be following.
Creating a New SonarQube Project
When you want to run Static Code Analysis tests locally, or even in some sort of pipeline, you'll need a home for the reports of the Static Code Analysis to live. That's where projects come into play. When you run a test, the output and results go to a project in SonarQube.
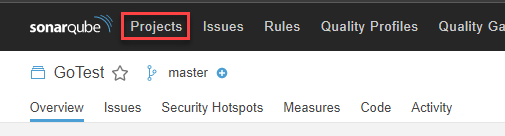
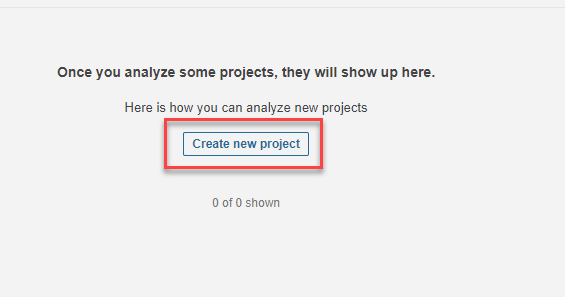
To create a new project, open up a web browser and go to the SonarQube dashboard.
Next, click Projects.
Click the Create new project button.
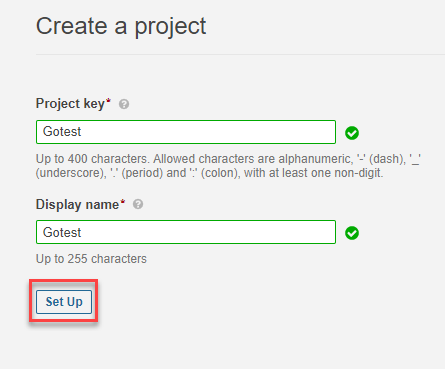
To follow along with this example, name your project "Gotest." Once named, clicked the Set Up button.
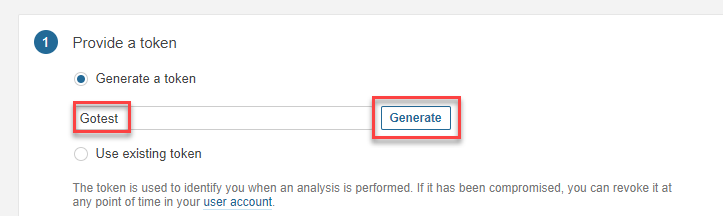
Next, you'll need to generate a token. The token allows you to authenticate from localhost while running SonarQube tests. Name the token "Gotest" and click the Generate button.
Click the Continue button and move on to the next section for running a test.
Running and Checking the Tests
Now that the project is created, it's time to start running the tests.
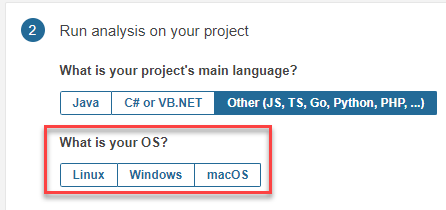
Under step 2, choose the Other option to run the Golang tests.
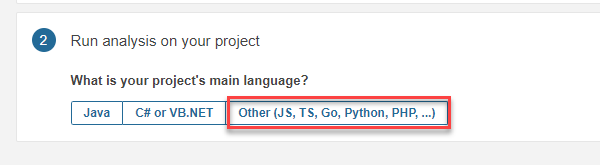
Choose the OS that you're running on.
Running the Test
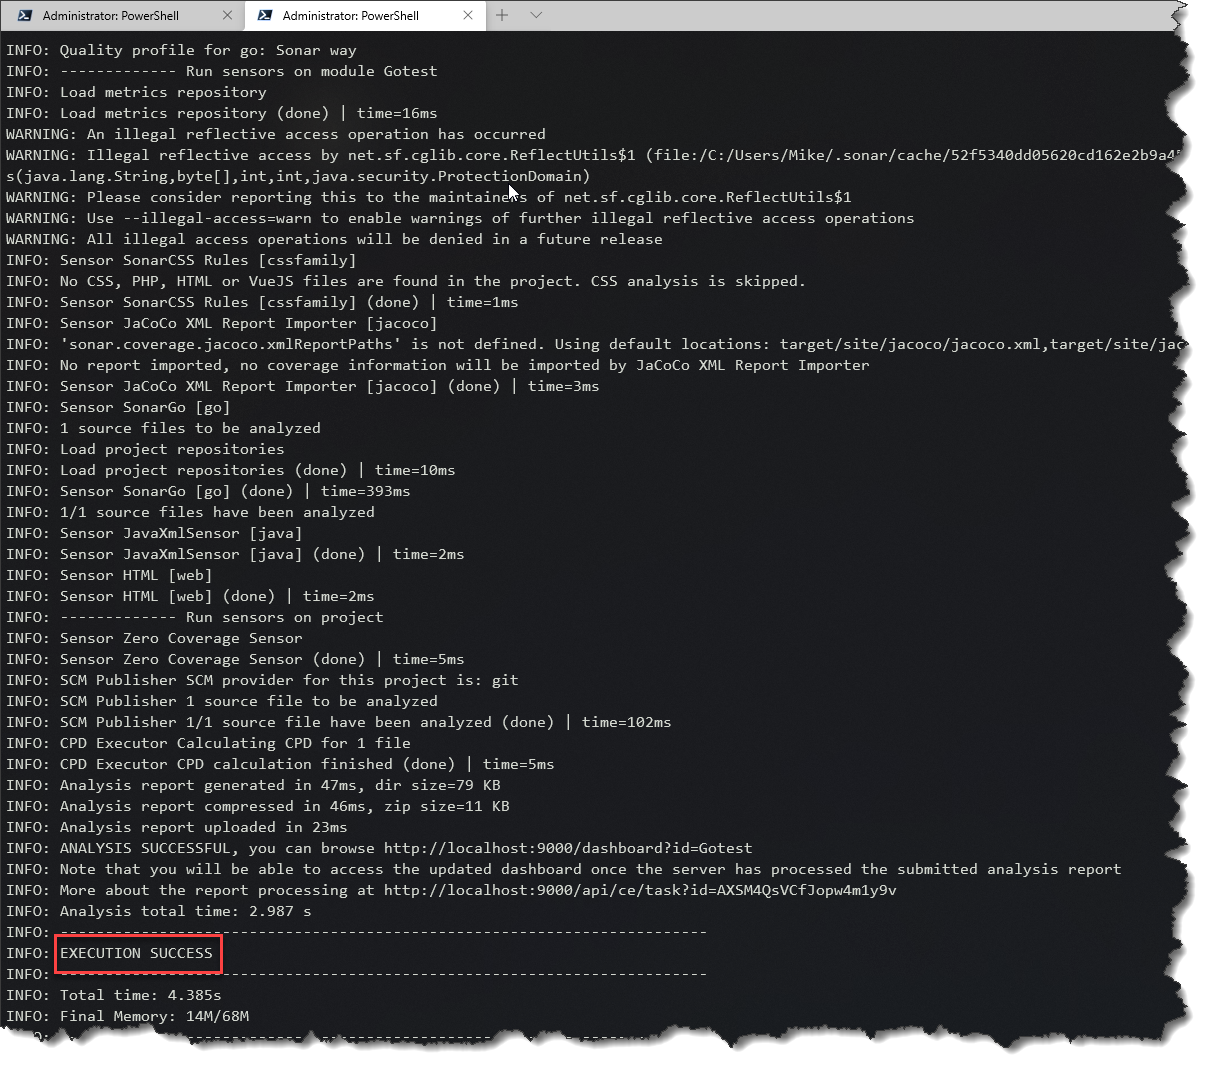
Copy the sonar-scanner command line to start running the test. The command line specifies the project from SonarQube, the host URL, and the generated token.

Now, head over to the command line and cd into the directory where the test is saved from the section The Code to Test.

Once you are in the same directory as the test, run the sonar-scanner command line that you copied. You should see a screenshot similar to the one below specifying the execution success.
Checking the Test
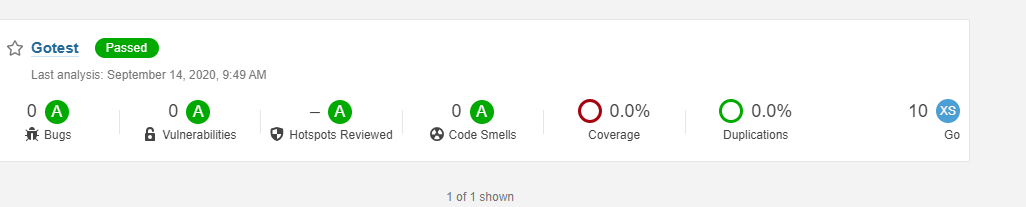
Congrats! You have successfully run a SonarQube test on Golang
Conclusion
When you decide to write any code, code quality is crucial to you and everyone using it. When it comes to code quality, you need to know if the code you're writing is ready to be released to the world. With Static Code Analysis, you get the satisfaction of knowing the code you run is properly configured.
Advance your tech skills today
Access courses on AI, cloud, data, security, and more—all led by industry experts.
