Use Fanout to Send Messages to Your Ionic2 App in About 20 Minutes
Quickly and easily send out messages to client applications with Fanout. This tutorial that will show how to implement a pub-sub mechanism using this service.
Dec 15, 2018 • 16 Minute Read
Fanout
Fanout is a great service that allows you to quickly and easily send messages to client applications. In this tutorial we will use Fanout to send messages to an Ionic2 application.
Getting Set Up
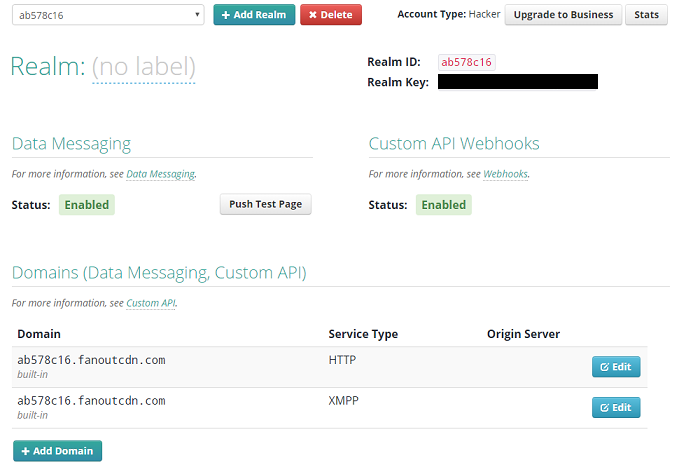
Ok, first things first - go to the Fanout site and create your FREE account - to ensure that is it free make sure you click on the "Hacker" type of account. Next, while you are log into the the site nagivate to the account page and make a note of both your Realm ID and your Realm Key (see screenshot below) - we will need both of these for wiring up the Ionic2 and Nodejs pub-sub mechanism.
Next, to create an Ionic2 app that receive messages and the Nodejs app that publishes messages, you need to install Nodejs. Download and install it here.
Once the installation is complete, open a command prompt and execute:
npm install -g ionic@beta
This command uses the node package manager to install the Ionic2 node package globally. That packate allows us to create Ionic2 applications.
If you run this:
Ionic -v
you should see something like this which means the package installed successfully and you are good to go (don't worry if your version numbers may be different from mine):
2.0.0-beta.32
If you get an error, please go back through the steps above or follow the more detailed installation steps on the Ionic2 installation page.
Creating the Base Application
Ok, if you are in impatient type all of the source code is available in Github here.
To create the base Ionic2 application, go to the command line and execute:
ionic start FanoutIonicNodeTutorial blank --v2 --ts
With that command we are creating a "blank" Ionic version 2 application named FanoutIonicNodeTutorial that uses TypeScript. Don't worry if you aren't familiar with TypeScript - we only have to get our hands a little dirty with it for this tutorial.
Once the installation is complete, change your directory to the folder that was created for your app and start running your app:
      cd FanoutIonicNodeTutorial
ionic serve
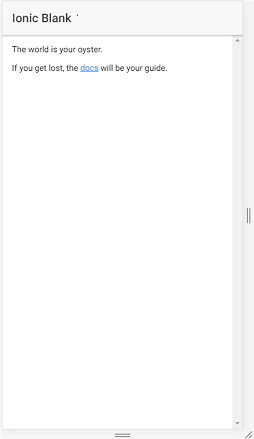
If everthing went well you should be seeing this in your browser:
Adding Our Code
To get our app receiving messages from Fanout and displayed on the screen we will need to create three "providers" in our application. Don't be put off by the name "provider" in Ionic2 and Angular2 as they are really just another name for what are referred to as "services" in other frameworks - objects that encasulate a specific set of functionality in order to have better separation of concerns and avoid duplication of code in an application.
For our app, those 3 providers are for alerts, configuration, and Fanout. We can add them easily using the ionic "generator" command, like this:
      ionic generate provider AlertProvider
ionic generate provider ConfigurationProvider
ionic generate provider FanoutProvider
With our providers created we will need to modify them to meet our needs. I use VS Code for developing Ionic2 applications due to its good support for TypeScript, but you can use whatever editor you feel most comfortable with.
In your favorite editor, open up the alert-provider.ts file in the /app/providers/alert-provider folder. Replace the contents of that file with this:
      import { Injectable } from "@angular/core";
import { NavController, Alert } from "ionic-angular";

@Injectable()
export class AlertProvider {
  constructor() {}

  presentDismissAlert(title: string, subtitle: string, navCtrl: NavController) {
    let alert = Alert.create({
      title: title,
      subTitle: subtitle,
      buttons: ["Dismiss"]
    });
    navCtrl.present(alert);
  }
}
Our alert provider will allow us to easily display alert messages on the screen to the user when messages are received from Fanout.
Next, open the configuration-provider.ts file in the /app/providers/configuration-provider folder and replace that file's contents with:
      import { Injectable } from "@angular/core";

@Injectable()
export class ConfigurationProvider {
  public fanoutUrl: string;

  constructor() {
    this.fanoutUrl = "http://your-realm-id-here.fanoutcdn.com/bayeux";
  }
}
Remember the "Realm ID" from the Fanout account screen? Replace "your-realm-id-here" with your actual Fanout Realm ID. This is crucial - if your don't replace this with your correct realm ID your app will never be able to connect to the proper Fanout endpoint.
Now open the fanout-provider.ts file in the /app/providers/fanout-provider folder and replace the contents with:
      import { Injectable } from "@angular/core";
import { Http } from "@angular/http";
import "rxjs/add/operator/map";
import { ConfigurationProvider } from "../configuration-provider/configuration-provider";

@Injectable()
export class FanoutProvider {
  data: any;
  client: any;
  clientUrl: string;

  constructor(
    private http: Http,
    private configurationProvider: ConfigurationProvider
  ) {
    this.data = null;
    this.clientUrl = configurationProvider.fanoutUrl;
    this.client = new Faye.Client(this.clientUrl);
  }

  subscribe(callback: any, channelName: string) {
    this.client.subscribe("/" + channelName, function(data) {
      callback(data);
      console.log("received data: " + data);
    });
  }
}
This file is a bit more complicated as this is where our application actually connects to the Fanout service. This provider uses the ConfigurationProvider to get the URL that is used to connect to Fanout. However, in order to for different parts of our application to able to access the providers we created, we need to regisgter those providers the the framework.
To do so, navigate to the file app.ts in the /app folder. Update the contents of that file to this:
      import { Component } from "@angular/core";
import { Platform, ionicBootstrap } from "ionic-angular";
import { StatusBar } from "ionic-native";
import { HomePage } from "./pages/home/home";
import { ConfigurationProvider } from "./providers/configuration-provider/configuration-provider";
import { AlertProvider } from "./providers/alert-provider/alert-provider";

@Component({
  template: '<ion-nav [root]="rootPage"></ion-nav>',
  providers: [ConfigurationProvider, AlertProvider]
})
export class MyApp {
  rootPage: any = HomePage;

  constructor(platform: Platform) {
    platform.ready().then(() => {
      // Okay, so the platform is ready and our plugins are available.
      // Here you can do any higher level native things you might need.
      StatusBar.styleDefault();
    });
  }
}

ionicBootstrap(MyApp);
Specifically, what we are doing here is showing the framework where the providers are located, the names of the providers that we want loaded, and then registering them as providers so that they are accessible throughout the framework?
Why isn't the FanoutProvider also getting registered here? That's because we only want to register providers globally that are likely to be used in many different parts of the application - the alert and configuration providers are good examples widely used providers. The FanoutProvider on the other hand may only be used in a few places so we will only register it where it is needed - such as in our Home component which is what we will work on next.
The Home Component/Page
Now we need to wire up the home page to the Fanout and the alert providers. Open the home.ts file in the /app/pages/home folder and replace its contents with:
      import { Component, OnInit } from "@angular/core";
import { NavController } from "ionic-angular";
import { FanoutProvider } from "../../providers/fanout-provider/fanout-provider";
import { AlertProvider } from "../../providers/alert-provider/alert-provider";

@Component({
  templateUrl: "build/pages/home/home.html",
  providers: [FanoutProvider]
})
export class HomePage implements OnInit {
  constructor(
    public navCtrl: NavController,
    private fanoutProvider: FanoutProvider,
    private alertPovider: AlertProvider
  ) {}

  ngOnInit() {
    this.fanoutProvider.subscribe(data => {
      console.log("received data in home page");
      console.log(data);
      this.alertPovider.presentDismissAlert("Fanout", data, this.navCtrl);
    }, "test");
  }
}
Note how we are referencing both the FanoutProvider and AlertProvider by their names and their relative paths to their files. Also note how we are registering the FanoutProvider here, but not the AlertProvider as we have already registered that provider globally.
The ngOnInit method is executed when the Home component gets initialized and this is where we use the FanoutProvider to subscribe to messages from the Fanout service. Here we are subscribing to the "test" message channel - when a message is received from the "test" channel by the FanoutProvider, the Home component logs messages to the console and sends the messge to the AlertProvider which pops up an alert dialog on the screen.
Final Things for the Client
Just 2 more things we need to do before we finish the client. First, we need to update the index.html file in the /www folder. Replace the contents of index.html with this:
      <!DOCTYPE html>
<html lang="en" dir="ltr">
<head>
  <title>Ionic</title>
  <meta charset="UTF-8">
  <meta name="viewport" content="width=device-width, initial-scale=1.0, minimum-scale=1.0, maximum-scale=1.0, user-scalable=no">
  <meta name="format-detection" content="telephone=no">
  <meta name="msapplication-tap-highlight" content="no">

  <link ios-href="build/css/app.ios.css" rel="stylesheet">
  <link md-href="build/css/app.md.css" rel="stylesheet">
  <link wp-href="build/css/app.wp.css" rel="stylesheet">
</head>

<body>
  <ion-app></ion-app>

  <!-- cordova.js required for cordova apps -->
  <script src="cordova.js"></script>
  <!-- Polyfill needed for platforms without Promise and Collection support -->
  <script src="build/js/es6-shim.min.js"></script>
  <!-- Zone.js and Reflect-metadata  -->
  <script src="build/js/Reflect.js"></script>
  <script src="build/js/zone.js"></script>
  <!-- the bundle which is built from the app's source code -->
  <script src="build/js/app.bundle.js"></script>
  <!-- reference to the Faye object for your realm -->
  <script src="http://your-realm-id-here.fanoutcdn.com/bayeux/static/faye-browser-min.js"></script>
</body>

</html>
Here we are mainly interested in making sure that we have added a script reference to the faye-browser-min.js file - remember to replace your-realm-id-here in the URL with the Fanout realm ID that you got from the account page
Second, we need to create a TypeScript file for our reference to the Faye object in the FanoutProvider - if you have been running the app you may have noticed in the build process that you were receiving a TypeScript error indicating that the Faye object is not defined. Unfortunately, since no one has created a real Faye TypeScript definition file, we will need to create on to get rid of that error.
Navigate to the /typings/global folder and create a sub-folder named faye. In that new folder create a file named index.d.ts and set its contents to:
declare var Faye: any;
Then, navigate to the typings folder and set the contents of that index.d.ts file to this:
      /// <reference path="globals/es6-shim/index.d.ts" />
/// <reference path="globals/faye/index.d.ts" />
Yeah, that's it - we just need to let TypeScript know that there is a Faye type of object that can be anything. With this in place there errors will go away.
Creating the Publisher
For the publisher we will also be using Nodejs. Don't worry if you are not familiar with Nodejs - this is a very, very simple app that will be extremely easy to understand.
From a command prompt, create a new folder and change to that folder; then use NPM (node package manager) to initialize our new Nodejs app:
      mkdir publisher
cd publisher
npm init -y
Next, we will use NPM to add the Fanout nodejs package to our publisher application (make sure that fanoutpub is in all lowercase letters so that it can be found) and create the index.js file that will contain our application's code:
      npm install --save fanoutpub
echo 'use strict' > index.js
Open up the index.js file in your text editor and replace its contents with this:
      "use strict";

let fanout = require("fanoutpub");

const realmId = "your-realm-id-here";
const realmKey = "your-realm-key-here";

let callback = (success, message, context) => {
  if (success) {
    console.log("Publish successful!");
  } else {
    console.log("Publish failed!");
    console.log("Message: " + message);
    console.log("Context: ");
    console.dir(context);
  }
};

let publisher = new fanout.Fanout(realmId, realmKey);
publisher.publish("test", "Test publish!", callback);

console.log("Publisher started");
As before, you will need to replace your-realm-id-here and your-realm-key-here with those on your account page.
Running the Application
To run the applcation open a console in the Ionic2Fanout folder and execute:
ionic serve
Once the browswer window or tab has opened and you can see that the application has fully started, open a console in the publisher folder and execute:
node index.js
If you see a message like:
      Publisher started
Publish successful!
You should see a screen like this in your Ionic2 application:
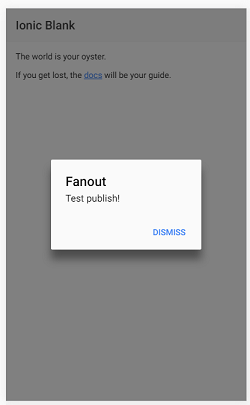
If you aren't seeing this or you saw an error message in the Nodejs application, please make sure that all of the realm IDs and realm keys that you cut and pasted into the code are correct. If these are not exactly what is on your account page, you may get errors or the messages will not be received by the Ionic2 application.
Conclusion
While this is definitely a very simple application, it demonstrates just how quick and easy it is to implement a pub-sub mechanism using Fanout. This example could easily be extended to publish weather information, sports scores, stock prices, or anything else you can imagine with very little code and very little maintenance as Fanout does most of "heavy lifting" for you.
Want to Get the App on Your Device?
Want to quickly test this on an actual device? Without any additional code changes you can quickly and easily get this application on your device using Ionic View
Source Code
All of the source code for this tutorial is available in Github here.
Advance your tech skills today
Access courses on AI, cloud, data, security, and more—all led by industry experts.
