Using AngularFire2 to Build Ionic 2 and Firebase Apps!
Take your Ionic Firebase skills to the next level with this free Ionic tutorial. Learn about Angular 2 Firebase as you create an app using Ionic 2 AngularFire2.
Jan 10, 2019 • 17 Minute Read
Ionic 2 + AngularFire2 = Awesomeness!
NOTE: This post was written in 2016, but last updated Nov, 23rd 2017.
In 2016 I/O conference, Google introduced the new version of firebase and all the goodies that came with it; from analytics integration to admob to monetize your apps, it has everything.
As soon as they announced the big update, David East and Jeff Cross started working really hard in making AngularFire2 compatible with the new services.
For ionic framework developers this means we get a really great library that integrates deeply with the framework, facilitating app creation.
I have been using AngularFire2 for over a month now and I find it fascinating how quickly I'm building my apps now.
This guide will help you create an app using Ionic 2 + AngularFire2 so you can make the jump and start building with that combo soon!
Getting Started
We are going to create a small app to keep track of our unpaid bills. This might be a nifty tool if you forget to pay bills sometimes.
The first thing you want to do is to make sure you have the latest version of ionic installed in your machine. Open your terminal and type:
npm install -g ionic cordova
This command installs the latest version of the Ionic CLI (you'll use it to create your projects) Cordova (this is how you get that nice installable) and typings to work with TypeScript.
Once you have everything installed, it's time to create your app. Go back to your terminal and navigate to wherever you want to create the app. I create my applications in my development folder. Then create the app.
Next, run the following command:
      $ cd Development
$ ionic start billTracker blank
$ cd billTracker
That does a few things:
- ionic start creates the new app.
- billTracker is the name we are giving the app.
- blank tells the CLI we don't want to use any starter template, just a blank project.
Now that you have created a new app and are inside your app folder, it's time to install the dependencies we'll need, right now you'll install firebase and angularfire2.
Go back to your terminal and, inside the billTracker folder, type:
$ npm install firebase angularfire2
If you are running intro trouble getting this to work you can message me and I'll help you troubleshoot. Easiest way to get in touch is via Twitter @javebratt
Now that we have everything installed, it's time to open your app in your favorite text editor or IDE.
Go to app/app.module.ts and you should see something like this:
      import { BrowserModule } from "@angular/platform-browser";
import { ErrorHandler, NgModule } from "@angular/core";
import { IonicApp, IonicErrorHandler, IonicModule } from "ionic-angular";
import { SplashScreen } from "@ionic-native/splash-screen";
import { StatusBar } from "@ionic-native/status-bar";

import { MyApp } from "./app.component";
import { HomePage } from "../pages/home/home";

@NgModule({
  declarations: [MyApp, HomePage],
  imports: [BrowserModule, IonicModule.forRoot(MyApp)],
  bootstrap: [IonicApp],
  entryComponents: [MyApp, HomePage],
  providers: [
    StatusBar,
    SplashScreen,
    { provide: ErrorHandler, useClass: IonicErrorHandler }
  ]
})
export class AppModule {}
You need to do a couple of things here. First, at the top of the file, you'll see where we import the components that we need. Go ahead and import AngularFire2:
      import { AngularFireModule } from "angularfire2";
import { AngularFireDatabaseModule } from "angularfire2/database";
Next, inside the @NgModule initialize your Firebase app:
      @NgModule({
  declarations: [...],
  imports: [
    BrowserModule,
    IonicModule.forRoot(MyApp),
    AngularFireModule.initializeApp({
      apiKey: "Your Credentials Here",
      authDomain: "Your Credentials Here",
      databaseURL: "Your Credentials Here",
      storageBucket: "Your Credentials Here",
    }),
    AngularFireDatabaseModule
  ],
  bootstrap: [...],
  entryComponents: [...],
  providers: [...]
})
You'll need to replace the Your credentials here string with your own firebase data.
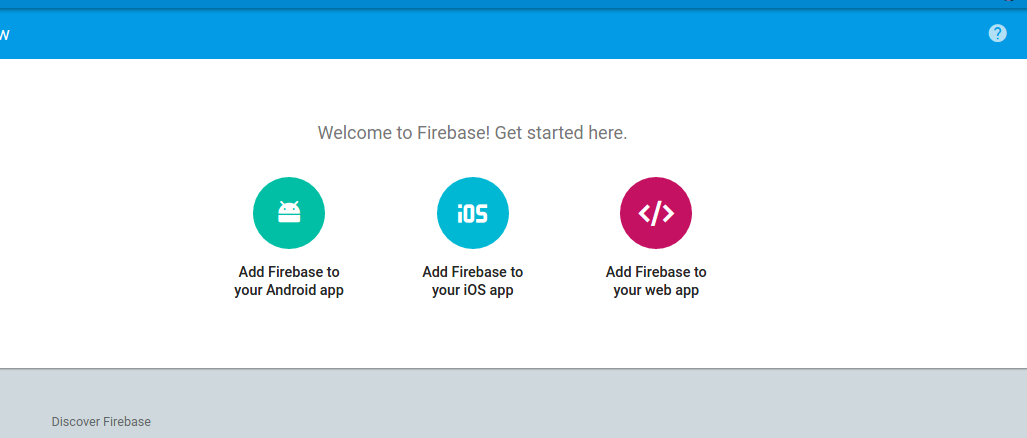
If you don't know where to get those, you'll need to go to the Firebase Console and click on your app (or create a new one)
You'll see a welcome message like the one in the image below, just pick Add Firebase to your web app and it'll open a pop up with all the info for you to use.
Building the App
Now we are ready to start building because we are already connected to firebase and most of the configuration is done.
The first thing we'll want to do is to add a button, so our users can create new bills inside their app. Go to src0/pages/home/home.html. It should look like this:
      <ion-header>
  <ion-navbar>
    <ion-title>
      Ionic Blank
    </ion-title>
  </ion-navbar>
</ion-header>

<ion-content class="home">

</ion-content>
Nothing weird here; it's just the basic html. Change the page title and add a navbar button that sends you to a new page to create bills:
      <ion-header>
  <ion-navbar>
    <ion-title>
      My Bills
    </ion-title>
    <ion-buttons end>
      <button (click)="newBill()">
        <ion-icon name="add"></ion-icon>
      </button>
    </ion-buttons>
  </ion-navbar>
</ion-header>

<ion-content class="home">

</ion-content>
That will give you a nice + sign to the right of your navbar. Once the user clicks the sign, the newBill() function is called.
Now we need to create newBill() in the home.ts file. To do this, open the file, which will have the following placeholder code:
      import { Component } from '@angular/core';
import { NavController } from 'ionic-angular';

@Component({
  selector: 'page-home',
  templateUrl: 'home.html'
})
export class HomePage {
  constructor(public navCtrl: NavController) {}
}
We are going to send the user to a new page to create this bill, so we'll need to use the NavController to send our user there.
First, however, let's create the BillCreate page to see the coolest thing about Ionic: its CLI. You can do a bunch of cool stuff with it, even generate placeholder code. Just open your terminal and type:
ionic g page BillCreate
That little line of code right there creates a bill-create folder, with 4 files in it bill-create.ts bill-create.html bill-create.scss bill-create.module.ts and they all have the boilerplate code already there.
Talk about a productivity boost!
We'll open those files later, for now we just needed to create them to avoid errors when creating the newBill() function.
Go back to home.ts and right after the constructor() create the new function:
      newBill(){
  this.navCtrl.push('BillCreatePage');
}
This will just take our user to the newly created page where we'll add the form to create a new bill.
So go to pages/bill-create/bill-create.html and delete everything in there, we'll replace it with this:
      <ion-header>
  <ion-navbar>
    <ion-title>New Bill</ion-title>
  </ion-navbar>
</ion-header>

<ion-content padding class="bill-create">
  <ion-item>
    <ion-label stacked>Bill Name</ion-label>
    <ion-input [(ngModel)]="name" type="text" placeholder="How do you identify this bill?"></ion-input>
  </ion-item>

  <ion-item>
    <ion-label stacked>Amount</ion-label>
    <ion-input [(ngModel)]="amount" type="number" placeholder="How much will you have to pay?"></ion-input>
  </ion-item>

  <ion-item>
    <ion-label>Due Date</ion-label>
    <ion-datetime displayFormat="D MMM, YY" pickerFormat="DD MMM YYYY" [(ngModel)]="dueDate"></ion-datetime>
  </ion-item>

  <button block (click)="createBill(name, amount, dueDate)">
    Create Bill
  </button>

</ion-content>
The first two items created are just regular inputs; you can see everything about them in the ionic docs. We are just adding an [(ngModel)] to them to hold the values.
The third item is a date-time item, this is why Ionic is so awesome, you add that input and it will add a beautifully designed date picker to your app.
And finally we add a button that calls the createBill() method passing the values of the inputs.
Now we need to go to bill-create.ts and create that function. Open the file and you'll see this:
      import { Component } from '@angular/core';
import { IonicPage, NavController } from 'ionic-angular';

@IonicPage()
@Component({
  selector: 'page-bill-create',
  templateUrl: 'bill-create.html'
})
export class BillCreatePage {
  constructor(public navCtrl: NavController) {}
}
We'll need to import AngularFire and our list observable to this file, so right below your last import statement type:
import { AngularFireDatabase, AngularFireList } from 'angularfire2/database';
- AngularFireDatabase gives us the AngularFire2 magic, where we can call lists, objects, auth methods, etc.
- AngularFireList gives us the observable we'll be using, it will subscribe to the list and sync it in real time with our app.
Right before the constructor, create a variable that will hold our list. If you are getting confused on where to do this don't worry, I'll show you the completed file later.
billList: AngularFireList<any>;
Inject AngularFireDatabase into your constructor.
      constructor(
  public navCtrl: NavController,
  public afDatabase: AngularFireDatabase
) {}
Now create a binding to the list inside the constructor:
this.billList = afDatabase.list('/bills');
This will keep billList synced with our Firebase real-time database on the /bills node.
To add new bills to that list, we just need to use angularfire's push() method:
      createBill(name, amount, dueDate) {
  const newBillRef = this.billList.push({});

  newBillRef.set({
    name: name,
    amount: amount,
    dueDate: dueDate,
    paid: false,
    id: newBillRef.key
  }).then( newBill => {
    this.navCtrl.pop();
  }, error => {
    console.log(error);
  });
}
- this.billList.push() is adding a new bill to the list, passing the values that the method is receiving, and setting the paid property to false.
- The .then() function happens after the bill is added to the list and it does 2 things:
- First it goes back one page (to the Home Page) after creating the bill.
- Second, if any error occurs on the process it's going to log it to the console.
The final version of the file should look like this:
      import { Component } from '@angular/core';
import { IonicPage, NavController } from 'ionic-angular';
import { AngularFireDatabase, AngularFireList } from 'angularfire2/database';

@IonicPage()
@Component({
  selector: 'page-bill-create',
  templateUrl: 'bill-create.html'
})
export class BillCreatePage {
  billList: AngularFireList<any>;
  constructor(
    public navCtrl: NavController,
    public afDatabase: AngularFireDatabase
  ) {
    this.billList = afDatabase.list('/bills');
  }

  createBill(name, amount, dueDate) {
    const newBillRef = this.billList.push({});

    newBillRef.set({
      name: name,
      amount: amount,
      dueDate: dueDate,
      paid: false,
      id: newBillRef.key
    }).then( newBill => {
      this.navCtrl.pop();
    }, error => {
      console.log(error);
    });
  }
}
home.ts
Great! We can create bills now. Is that it for this app?
Nope, now we are going to list those bills in the Home page. To do this, open home.ts, import AngularFireDatabase, inject it to the controller, and bind it to a list:
      import { Component } from '@angular/core';
import { NavController } from 'ionic-angular';
import { AngularFireDatabase, AngularFireList } from 'angularfire2/database';

@Component({
  templateUrl: 'home.html',
})
export class HomePage {

  billList: AngularFireList<any>;
  constructor(
    public navCtrl: NavController,
    public afDatabase: AngularFireDatabase
  ) {
    this.billList = afDatabase.list('/bills').valueChanges();
  }

  newBill(){
    this.navCtrl.push('BillCreatePage');
  }

}
We're going to go to home.html and create a couple of cards to show both paid and unpaid bills. However, since I want to format the Due Date, I'm going to need a little help.
You see, Angular2 pipes (that's what we use to format dates) break when we are using Ionic to build mobile apps. We're going to use a custom pipe from angular2-moment instead.
Open your terminal and type:
npm install --save angular2-moment
This will install both the module and its typings, you can read the docs here but we'll only use a small part of it.
Import the pipe we'll need:
import { DateFormatPipe } from 'angular2-moment';
Now inside our @Component declaration we need to express we'll use that pipe:
      @Component({
  templateUrl: 'build/pages/home/home.html',
  selector: 'app',
  pipes: [DateFormatPipe]
})
And that's it! Go to the home.html file to use our app. Just open the file and, inside the ion-content, create a card to hold our unpaid bills:
      <ion-card>
  <ion-card-header>
    Pending Bills
  </ion-card-header>

  <ion-list>
    <ion-item text-wrap *ngFor="let bill of billList | async" (click)="promptPayment(bill.id)"
      [class.hide]="bill.paid == true">
      <ion-icon name="timer" danger item-left></ion-icon>
      <h2>{{bill.name}}</h2>
      <h3>Total: <strong>${{bill.amount}}</strong></h3>
      <p>Pay before: <strong>{{bill.dueDate | amDateFormat: 'LL'}}</strong></p>
    </ion-item>
  </ion-list>
</ion-card>
There are a few things going on here:
- *ngFor="let bill of billList | async" tells our item to repeat for every bill it finds on our billList.
- (click)="promptPayment(bill.id) tells our system to call that function when users tap on the item. (we'll create that function in a minute).
- [class.hide]="bill.paid == true" says that if the bill is already paid, add the hide css class, which will hide the item from the list.
And after that we are creating a regular item and binding the bill properties to it.
See this line <p>Pay before: <strong>{{bill.dueDate | amDateFormat: 'LL'}}</strong></p> this is where we are using angular2-moment to format the date.
Right after that card we'll create another card, this time to hold the list of the bills our user already paid:
      <ion-card>
  <ion-card-header>
    Paid Bills
  </ion-card-header>

  <ion-list>
    <ion-item text-wrap *ngFor="let bill of billList | async"
      [class.hide]="bill.paid == false">
      <ion-icon name="checkmark-circle" favorite item-left></ion-icon>
      <h2>{{bill.name}}</h2>
      <h3>Total: <strong>${{bill.amount}}</strong></h3>
    </ion-item>
  </ion-list>
</ion-card>
It's almost the same as before, we are just adding the hide class to the ones that haven't been paid yet.
promptPayment()
Remember when we said we'd create the promptPayment() function in a minute? It's that time now. Go to home.ts and import AlertController; we'll need this to create a prompt:
import { NavController, AlertController } from 'ionic-angular';
Now we just need to create the function:
      promptPayment(billId: string) {
  let alert = this.alertCtrl.create({
    message: "Mark as paid?",
    buttons: [
      {
        text: 'Cancel',
      },
      {
        text: 'Mark as Paid',
        handler: data => {
          this.billList.update(billId, { paid: true });
        }
      }
    ]
  });
  alert.present();
}
The code is really easy to follow. We are creating a prompt that's going to ask the user: Mark as paid? and our user is going to get 2 buttons:
- Cancel, which does nothing.
- Mark as Paid, which will call this.billList.update(billId, { paid: true });. This method will take the billId we're sending from the html and update that bill with AngularFire's update() method.
Piece of cake!
Take Your Skills to the Next Step
Advance your tech skills today
Access courses on AI, cloud, data, security, and more—all led by industry experts.
