Set Up a Gated Check-in Policy Using Azure DevOps Services
A gated check-in is a process that restricts developers from merging a broken code into the source control system—something every software company wants to establish.
Nov 9, 2020 • 8 Minute Read
Introduction
A gated check-in is a process that restricts developers from merging a broken code into the source control system—something every software company wants to establish. As they do so, organizations need to ask several questions:
- How does one set up a gated check-in policy?
- What are the best practices to follow while setting up this policy?
- What are the benefits to an organization if this policy is well established?
- What are the features that can be configured?
This guide will clarify these questions and shed light on how to set up different policies that can be configured for a gated checked-in process using Azure DevOps Services (formerly known as VSTS).
Let's start by learning about branch policies and related features.
Protect Your Branches
Azure DevOps has a feature called branch policies used to set up a gated check-in process. Branch policies help teams to protect their important branches of development. Policies are enforced on the team for better code quality and help improve managing code standards.
In a nutshell, you can set up the following policies:
- Configure branch policies
- Require a minimum number of reviewers
- Check for linked work items
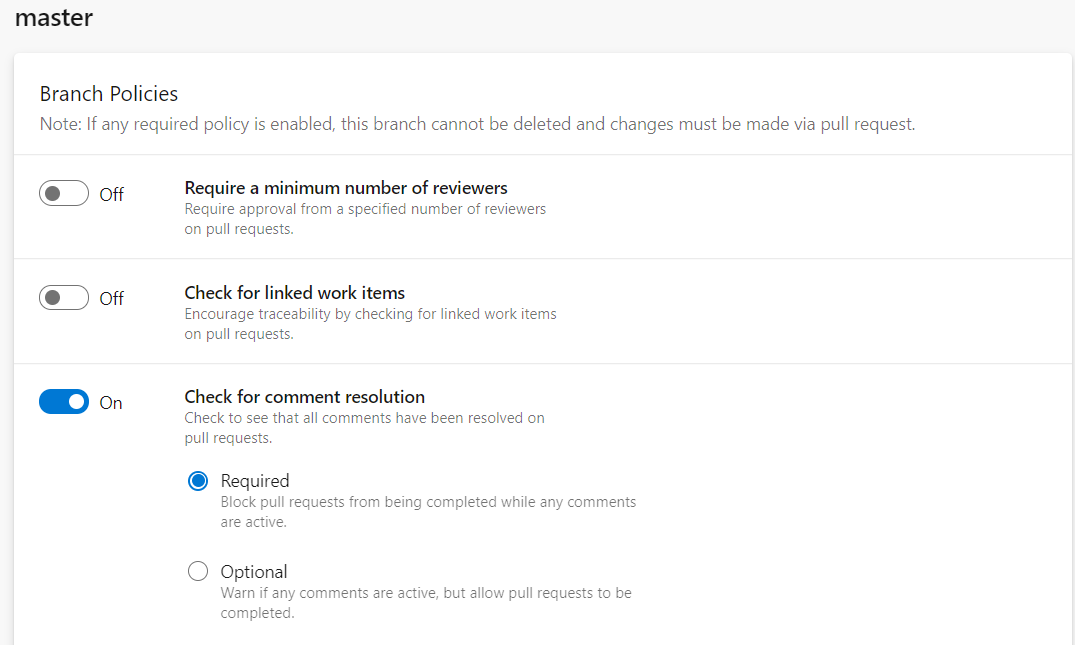
- Check for comment resolution
- Build validation
- Automatically include code reviewers
Now it’s time to deep dive into each policy and leverage the power of the branch policies feature for a gated check-in process. The following sections will explain each policy in detail and give tips for configuring branch policies.
Configure Branch Policies
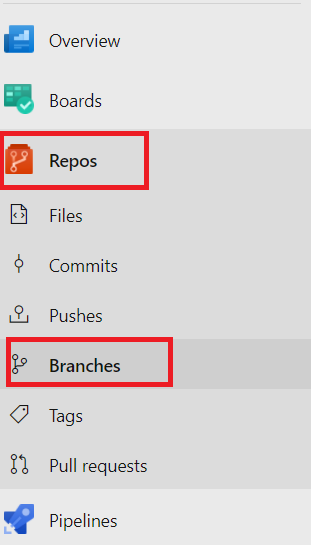
To set up branch policies, navigate to Repos > Branches, as shown in the figure below.
Once you click on the Branches option, it launches the Branches page in the web portal, as shown in the figure below.
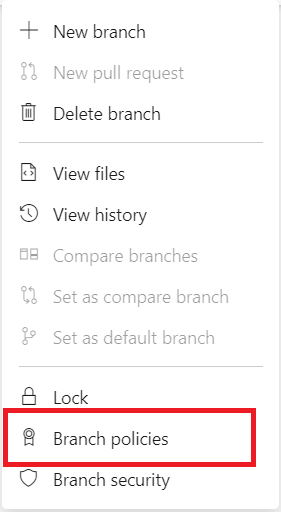
Select the … button, then select Branch Policies from the context menu.
Now you can configure various policies on the setting page. See the rest of the guide for the description of each policy type.
Set Up Minimum Number of Reviewers
The require a minimum number of reviewers’ policy helps most software development projects. Code review is a best practice to follow and the recommended way to ensure code quality improvement.
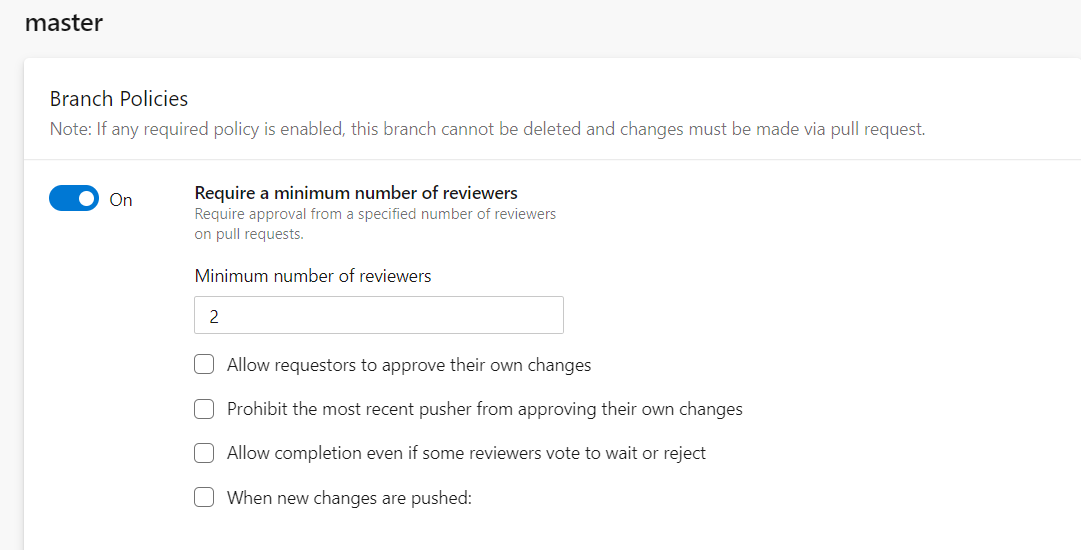
To require teams to review their changes before completing a pull request, select the Require a minimum number of reviewers option. It is recommended to set a minimum of two reviewers as best practice.
This policy also helps all the software industries before the developer’s code gets merged to the master branch. It provides various options to configure policy along with a minimum number of reviewers. Let's explore these options in detail.
Allow requestors to approve their own changes
If this option is selected, the creator of the pull request can vote on its approval. If not, then their vote won’t count toward the minimum number of reviewers. It is recommended that the creator of the pull request not be able to vote on their own request.
Prohibit the most recent pusher from approving their own changes
If you enable this option, enforced segregation of duties happens. It means that the most recent push automatically makes the pusher’s vote not count.
Allow completion even if some reviewers vote to wait or reject
If this option is not enabled, the pull of request code will not be merged to the master branch if some reviewers vote to reject it. It is recommended to not enable this option unless it is needed.
Reset code reviewer votes when there are new changes
This option gives you the capability to reset code reviewers' votes if the creator of the pull request submits new changes to the same PR. This way, reviewers are well of aware new changes and can decide to approve the PR or not.
Set Up Check for Associated Work Items
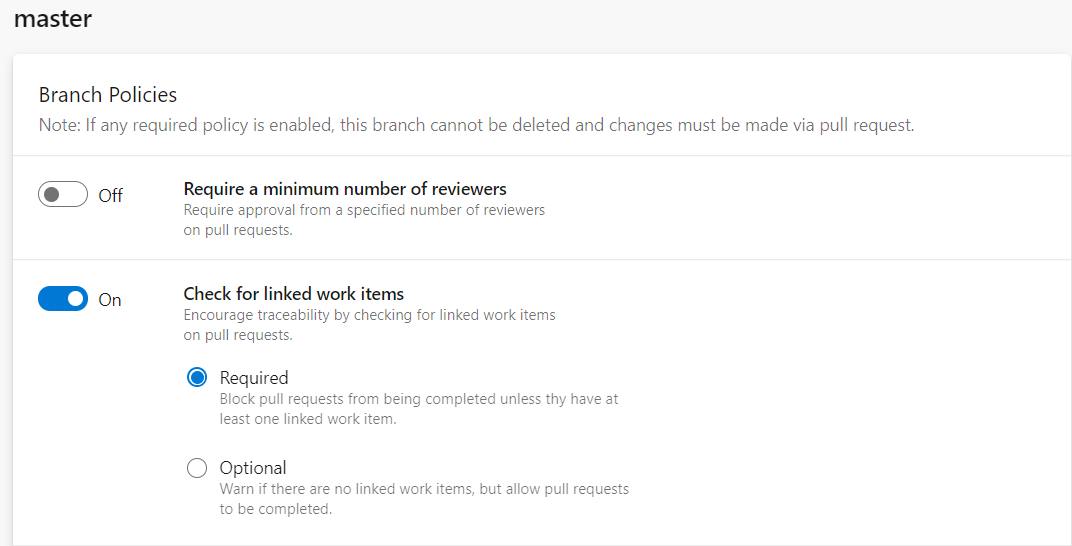
This policy provides you the ability to set up an association between a pull request and a work item to ensure that upcoming changes to your branch have proper traceability.
You can set up this policy as required or optional to check for associated work items in the pull request. It is recommended to set up this option as required, which means blocking the pull request from being completed unless the user has at least one linked work item.
Enforce Comment Resolution
Similarly, branch policies provide you an ability to block pull requests from being completed while any comments are active.
Azure DevOps provides two options: required and optional. It is recommended to set up this option as required so the user won’t be able to complete their PR unless all comments are resolved.
Set Up Build Validation
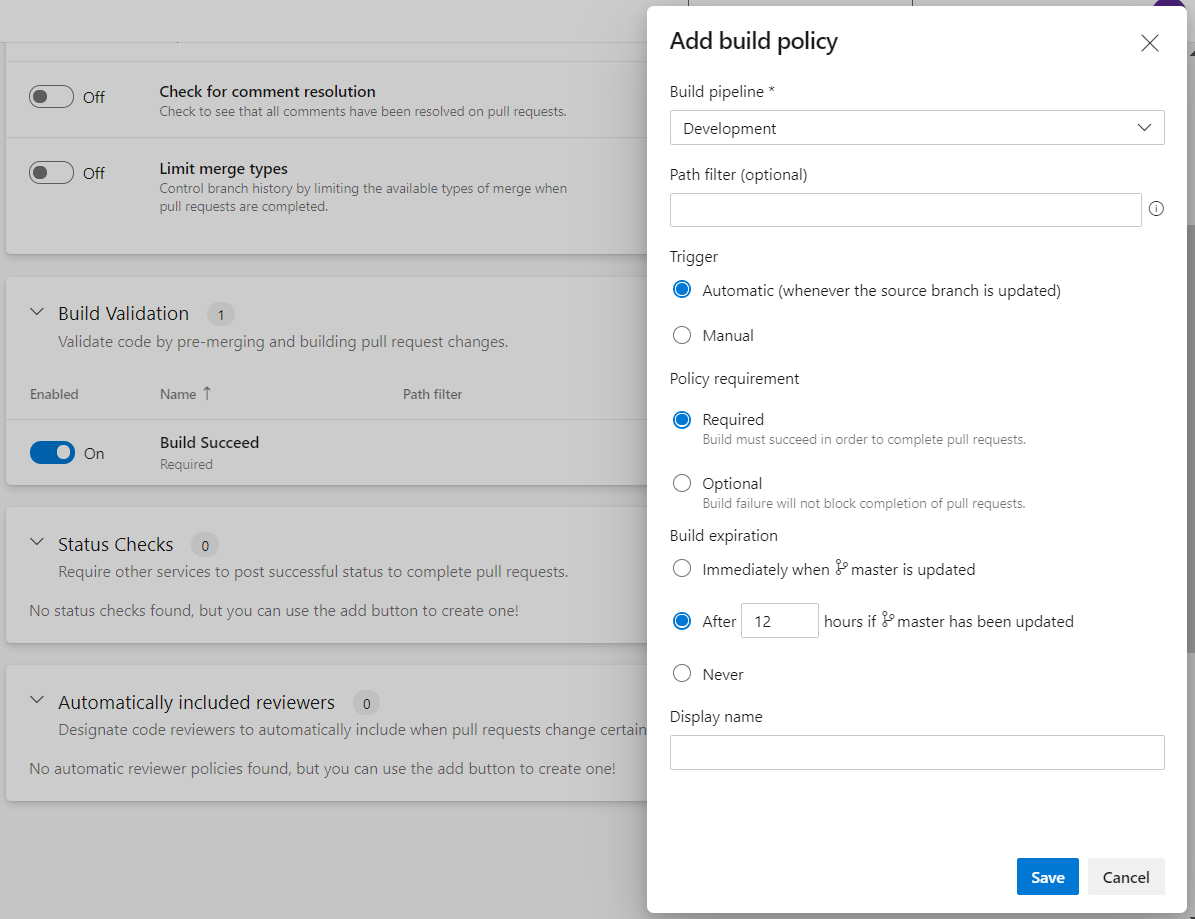
Setting up build validation is a crucial part of the gated check-in process. This option gives you more control over code quality, protecting code using various processes, such as requiring that all unit or integration tests are passed, SonarQube code quality gate is approved, build succeeded, etc.
Build policy reduces breaks and keeps your test result passing. It can be very well integrated with Continuous Integration (CI) on your development branches to catch issues early.
It is a prerequisite to have a build pipeline up and running before setting up this policy. Build policy needs a pipeline that is triggered when the source branch is updated. This policy gives you options during setup:
**1. Trigger options **
- Automatic (Recommended): Triggers build automatically when the source branch is updated
- Manual: User needs to trigger build manually as needed
2. Policy requirement
- Required (Recommended): Build must succeed to complete the pull request
- Optional: Build failure will not block the completion of the pull request
**3. Build expiration **
- Immediate: when the main branch is updated
- Duration (Recommended): After N number of hours if the main branch has been updated
- Never: Build never expires
Automatically Include Code Reviewers
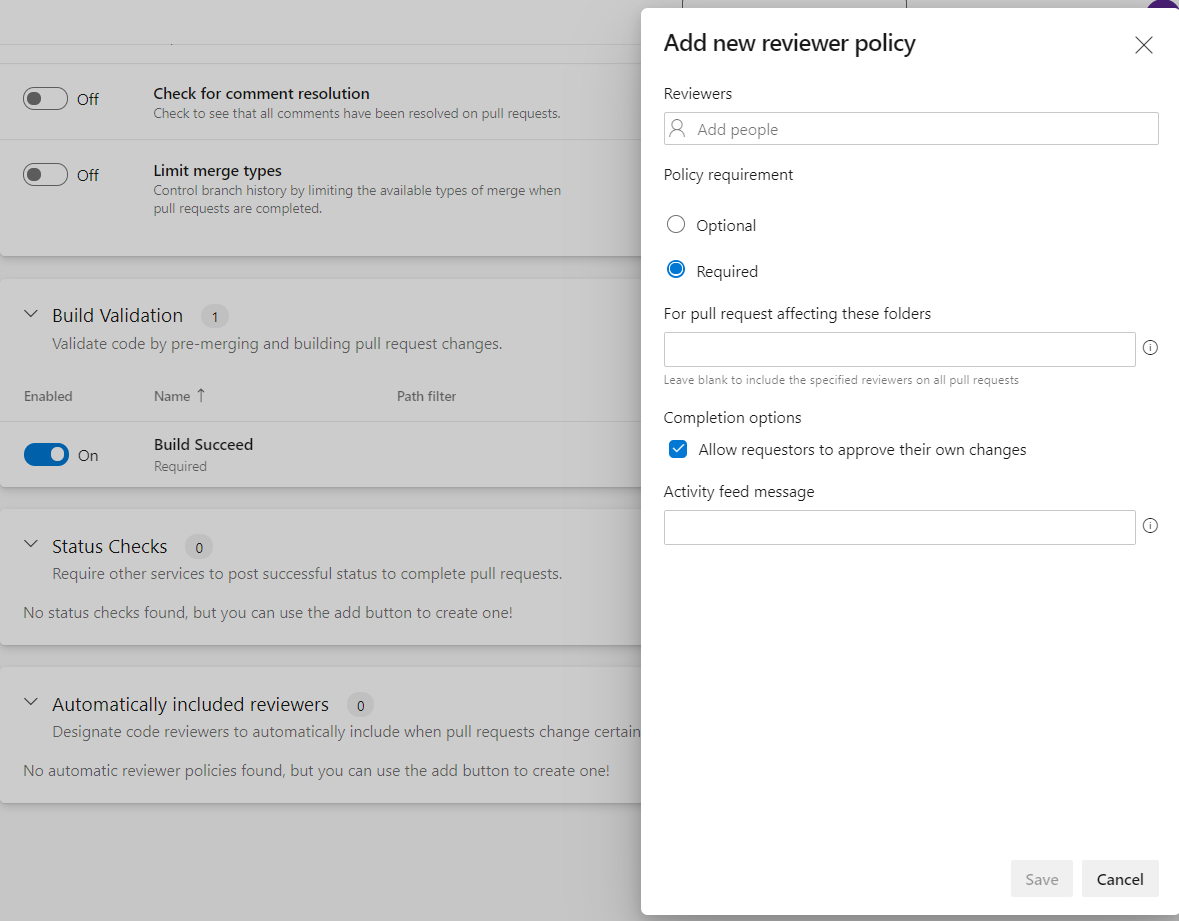
This filter provides you the capability to include code reviewers automatically when a new pull request is submitted. To configure this policy, a team needs to decide the reviewer’s name and policy requirements, as shown in the figure below.
-
If you select Required, then a pull request can’t be completed until every user added as a reviewer has approved changes.
-
If you select Optional, then a pull request doesn’t require their approval to complete the pull request.
-
You can set up Allow requestors to approve their own changes.
-
When all the above conditions are met then a pull request can be completed.
Conclusion
In this guide, you have learned about configuring a gated check-in process in Azure DevOps using the branch policies feature. Overall, this helps a team to set up better processes, improve code quality, and focus on business problems.
To further build on this guide, you can set up other options like path filters, bypass branch policies, status checks, and so on. Azure DevOps provides you a branch permissions (security) feature to implement them. Thank you for reading.
Advance your tech skills today
Access courses on AI, cloud, data, security, and more—all led by industry experts.

