Creating a Hard Surface Sci-Fi Ninja in ZBrush
In this series of tutorials we will cover how to create a fully detailed armored ninja. Software required: ZBrush 4R6, Photoshop CS6.
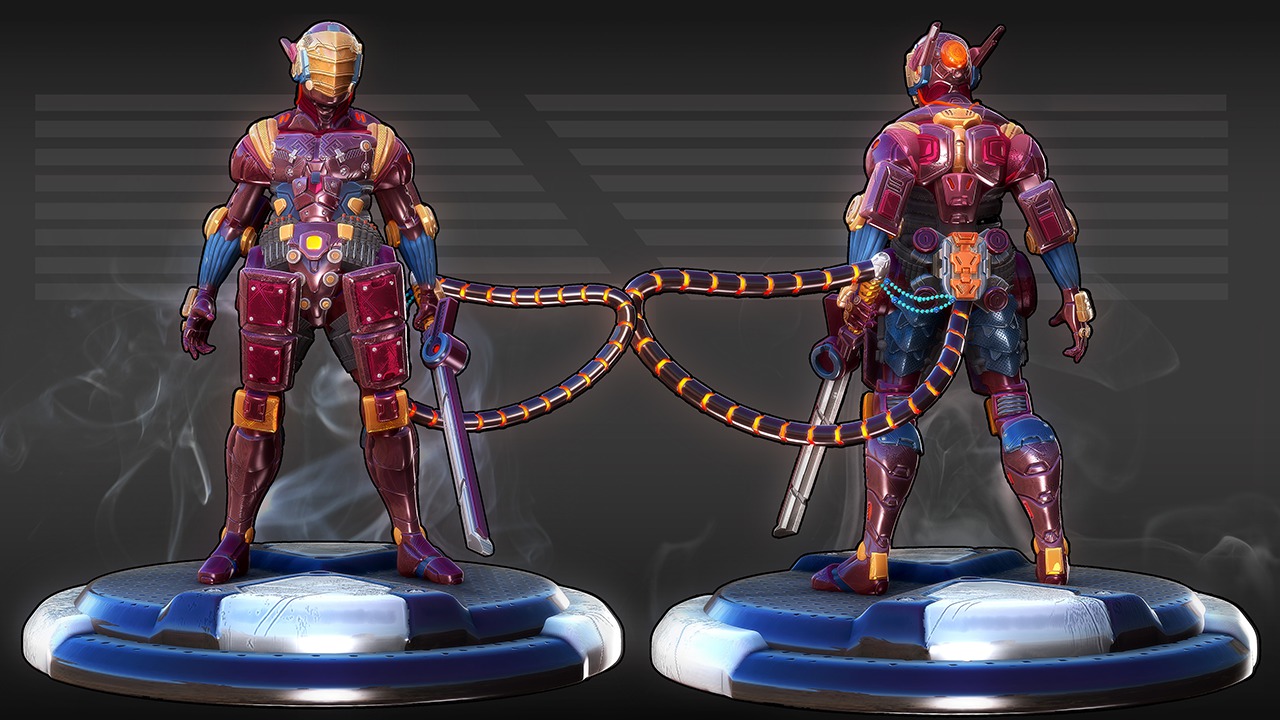
What you'll learn
In this series of tutorials we will cover how to create a fully detailed armored ninja. Throughout these lessons we will cover how to create hard surface pieces using a more hands on approach involving brushes, DynaMesh, and Spotlight techniques. We will also cover some simple and effective painting and rendering methods upon completion of our character. By the end to the course you will grasps many ways to edit hard surface geometry in ZBrush. Software required: ZBrush 4R6, Photoshop CS6.
Table of contents
- Introduction to Concept and Reference Sheet 6m
- Introduction to Tools 9m
- Introduction to Brushes 7m
- Blocking out the Head 8m
- Modeling the Arms 9m
- Blocking out the Front Torso 10m
- Creating the Rear Torso 6m
- Blocking out the Front Legs 9m
- Building out the Rear Legs 10m
- Refining Shapes of Head and Front Torso 10m
- Refining Shapes of Arms and Legs 10m
- Refining Shapes of Rear Torso and Legs 10m
- Expanding Secondary Shapes of the Head and Chest 10m
- Expanding Secondary Shapes on the Front of the Torso 10m
- Fleshing out to Secondary Shapes on the Front of the Torso 11m
- Expanding to Secondary Shapes of the Legs 9m
- Adjusting Secondary Shapes on the Rear of the Torso and Arms 10m
- Expanding Secondary Shapes of Arms and Feet 10m
- Tweaking and Editing the Torso and Thigh Armor 10m
- Tweaking and Editing the Visor and Head Gear 10m
- Further Detailing Subshapes of the Headgear 10m
- Expanding Subshapes on the Front of the Torso 9m
- Editing Shapes on the Front of the Torso 11m
- Editing Subshapes on the Torso and Armor 10m
- Expanding Subshapes of and the Arms 10m
- Tweaking Subshapes of the Arms 10m
- Tweaking Character Using Transpose Master 10m
- Expanding Shapes on the Rear of the Torso 9m
- Continuing to Expand Shapes on the Rear 9m
- Adding Attachments to the Legs and Hands 9m
- Editing and Tweaking Arm Muscle Fiber Details 6m
- Adding Detail to the Headgear 11m
- Tweaking Headgear and Add Additional Geometry 10m
- Additional Torso Tweaks and Edits 9m
- Editing the Waistband 9m
- Editing the Thigh Pads and Thigh Armor 9m
- Editing the Thigh Armor 12m
- General Tweaks and Edits 11m
- Tweaking the Hand Plate and Waist Band 8m
- Utilizing Transpose Master 7m
- Recreating the Hip Device 10m
- Blocking out the Sword 8m
- Editing and Tweaking the Sword 9m
- Editing the Sword Device and Hilt 8m
- Detailing the Hilt of the Sword 11m
- Creating the Brush for the Sword 15m
- Blocking out the Power Supply 13m
- Editing the Power Supply 9m
- Creating an Insert Multi Mesh Brush to Form the Cable 8m
- Adding the Sword and Power Supply to Our Scene 9m
- Performing General Tweaks 8m
- Detailing Head from Re-concept 12m
- Adding New Geometry to the Head 15m
- Tweaking Details of the Visor and Shoulder Piece 9m
- Detailing the Chest from Re-concept 12m
- Detailing the Torso and Knee from Re-concept 11m
- Detailing the Legs and Feet from Re-concept 16m
- Adding the Power Supply and Shoulder Details 11m
- Detailing the Hand from Re-concept 14m
- Creating a Dart Knife 8m
- Texturing the Waist Band 7m
- Texturing the Thigh Band 8m
- Third Level Detailing of the Neck and Torso 12m
- Editing the Arms and Torso 10m
- Third Level Detailing of Torso and Legs 13m
- Creating a Stage for Character 9m
- Damaging the Character with Morph Targets 16m
- Damaging the Character with Orbs Crack Brush 11m
- Creating Some Materials for Our Character 8m
- Applying Materials to the Head and Torso 11m
- Applying Materials to the Arms, Legs, and Sword 12m
- Creating a Color Palette 14m
- Cavity Color Painting 17m
- Tweaking the Lights and Render Settings 10m
- Editing the Render and Conclusion 11m