Publish Machine Learning Models in Azure Machine Learning Studio
In many companies, data scientists are required not just to build predictive models, but also to deploy and publish them.
Oct 21, 2020 • 11 Minute Read
Introduction
One of the most in-demand skills in the analytics workplace today is the ability to deploy machine learning algorithms. In many companies, data scientists are required not just to build predictive models, but also to deploy and publish them. This has become a key requirement in today's era of building data science products. In this guide, you will learn how to publish a machine learning model in Azure Machine Learning Studio.
Data
You will use the Adult Census Income Binary Classification dataset available in Azure Machine Learning Studio. The data is a subset of the 1994 census database, using working adults over the age of 16 with an adjusted income index of greater than 100. The data is used as a classification machine learning problem where the objective is to classify people using demographics to predict whether a person earns over US$50,000 a year. The data comes from the UCI Machine Learning Repository.
Steps
There are two main steps to publish machine learning models. The first is to build the machine learning model, and the second is to deploy and publish it.
Build the Model
Building models is not covered in this guide. You can follow the steps detailed in the guide Getting Started with Azure ML Studio to build the model you will deploy in this guide.
The only change, although not mandatory, is that you can change the name of the experiment from Getting Started with Azure ML Studio to Publishing Model on Azure.
The result from the model building step is the following output.
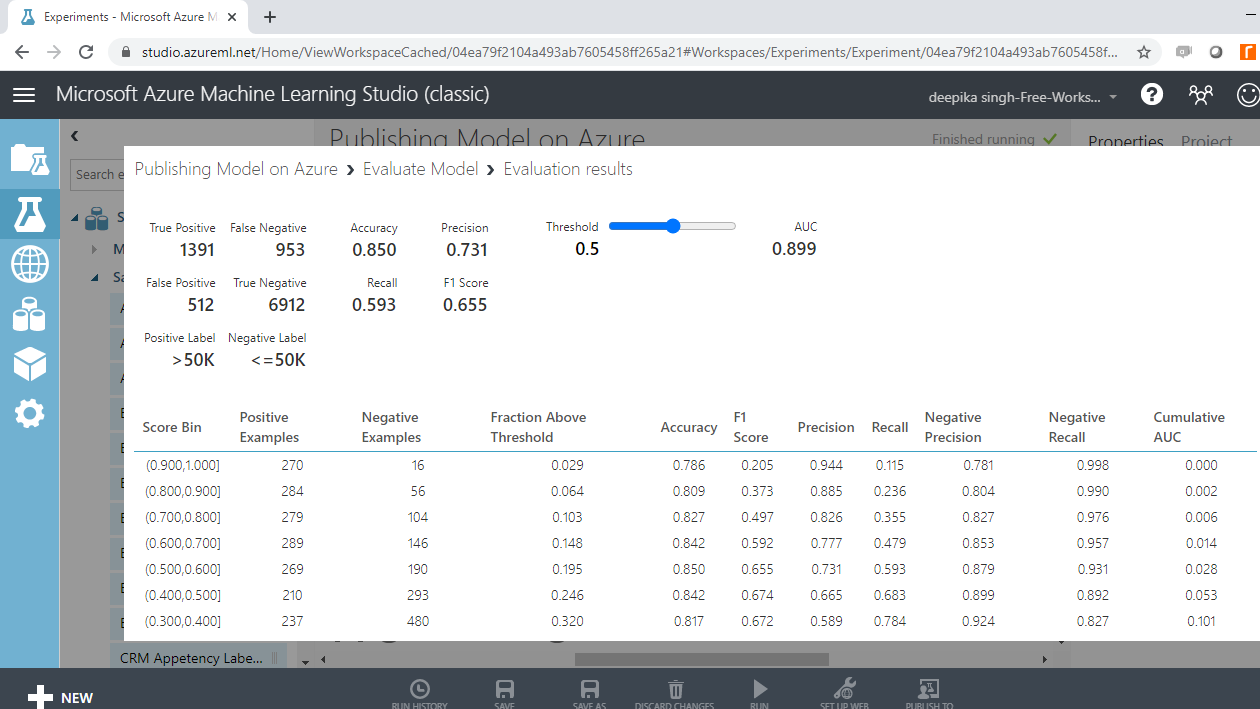
You now have a machine learning algorithm built on Azure Machine Learning Studio, and the next step is to publish and deploy it, which is covered in the subsequent sections.
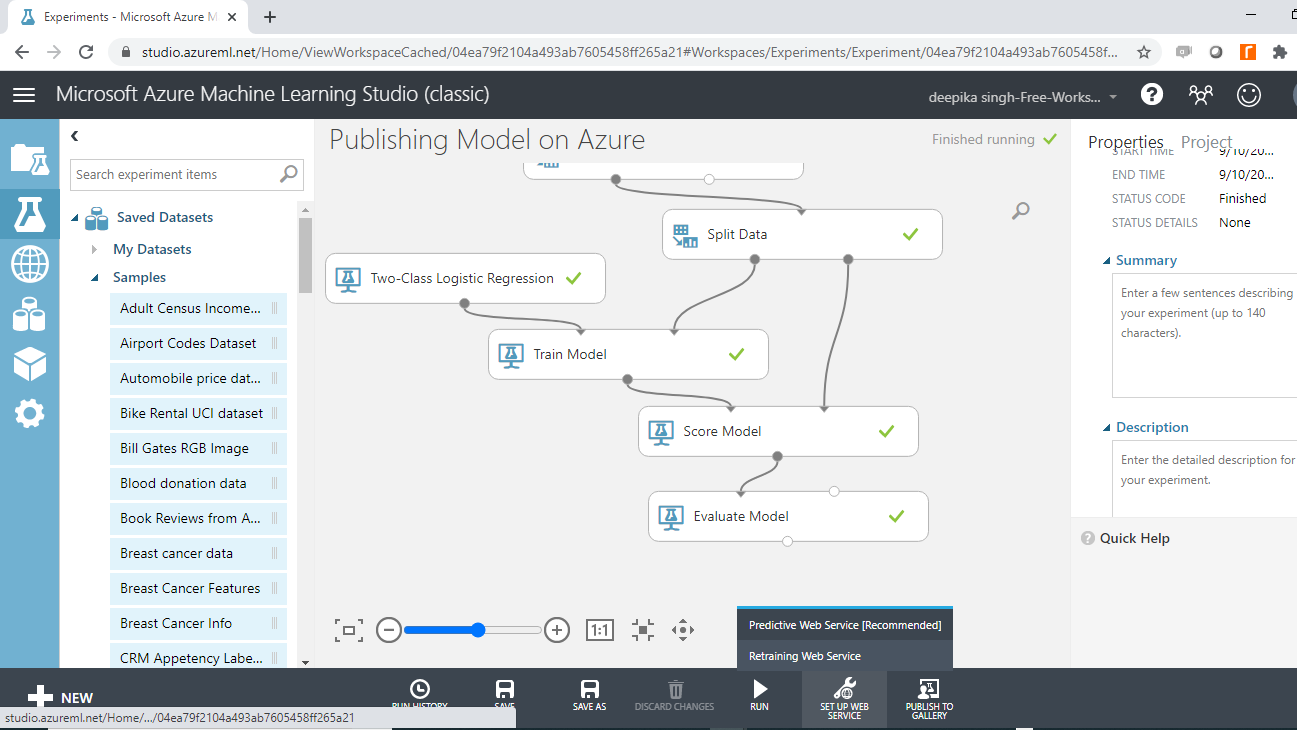
Create the Web Service
At the bottom of the workspace, click on Set Up Web Service, and select Predictive Web Service Recommended.
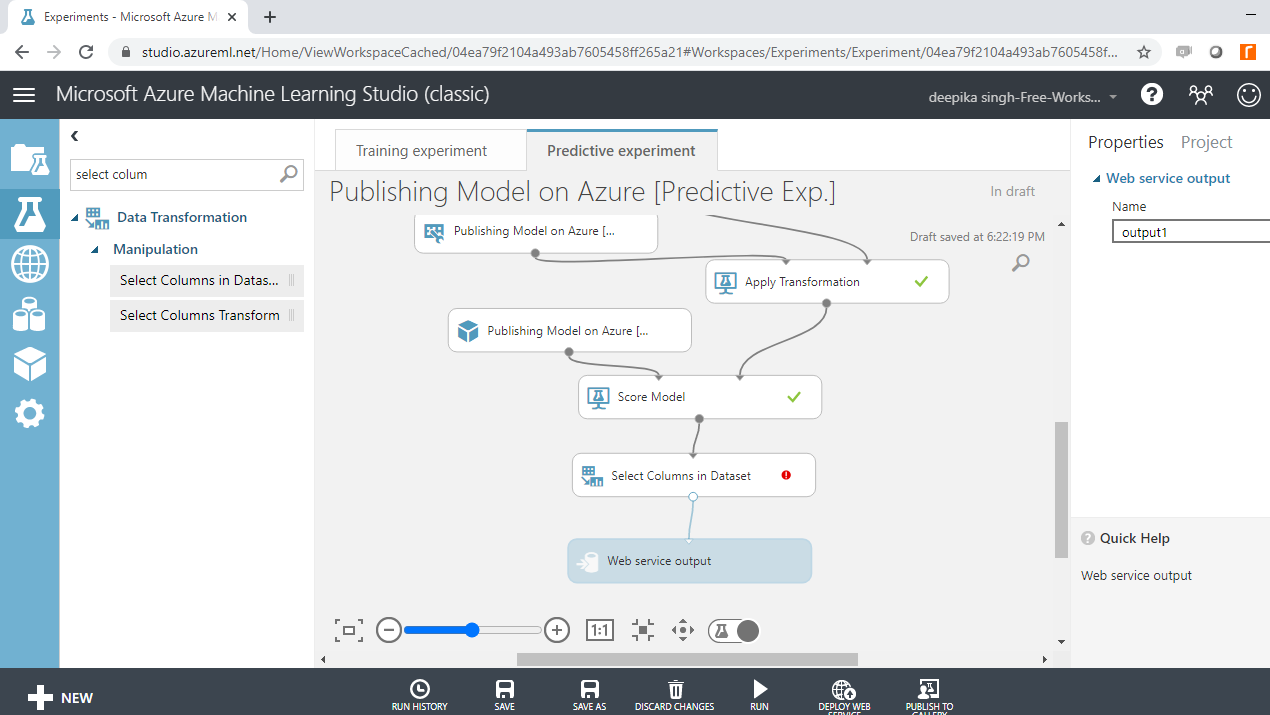
A predictive experiment is created, and several new modules will be added. For example, the Web service input and Web services output modules get added to the predictive experiment. These are the first and last modules in the experiment.
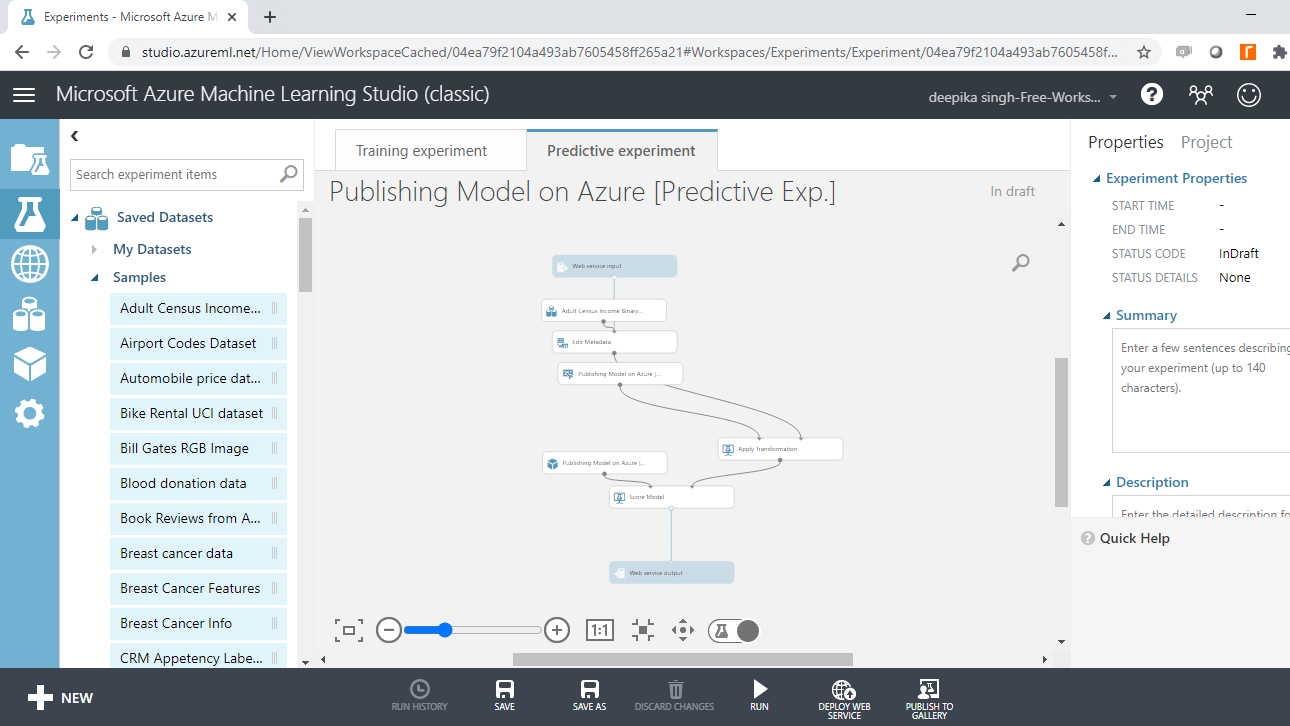
The Publishing model on Azure and Apply Transformation modules also get added. Run the experiment, and once all the modules run successfully, right-click on the Score model module, and select Visualize.

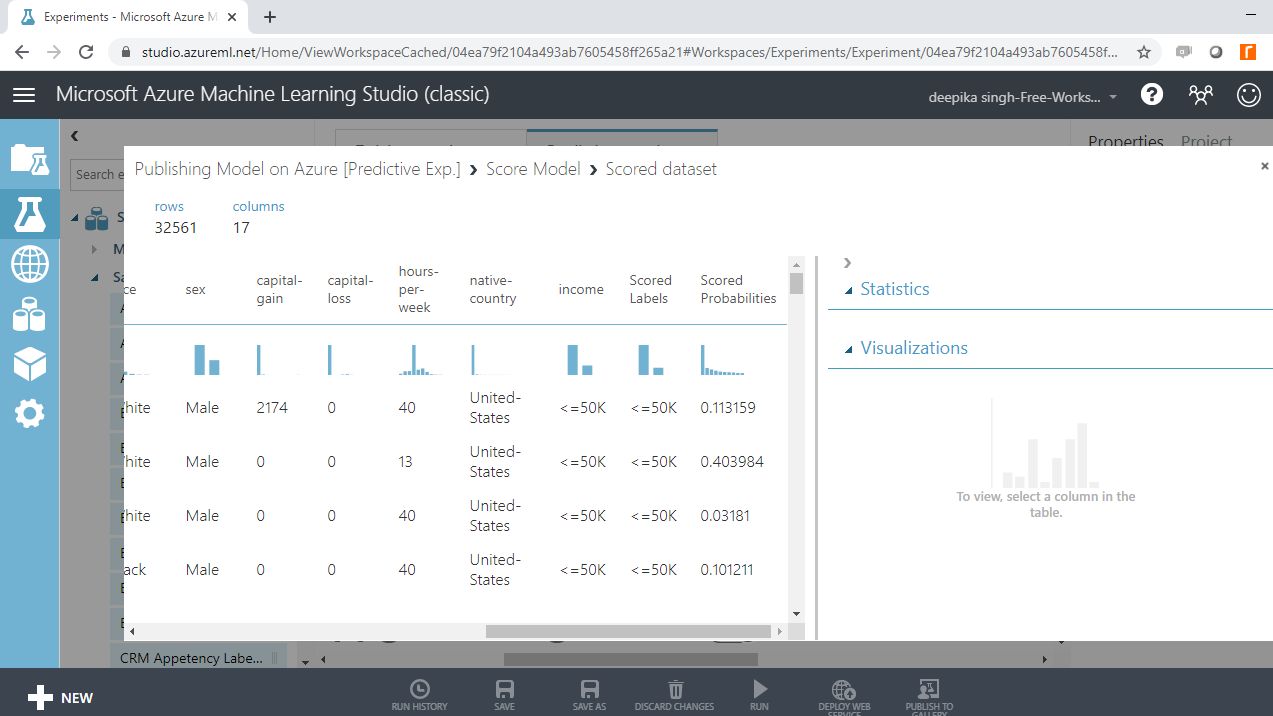
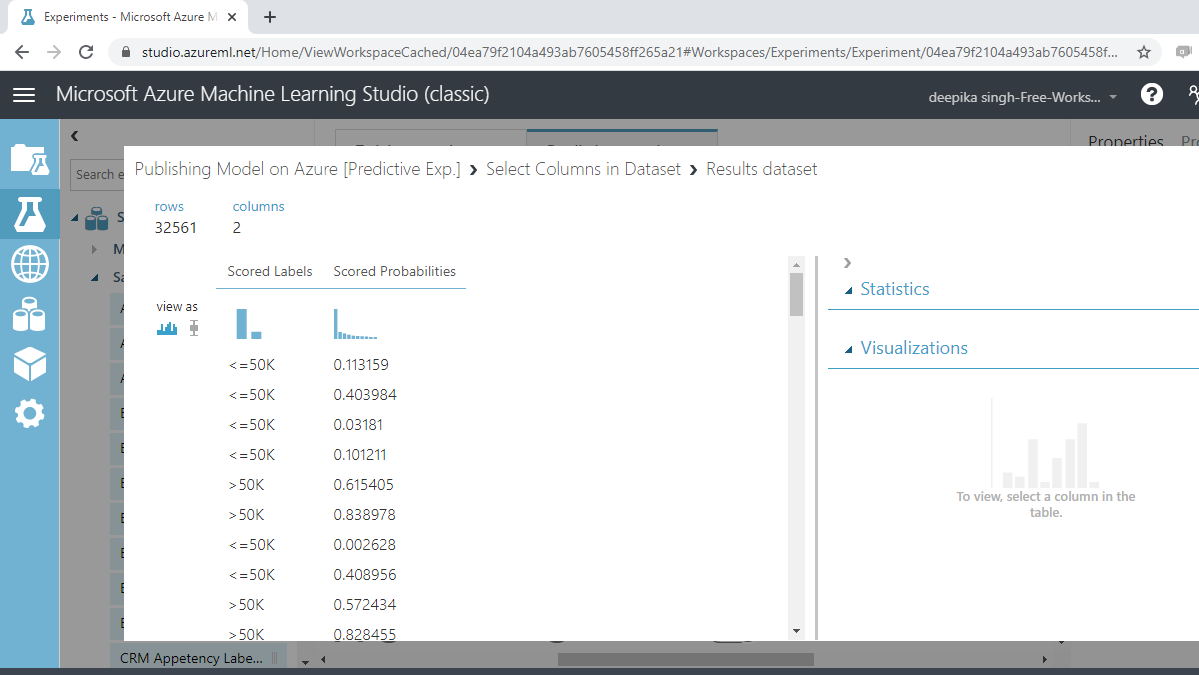
The following output will be displayed. You can see two new variables being added. These are Scored Labels and Scored Probabilities. The first gives the predicted labels while the latter gives the probability score.
Customize Web Service Output
You have created a predictive experiment, and the next step is to customize the output. To begin, delete the connection between the Score Model module and Web service output. Next, search and drag the Search Columns in Dataset module between the Score Model module and Web service output. Then make the connection as shown below.
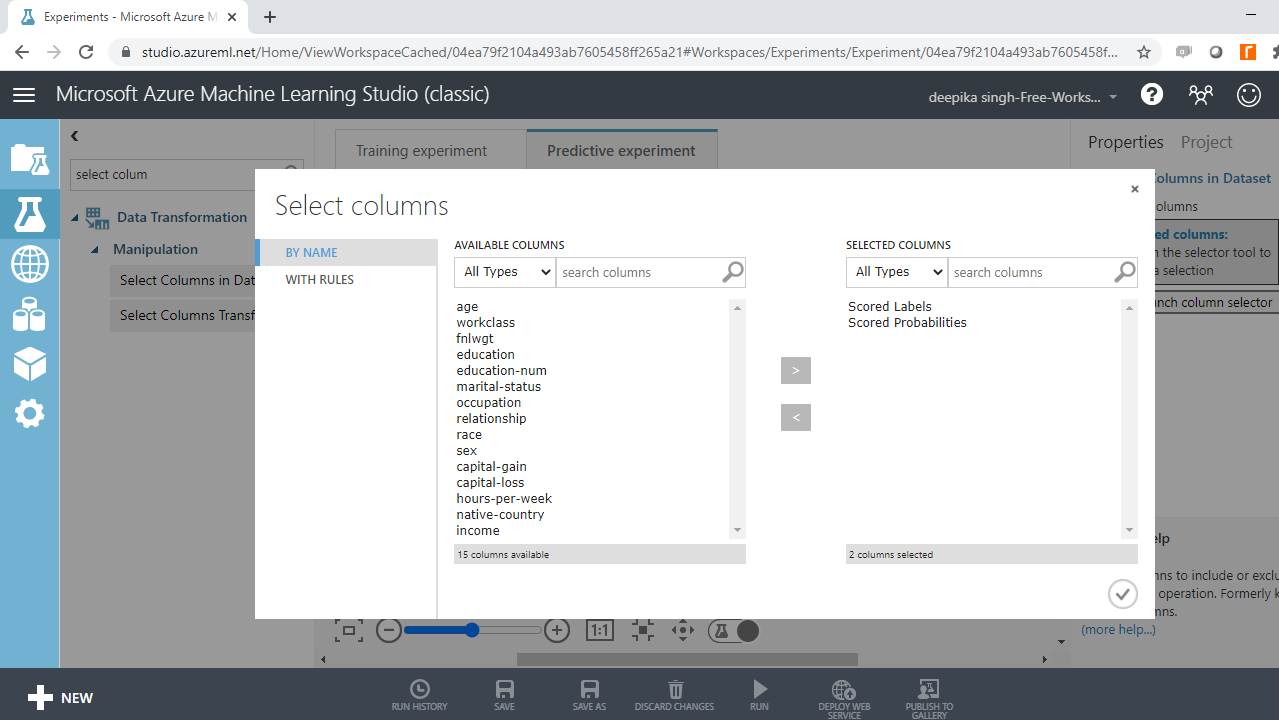
Click on the Search Columns in Dataset module, and then click Launch column selector to select the following variables.
Run the predictive experiment again, and visualize the output of the Search Columns in Dataset module. Only two columns are returned.
Deploy the Web Service
After customizing the web service output, you are ready to deploy it. Click the Deploy Web Service icon at the bottom of your experiment. After the deployment is finished, you will see the following output with web service properties as shown below.

Copy the API key as shown below and paste it in a notepad or word document, whichever you prefer. This will be a different API key for your Azure account.
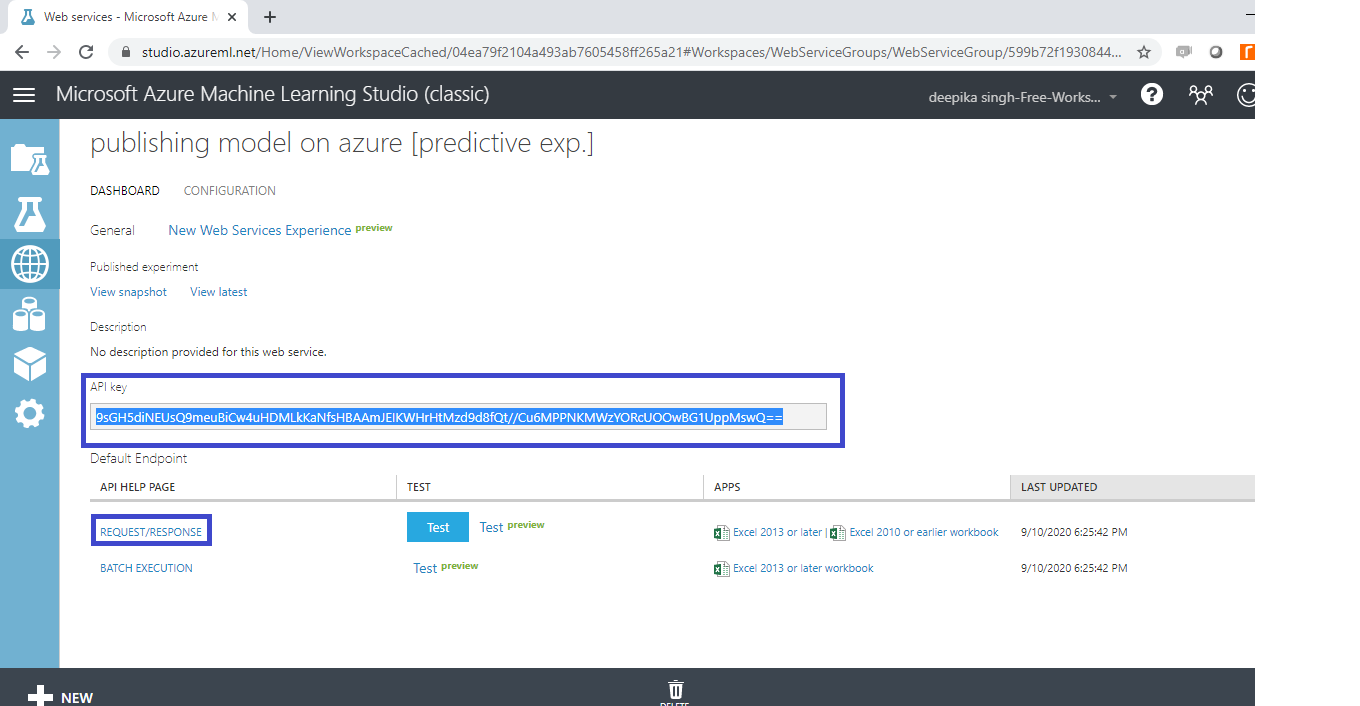
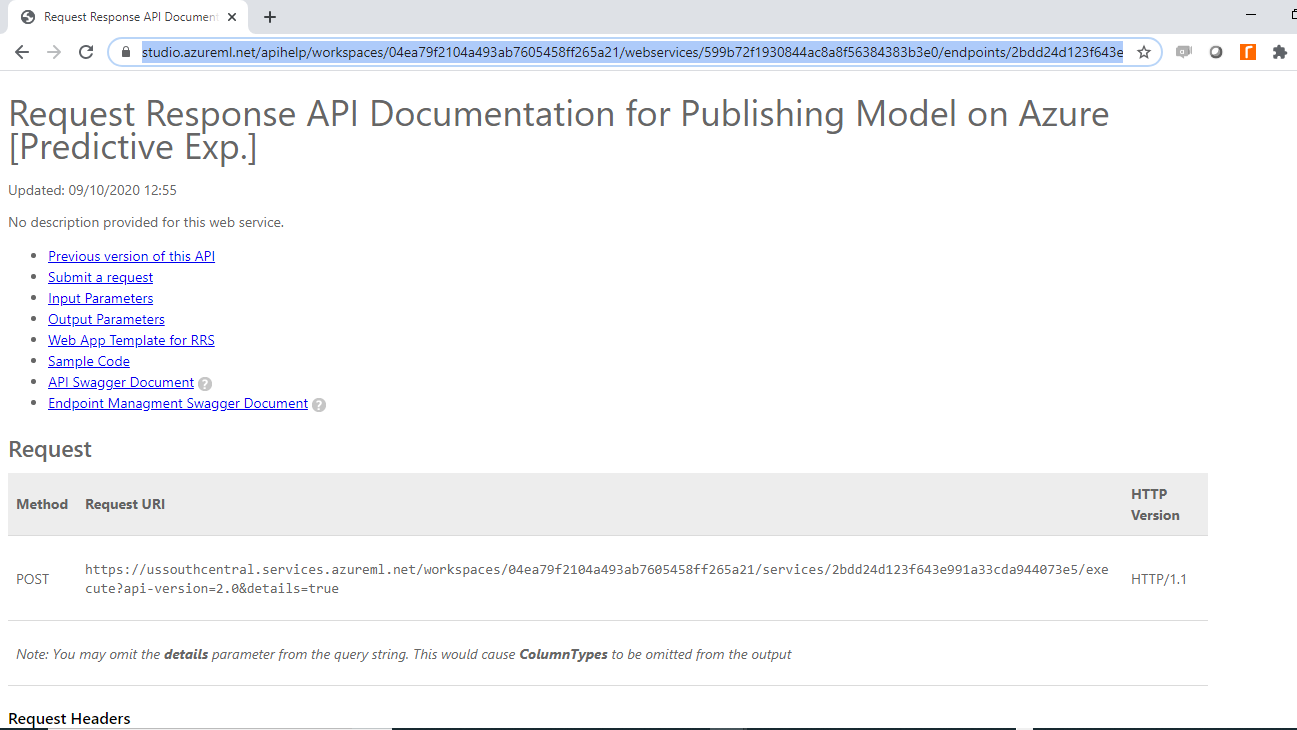
You can also see the Request/Response hyperlink in the output above. Click the hyperlink that will open a new browser tab containing the Request Response API documentation for your web service. It will also have a URL. Copy and save it in your notebook. This will be different URL for your Azure account.
Test the Web Service
You have created a web service and generated the required keys. The next step is to test the web service, which requires a OneDrive account. If you don’t have an account, create an account here. Use the Microsoft Studio account to create the OneDrive account so you can access both accounts.
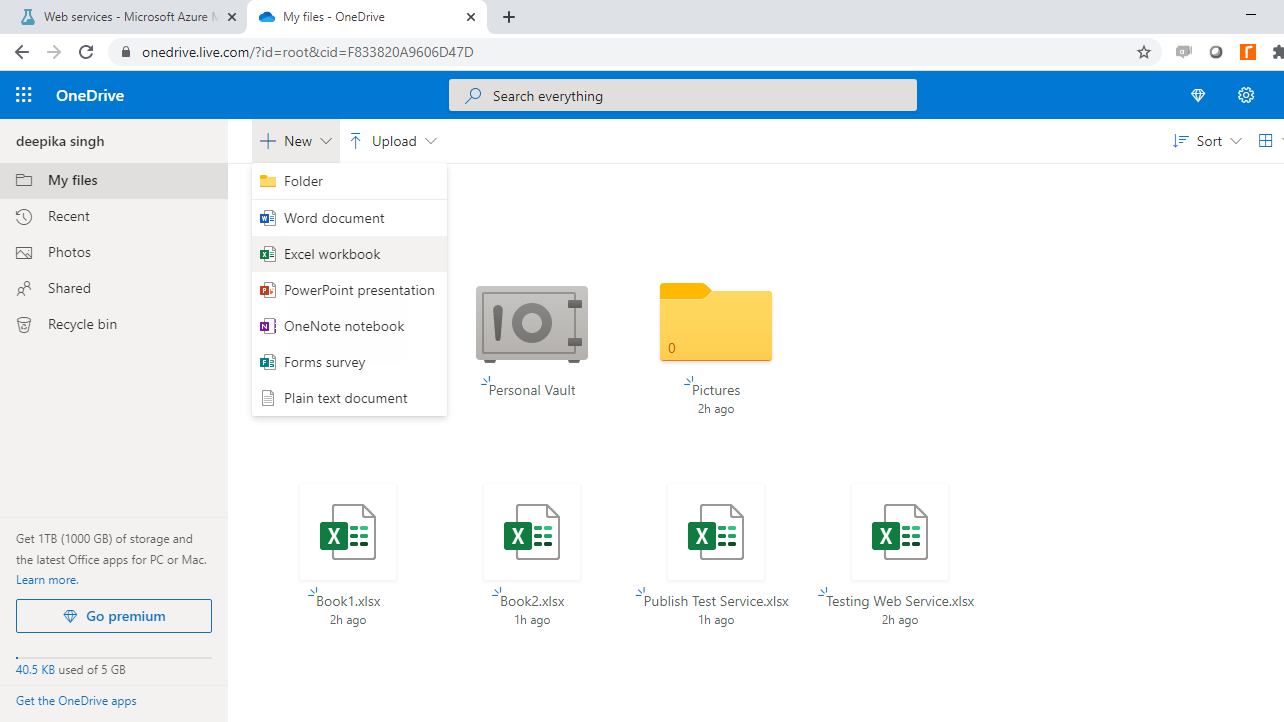
Once the account is created, login to it. In the New menu, click Excel workbook.
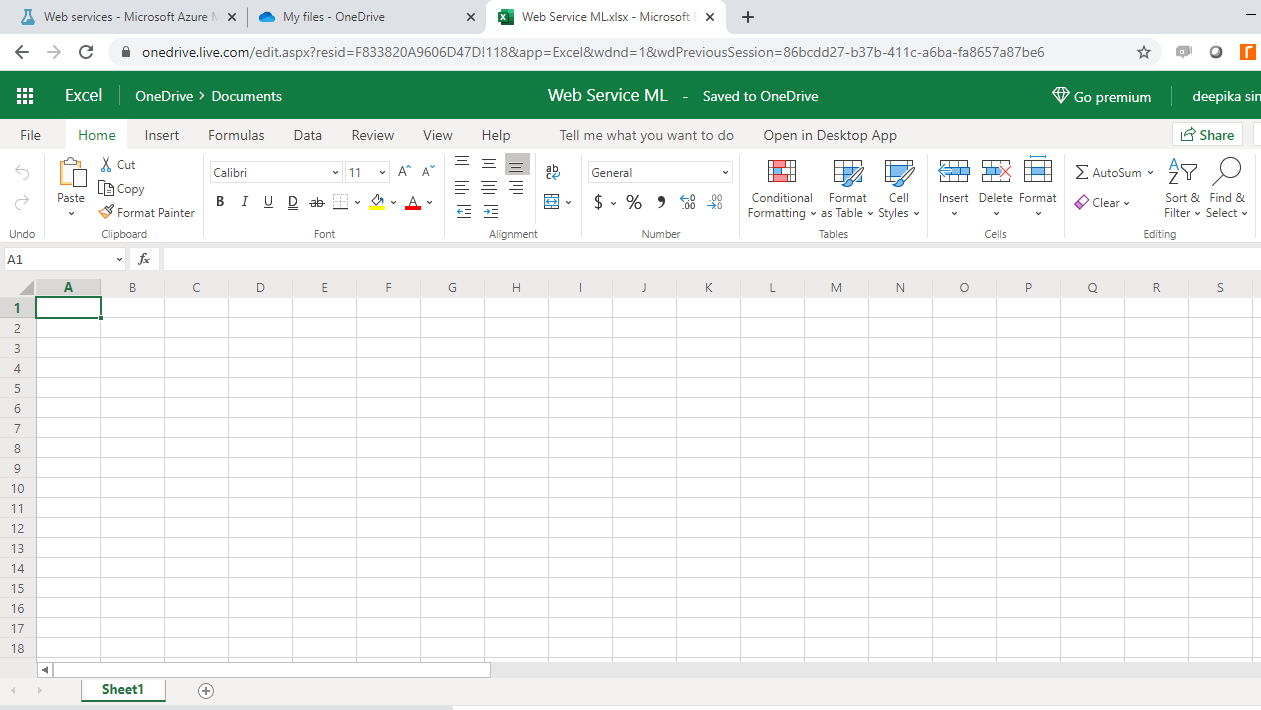
This will open a new tab in the Excel workbook, as shown below. Save the workbook as Web Service ML.
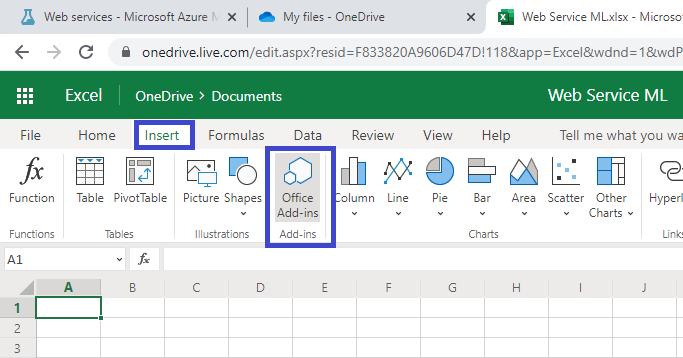
Next, on the Insert tab, click Office Add-ins.
Next, in the Office Add-ins dialog box, click Store. Then type Azure Machine Learning in the search box and you will see the following output.
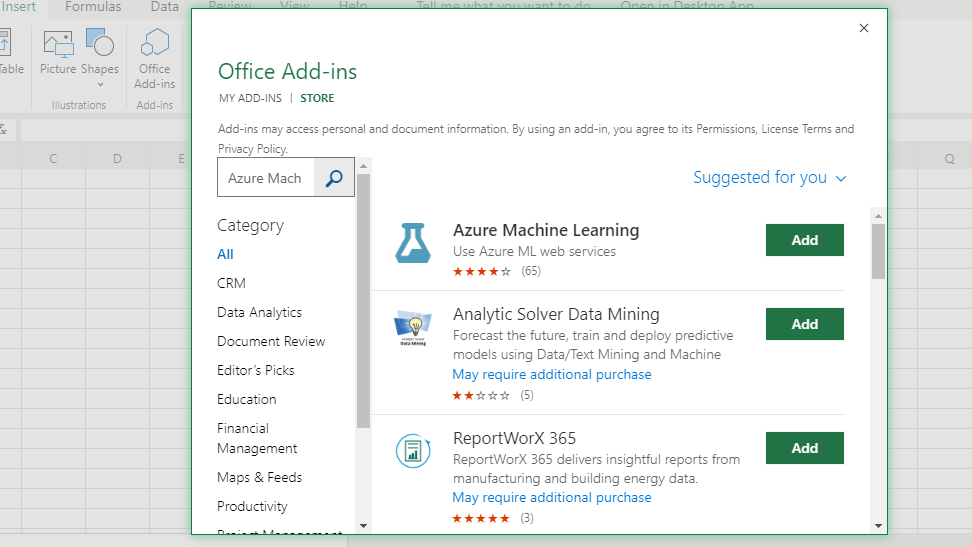
The next step is to click and add the Azure Machine Learning icon to load it. Once the Azure Machine Learning plugin is loaded, you can see the following output.
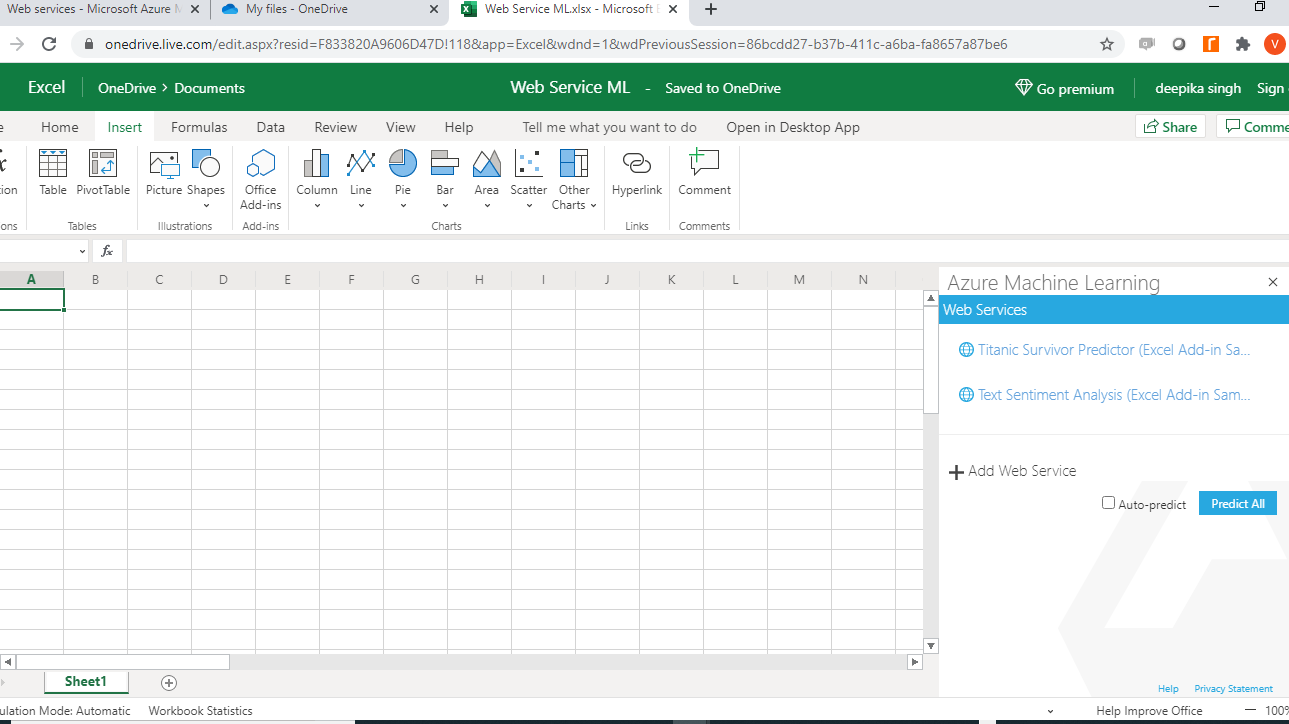
Next, click on Add Web Service. Paste the Request Response URL you copied earlier into the URL box, and the API key into the API key box.
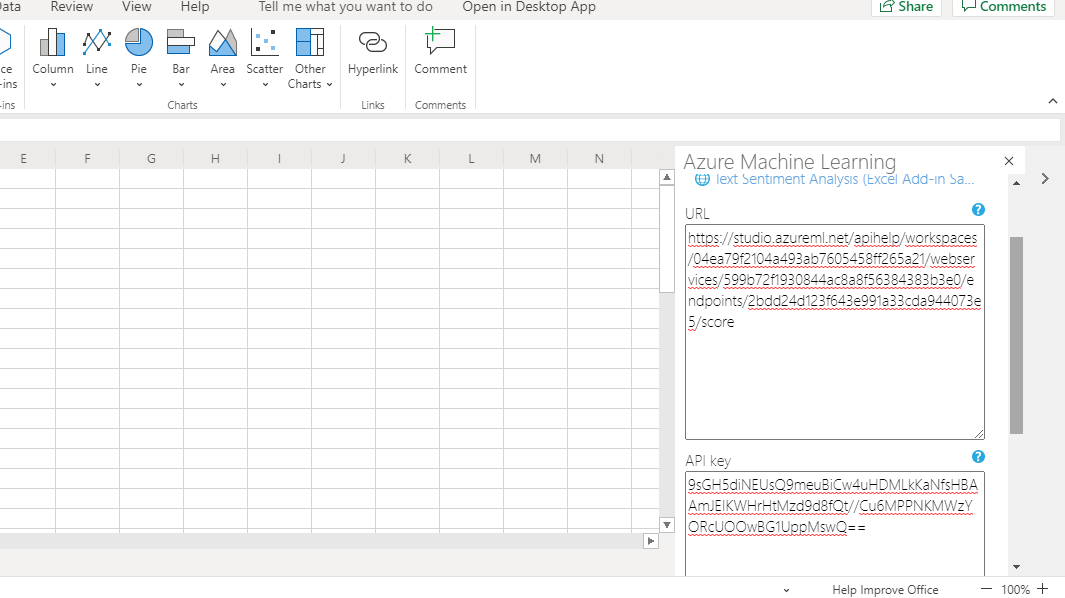
Click the Add button located below the API key.
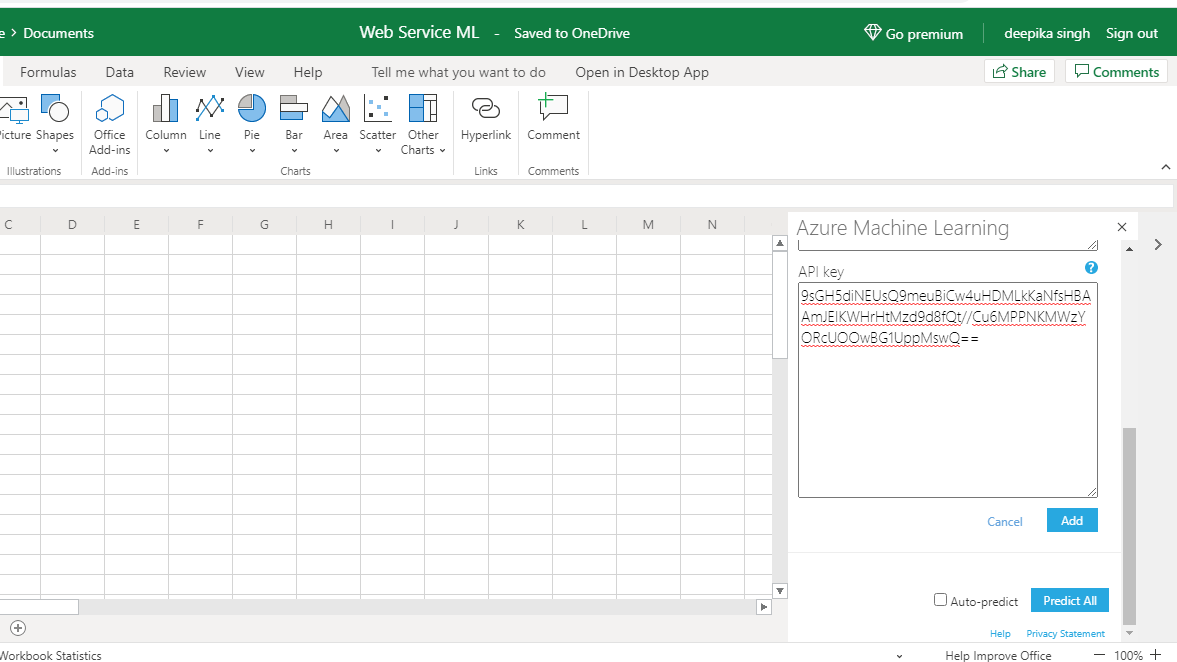
Completing the above steps will create the following output.
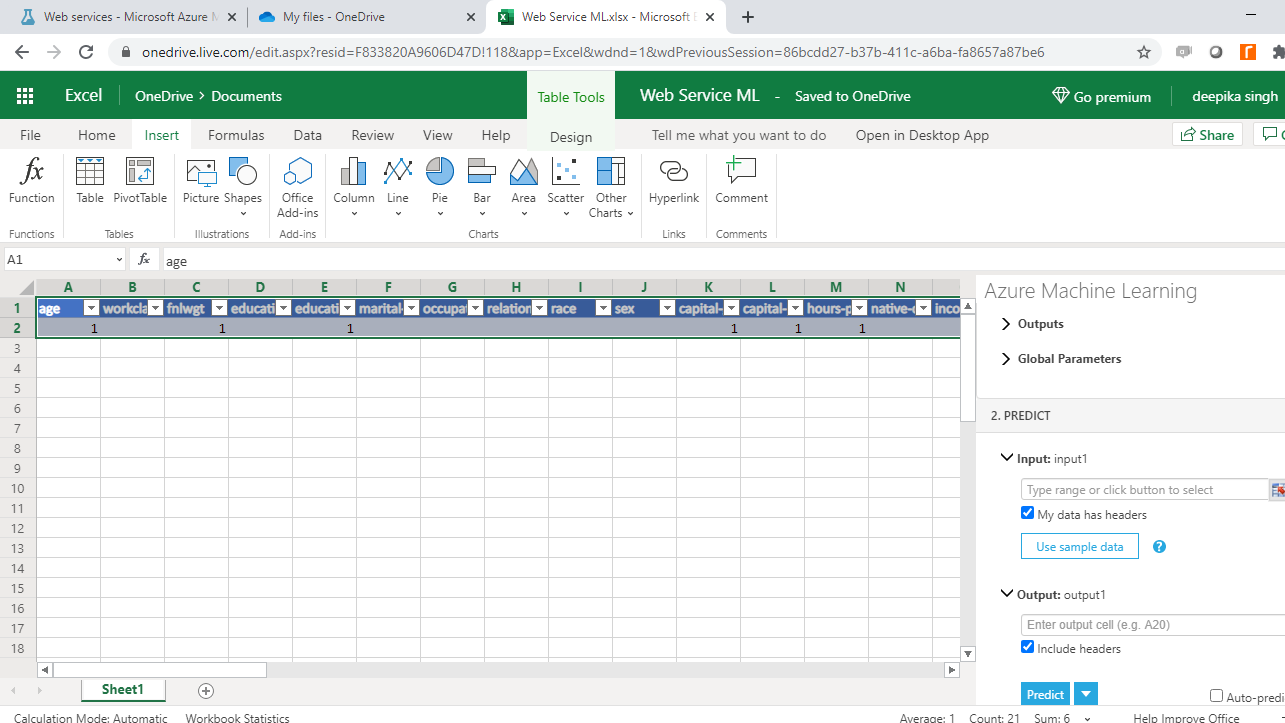
To test the web service, you need to provide the inputs. In the above output, leave the My data has headers box checked, and click the Use sample data button. This will generate the output below. Enter the values as shown below, or values of your choice.
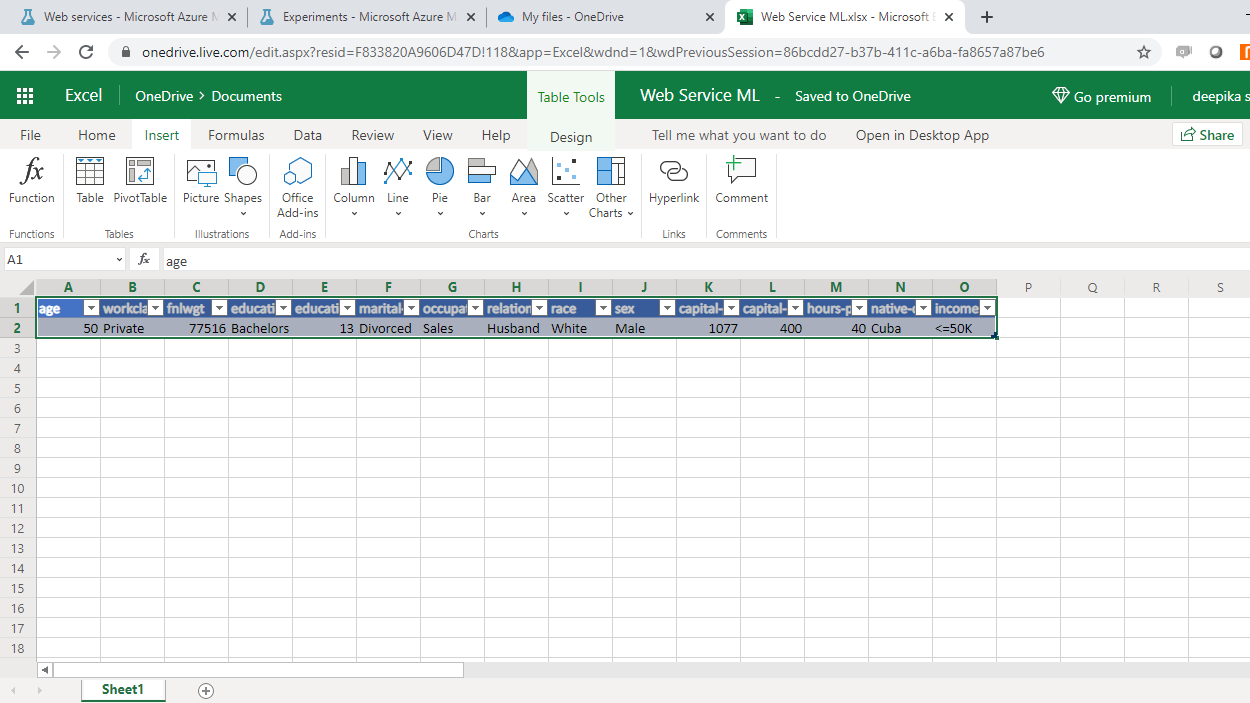
Note that there is input provided to the income variable, which is the target variable. You can leave this input blank and still test the web service. Next, select the header and data cells (A1 to O2). This is reflected in the Input pane. In the Output box, select P1. This will create the header for the predictions.
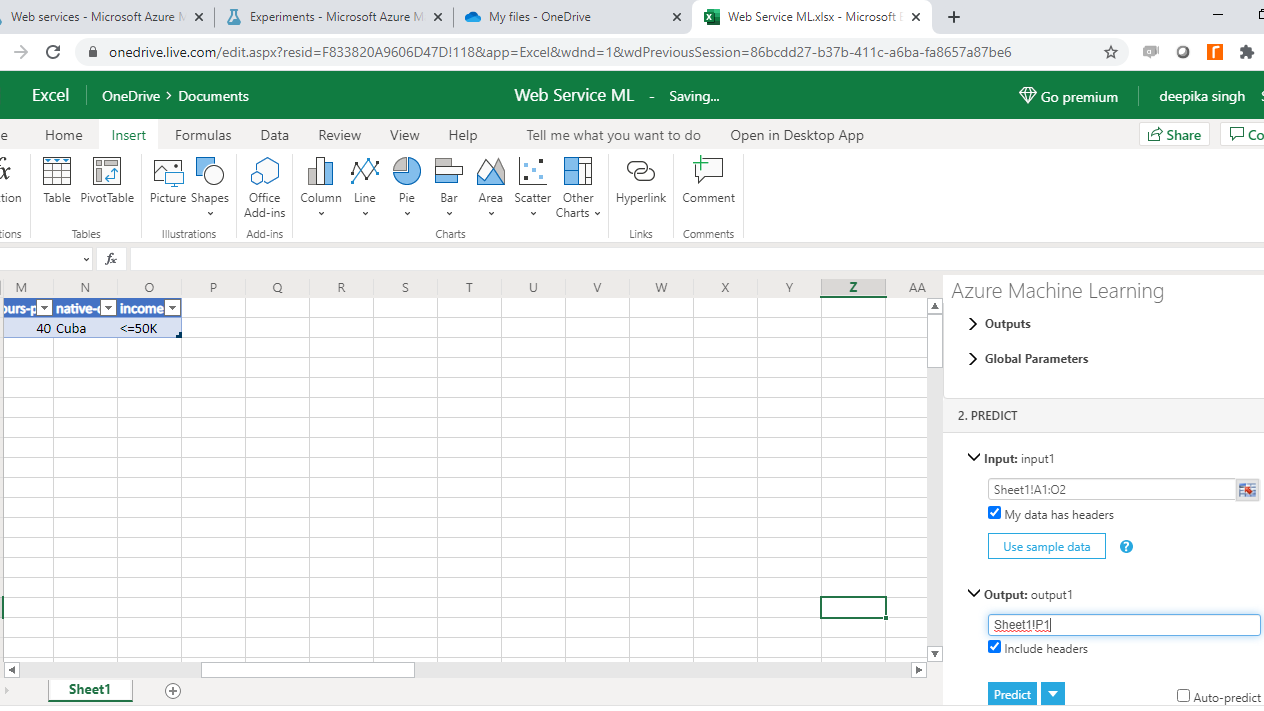
Once the selection is made, click the Predict button. This will generate the following output.
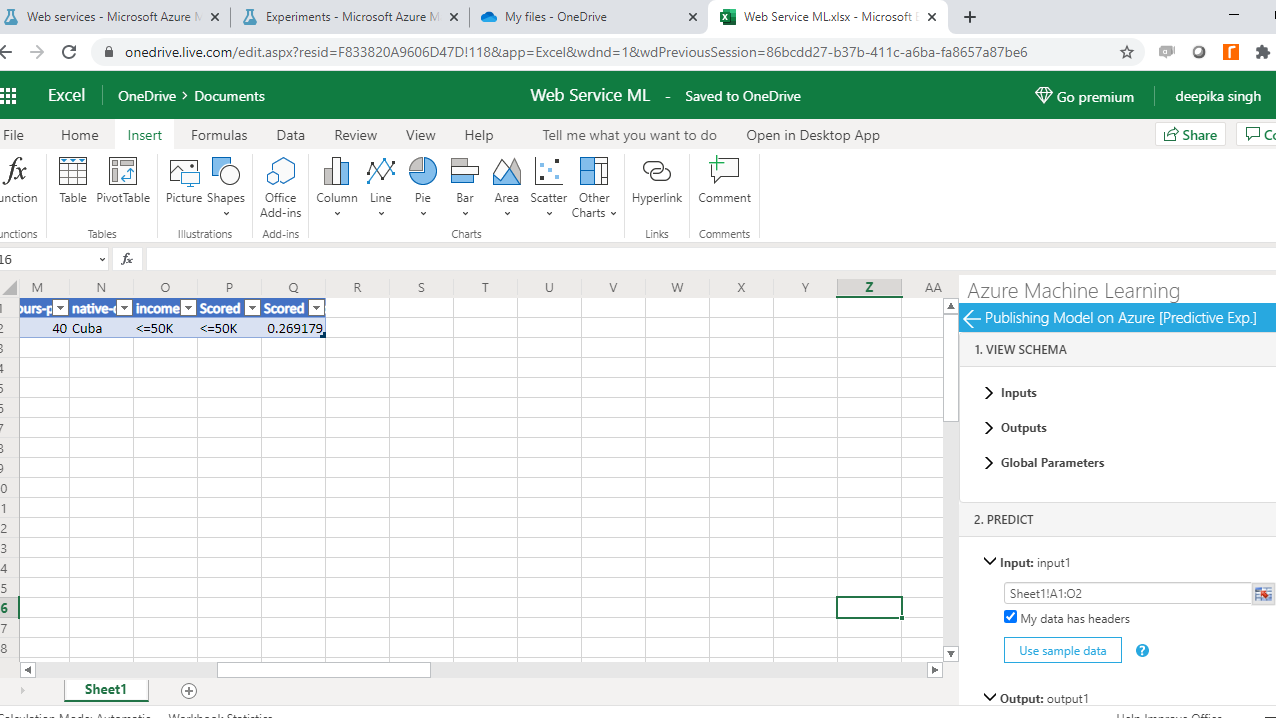
When the web service has finished running, view the data returned in cells P2 (Scored Label) and Q2 (Scored Probabilities). The web service has predicted the income class for this set of inputs to be <=50K.
You have successfully created and tested a machine learning web service that predicts income class.
Conclusion
Building data science products has applications across several industries. You can build a forecasting product to predict shipping volumes. Banks are building fraud detection algorithms. Even income tax institutions are using artificial intelligence to identify tax frauds.
Some other application areas where data science models can be built and deployed are healthcare, crime prevention, stock market valuation, natural language processing, self-driving cars, computer vision, and advanced image recognition.
In this guide, you learned how to publish machine learning models in Azure Machine Learning Studio. Building machine learning models is crucial, but adding the knowledge of deploying them to the cloud and testing the web service will add more power to your data science portfolio.
To learn more about data science and machine learning using Azure Machine Learning Studio, please refer to the following guides:
Advance your tech skills today
Access courses on AI, cloud, data, security, and more—all led by industry experts.
