
- Course
Creating and Rigging a Low Poly Robot in 3ds Max and Photoshop
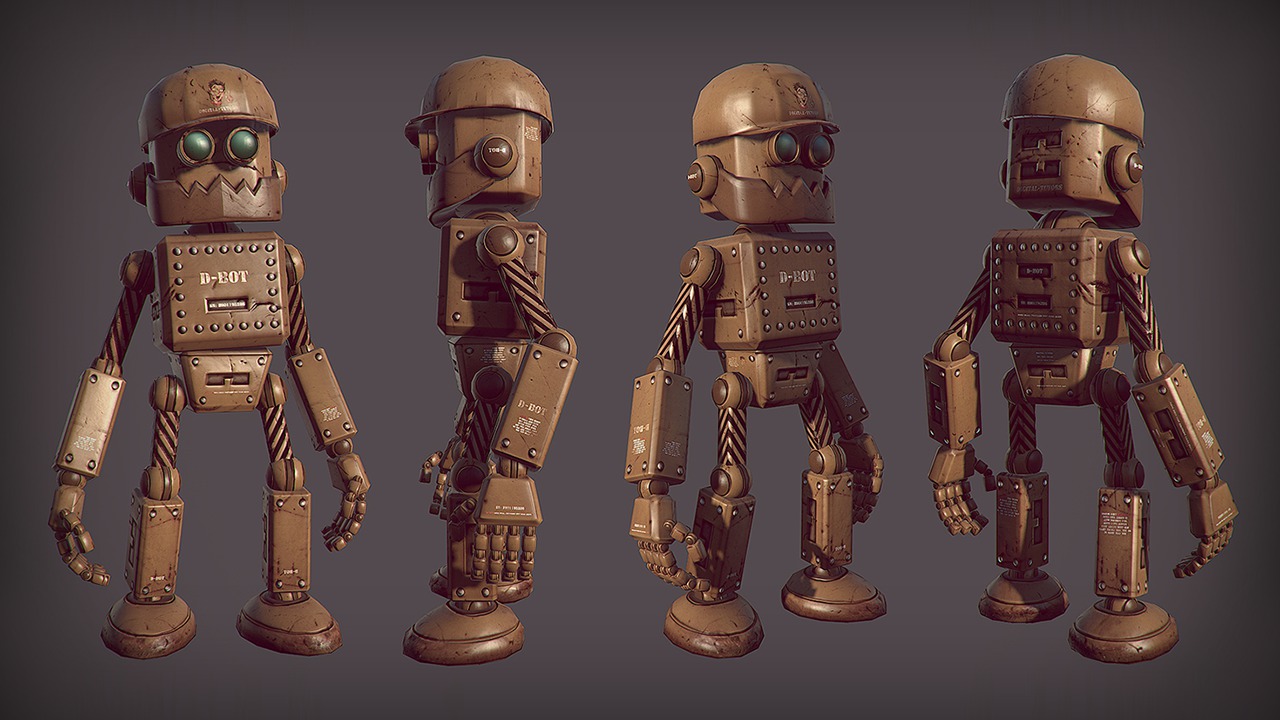
In this tutorial, we will make a low-poly robot, texture it, and then rig it. Software required: 3ds Max, ZBrush, Photoshop, Mudbox, xNormal, Marmoset Toolbag, CrazyBump.
Advanced
- Course
Creating and Rigging a Low Poly Robot in 3ds Max and Photoshop
In this tutorial, we will make a low-poly robot, texture it, and then rig it. Software required: 3ds Max, ZBrush, Photoshop, Mudbox, xNormal, Marmoset Toolbag, CrazyBump.
Advanced
Get started today
Access this course and other top-rated tech content with one of our business plans.
Try this course for free
Access this course and other top-rated tech content with one of our individual plans.
This course is included in the libraries shown below:
- Core Tech
What you'll learn
In this tutorial we will make a low-poly robot, texture it, and then rig it. Throughout these lessons, you will see a proven process of turning a high-poly robot piece that we have into a low-poly piece. We'll take a look at working with floater geometry and fixing our high-poly, then we'll move on to low-poly retopology of the robot. From there, our next goal will be to make the UVs of the robot. Then, we will get to the texturing stage, where we'll go into different programs to create the texture look that we want for our robot. Also, you will see how to make different variations of robots using the parts from this robot. Finally, you will have an overall idea of how to rig your creation using the CAT rig system inside of 3ds Max. Software required: 3ds Max, ZBrush, Photoshop, Mudbox, xNormal, Marmoset Toolbag, CrazyBump.
Creating and Rigging a Low Poly Robot in 3ds Max and Photoshop
Advanced
Table of contents
