
- Lab
-
Libraries: If you want this lab, consider one of these libraries.
- Cloud
Using IoT Hub Direct Methods to Change Device Properties
The primary purpose for an Azure IoT hub is to be somewhere the devices, or "things," can send telemetry. But did you know it can talk *back* to the things as well? Standard Tiers of Azure IoT Hub allow for cloud-to-device communication. One of the options by which we can communicate from our back-end applications to our devices is by using direct methods. Direct methods are used for communications that require immediate confirmation of the result. Direct methods are often used for interactive control of devices. In this hands-on lab, we will create a device in a pre-provisioned Azure IoT hub and then use a Node.js application to simulate the physical device. As our "device" sends telemetry information back to the IoT hub, we will use another Node.js application to send a direct method to the device, forcing it to change the interval in which it provides telemetry.
Lab Info
Table of Contents
-
Challenge
Register the Device with an Azure IoT Hub
-
Access Azure Cloud Shell using the credentials provided in the lab.
-
Choose the Bash environment.
-
Select Show advanced settings.
-
Use the existing storage account that resides in the resource group location and the existing
cloudshellfile share name. -
Install the Azure IoT extension for CLI:
az extension add --name azure-iot -
Register the device (
XXXXXis the five-character suffix for the lab resources):az iot hub device-identity create --device-id IoTDevice1 --hub-name iothub-XXXXX -
Obtain the connection string for the device application (
XXXXXis the five-character suffix for the lab resources):az iot hub device-identity connection-string show --hub-name iothub-XXXXX --device-id IoTDevice1 --output table -
Copy the connection string to your clipboard and paste it into a text document.
-
Obtain the connection string for the back-end application (
XXXXXis the five-character suffix for the lab resources):az iot hub connection-string show -n iothub-XXXX --policy-name service --output table -
Copy the connection string to your clipboard and paste it into a text document.
-
-
Challenge
Configure and Launch the Simulated Device
-
Download the sample Node.js IoT project from Github by typing the following:
wget https://github.com/Azure-Samples/azure-iot-samples-node/archive/master.zip -
Unzip the project into your home directory:
unzip master.zip -
Change to the directory for the simulated device Node.js application:
cd azure-iot-samples-node-master/iot-hub/Quickstarts/simulated-device-2 -
Edit the
SimulatedDevice.jsfile, replacing the value of theconnectionStringvariable with the device connection string you made a note of earlier. Save the file. -
Install the required libraries and run the simulated device application:
npm installnode SimulatedDevice.js -
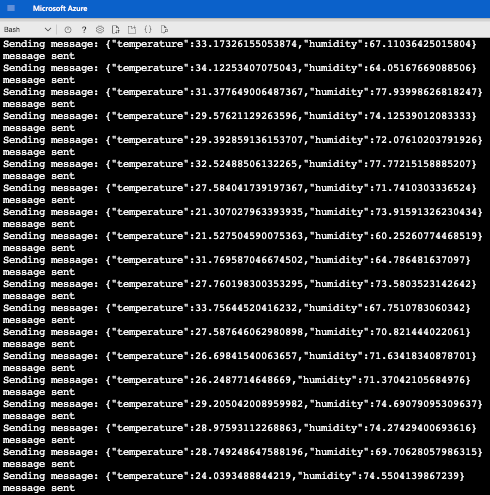
Verify the "device" is sending telemetry data as shown in the following screenshot:
-
-
Challenge
Configure and Launch the Back-End Application
-
Change to the directory for the back-end Node.js application:
cd azure-iot-samples-node-master/iot-hub/Quickstarts/back-end-application- Edit the
BackEndApplication.jsfile, replacing the value of theconnectionStringvariable with the service connection string you made a note of earlier, and replacing the value of thedeviceIdvariable to IoTDevice1. Save the file.
- Edit the
-
Install the required libraries and run the back-end application:
npm installnode BackEndApplication.js -
Verify the back-end application has changed the telemetry interval for the device to 10 seconds:

Back-end Application Response

Device Response
-

Real skill practice before real-world application
Hands-on Labs are real environments created by industry experts to help you learn. These environments help you gain knowledge and experience, practice without compromising your system, test without risk, destroy without fear, and let you learn from your mistakes. Hands-on Labs: practice your skills before delivering in the real world.
Learn by doing
Engage hands-on with the tools and technologies you’re learning. You pick the skill, we provide the credentials and environment.
Follow your guide
All labs have detailed instructions and objectives, guiding you through the learning process and ensuring you understand every step.
Turn time into mastery
On average, you retain 75% more of your learning if you take time to practice. Hands-on labs set you up for success to make those skills stick.